
Related Manuals for Wiytamo OX-14KHW

Summary of Contents for Wiytamo OX-14KHW
- Page 1 Wiytamo Service@wiytamo.com Portable Air Conditioner Owner’s Manual Original instructions OX-14KHW 14,000 BTU READ AND SAVE THESE INSTRUCTIONS...
-
Page 2: Table Of Contents
Wiytamo service@wiytamo.com TABLE OF CONTENTS 1. BEFORE YOU BEGIN ....................3 1.1. CUSTOMER SERVICE ................... 3 1.2. BEFORE REQUESTING SERVICE ................4 1.3. PRODUCT DESCRIPTION ..................8 1.4. SYMBOLS FROM THE UNIT AND USER MANUAL ..........9 1.5. PRODUCT DIAGRAM ..................11 1.6. PRODUCT FEATURES ..................12 2. -
Page 3: Before You Begin
At Wiytamo we are very proud of our products and are completely committed to providing you with the best products and service possible. Your satisfaction is our number one priority. -
Page 4: Before Requesting Service
Wiytamo service@wiytamo.com information will delay the processing of the problem. Please contact us: service@wiytamo.com Required Information Damaged: includes picture and video about damage parts Quality Problem: includes picture about damage ① Nature of malfunction(as parts accurately as possible) Please follow the direction at “... - Page 5 Wiytamo service@wiytamo.com improve the shipping box's strength from your information. 1.2.2 The Process of Receiving and Inspection Step 1 Please check the outer shipping box and product carefully. Step 2 If there is any problem, please take some photos and ...
- Page 6 Wiytamo service@wiytamo.com Take some pictures about all the labels on the shipping box. Take some videos to show the condition of the shipping box and inner product more intuitively. How to take a useful video: To show the outer packaging box is damaged but not unpacked;...
- Page 7 Check if any loose, vibrating parts. Noise sounds like water flowing. If the problem persists after taking appropriate remedial measures, please unplug the power cord from the wall outlet and please contact us with follows information(service@wiytamo.com) : Wiytamo service@wiytamo.com...
-
Page 8: Product Description
Wiytamo service@wiytamo.com Photos and videos of the trouble part. Take some videos to show the working status and the specific problem. The contents of this video should include, such as: The outer situation or environment around the machine; To show the working status of the control panel;... -
Page 9: Symbols From The Unit And User Manual
Wiytamo service@wiytamo.com 1.4. SYMBOLS FROM THE UNIT AND USER MANUAL This unit uses a flammable refrigerant. If refrigerant leaks and comes in contact with fire or heating warning part, it will create harmful gas and there is risk of fire. - Page 10 Wiytamo service@wiytamo.com It collects first in low areas but can be circulated by the fans. If propane gas is present or even suspected, do not allow untrained personnel to attempt to find the cause. The propane gas used in the unit has no odor.
-
Page 11: Product Diagram
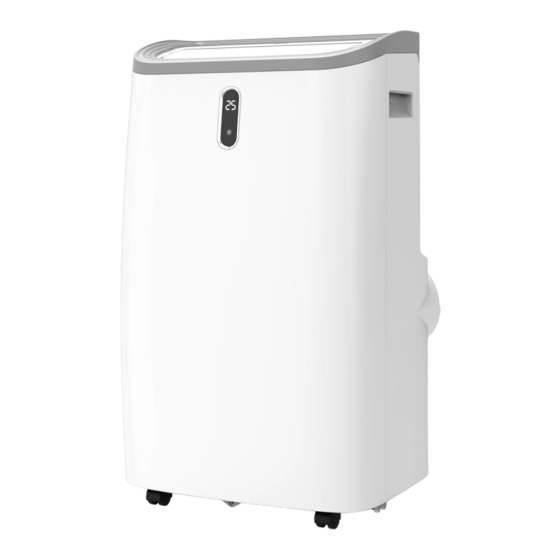
Wiytamo service@wiytamo.com 1.5. PRODUCT DIAGRAM Air inlet with Drain opening Control panel air filter with sealing plug Air outlet with Recessed adjustable Castor handle louver Front Panel Air Exhaust Note: The appearance is only for reference. Please see the real product for detailed information. -
Page 12: Product Features
Wiytamo service@wiytamo.com 1.6. PRODUCT FEATURES High Capacity in a compact size with cooling, dehumidifying, Heating and ventilating function. Temperature setting and display LED Digital display Electronic control with built-in timer, sleep mode Self-evaporating system for better efficient ... -
Page 13: For Your Safety
Wiytamo service@wiytamo.com 2. FOR YOUR SAFETY Your safety is the most important thing we concerned! Please read this manual carefully and fully understand before operating your appliance. WARNING 2.1. OPERATIONAL PRECAUTIONS WARNING- to reduce the risk of fire, electric shock or injury to persons or property: ... - Page 14 Wiytamo service@wiytamo.com Do not unplug by pulling on the power cord. Do not use an extension cord or an adapter plug. Do not put objects on the unit. Do not climb or sit on the unit.
-
Page 15: Safety Precautions On Servicing
Wiytamo service@wiytamo.com Keep any required ventilation openings clear of obstruction. The appliance shall be stored in a well-ventilated area where the room size corresponds to the room area as specified for operation. Any person who is involved with working on or breaking... - Page 16 Wiytamo service@wiytamo.com 2.2.2 Work procedure Work shall be undertaken under a controlled procedure so as to minimize the risk of a flammable gas or vapor being present while the work is being performed. 2.2.3 General work area All maintenance staff and others working in the local area shall be instructed on the nature of work being carried out.
- Page 17 Wiytamo service@wiytamo.com refrigerant can possibly be released to the surrounding space. Prior to work taking place, the area around the equipment is to be surveyed to make sure that there are no flammable hazards or ignition risks. “No Smoking” signs shall be displayed.
- Page 18 Wiytamo service@wiytamo.com constructed of materials which are inherently resistant to being corroded or are suitably protected against being so corroded. 2.2.9 Checks to electrical devices Repair and maintenance to electrical components shall include initial safety checks and component inspection procedures. If a fault exists that could compromise safety, then no electrical supply shall be connected to the circuit until it is satisfactorily dealt with.
-
Page 19: Installation
Exhaust Remote hose control Hose Window connector Window Drain Hose adapter Note: If there are any problems or missing parts, please contact us after-sales promptly and we will try our best to help you solve the problem (service@wiytamo.com) Wiytamo service@wiytamo.com... -
Page 20: Choose Your Location
Wiytamo service@wiytamo.com 3.2. CHOOSE YOUR LOCATION If tipped more than 45°, allow the unit to set upright for at least 24 hours before start up. Place the unit on a firm, level surface in an area with at least 70cm of free space around it to allow for proper air circulation. -
Page 21: Attach The Exhaust Hose
Wiytamo service@wiytamo.com 3.3. ATTACH THE EXHAUST HOSE The air conditioner requires being vented outside so that the exhaust air can escape the room which coming from the appliance contains waste heat and moisture. Do not replace or extend exhaust hose which will result in decreased efficiency, even worse shut down the unit due to low backpressure. - Page 22 Wiytamo service@wiytamo.com Step 4: Close your window to secure the kit in place. It needs to hold the windows kit firmly in place, secure the window kit with duct tape if required. It is recommended that the gap between the adapter and the sides of the window should be sealed off for maximum efficiency.
- Page 23 Wiytamo service@wiytamo.com Step 6: Adjusting the length of the flexible exhaust hose, to make sure the distance between the unit and the window will be more than 70cm, height from exhaust hose to the floor will be more than 90cm. And avoid bends in the hose. Then place AC near an electrical outlet.
-
Page 24: Operation
Wiytamo service@wiytamo.com OPERATION 4.1. CONTROL PANEL AND DISPLAY Press the key to set timing Toggle between high, medium, ② ① value. and low fan speeds. LED for fan speed (high, Automatic swing mode of air ④ ③ medium, low) and wifi status... -
Page 25: Wifi Connected
Wiytamo service@wiytamo.com 4.2. WIFI CONNECTED Information on the App “Smart Life” “Smart Life” app is available for android and iOS. Scan the corresponding QR code to get directly to the download. Information on How to Use the App This appliance allows you to operate the appliance via your home net-work. - Page 26 ● Press and hold the timer button for about 5 seconds, the device disconnects and the WIFI light blinks back on. NOTE: If you need a more detailed operation process, you can refer to the customer service book, and feel free to contact our technical staff with any questions: service@wiytamo.com Wiytamo service@wiytamo.com...
-
Page 27: Function Keys And Indicators
Wiytamo service@wiytamo.com 4.3. FUNCTION KEYS AND INDICATORS Press to switch the machine on POWER or off. Press the key to set timing Timer value. Press the button to set the cool COOL mode Press the button to set the dry... -
Page 28: Settings
Wiytamo service@wiytamo.com 4.4. SETTINGS 4.4.1. Start-up and Shutdown Press the to turn the unit on. The unit runs in in FAN as default. Press MODE button to select the desired operation mode. Press the again to turn off the power. - Page 29 Wiytamo service@wiytamo.com Press the button repeatedly to select the fan speed as desired. C. Drying your room Press the button on the control panel or remote control, the LED of DRY operation lights up. The fan speed is unable to select.
- Page 30 Wiytamo service@wiytamo.com 4.4.3. TIMER SETTING(1hour-24hours): The timer has two ways of operation: Press UP/Down Press To turn off repeatedly to set the (When power on) to turn on the timer delay OFF time. Press UP/Down To turn on Press repeatedly to set the...
-
Page 31: Drainage
Wiytamo service@wiytamo.com 4.5. DRAINAGE Manual drainage: 1)When the machine stops after the water is full, please unplug the power plug. Notes: Please move the machine carefully, so as not to spill the water in the water pan at the bottom of the body. - Page 32 Wiytamo service@wiytamo.com Continuous drainage The self-evaporating system uses the collected water to cool the condenser coils for better efficient performance. It is no need to empty the drainage tank in cooling operation except in heating operation, drying operation and high humidity conditions. The condensate water evaporates at the condenser and evacuated through the exhaust hose.
-
Page 33: Cleaning And Care
Wiytamo service@wiytamo.com 5. CLEANING AND CARE 5.1. CLEANING THE AIR FILTER (every two weeks) Dust collects on the filter and restricts the airflow. The restricted airflow reduces the efficiency of the system and if it becomes blocked it can cause damage to the unit. -
Page 34: Cleaning The Air Filter
Wiytamo service@wiytamo.com 5.2. CLEANING UP OF REFRIGERANT General Measures: 1. Gas/vapor heavier than air. May accumulate in confined spaces, particularly at or below ground level. 2. Eliminate every possible source of ignition. 3. Use appropriate personal protection equipment (PPE). 4. Evacuate unnecessary personnel, isolate, and ventilate area. -
Page 35: Operation
Wiytamo service@wiytamo.com OPERATION Symptom Inspection Solution Check the power Insert the power cord connection in securely. securely into the wallOutlet. The unit is Check if the water level Empty the drain pan by indicator lights up? remove the rubber plug. -
Page 36: Decommissioning
Wiytamo service@wiytamo.com 7. DECOMMISSIONING 7.1. STORAGE Long-Term Storage - If you will not be using the unit for an extended period of time (more than a few weeks) it is best to clean the unit and dry it out completely. Please store the unit per the following...
Need help?
Do you have a question about the OX-14KHW and is the answer not in the manual?
Questions and answers
My unit portable ac not cooling
Who can I take to for service Porter tx 77365
@Billy G HOLDER, call a local A/C repair shop, they may or may not be able to service your unit, but worth a try.
The Wiytamo OX-14KHW portable AC is not cooling because it is overheating in A/C mode. This prevents it from functioning properly, limiting its use to fan mode only.
This answer is automatically generated
how can I get an air filter for my portable A/C (ox-14kh 14,000BTU). I have 2 A/C's and neither came with a filter.
@john waymire I have model #OX-14KWH and it also did not come with any filter media. I believe the filter is just the screen part.
what kind and size filter for model# OX-14khw1
red snow flake is on what does this mean unit will not work
thermostat reads in twenties instead of seventies just changed on its own
Unit is on and set to 61* F but air is not cold.
How to disassemble the outer casing for a deep cleaning?