
Related Manuals for Hytera BP36X


Summary of Contents for Hytera BP36X
- Page 1 Hytera BP36X Digital Portable Radio User Manual Hytera Communications Corporation Limited...
- Page 2 Preface Welcome to the world of Hytera and thank you for purchasing this product. This manual includes a description of the functions and step-by-step procedures for use. To avoid bodily injury or property loss caused by incorrect operation, please carefully read the Safety Information Booklet before use.
- Page 3 Copyright Information Hytera is the trademark or registered trademark of Hytera Communications Corporation Limited (the Company) in the People's Republic of China (PRC) and/or other countries or areas. The Company retains the ownership of its trademarks and product names. All other trademarks and/or product names that may be used in this manual are properties of their respective owners.
- Page 4 Reorient or relocate the receiving antenna. Increase the separation between the equipment and receiver. Connect the equipment into an outlet on a circuit different from that to which the receiver is connected. Consult the dealer or an experienced radio/TV technician for help. Note: Changes or modifications not expressly approved by the party responsible for compliance could void the user’s authority to operate the equipment.
- Page 5 requirements set a SAR limit of 1.6 W/kg averaged over one gram of tissue. The highest SAR value reported under this standard during product certification for use when properly worn on the body and head. Cet é quipement est conforme aux limites d'exposition aux rayonnements de l'ised pour les environnements non contrô...
-
Page 6: Table Of Contents
User Manual Contents Contents Documentation Information ........................1 1. Packing List .............................. 3 2. Product Layout ............................4 3. Before Use ..............................5 3.1 Charge the Battery ..........................5 3.2 Attach the Belt Clip ..........................5 3.3 Attach the Audio Accessory ......................... 6 4. - Page 7 Contents User Manual 7.4.1 Radio Silent ..........................14 7.4.2 Tones ............................14 8. Supplementary Services ........................15 8.1 VOX ..............................15 8.2 Power Level ............................15 8.3 Scan ..............................15 8.4 Squelch ............................... 15 8.4.1 Squelch Off ..........................15 8.4.2 Squelch Level ........................... 16 8.5 Scrambler ............................
-
Page 8: Documentation Information
User Manual Documentation Information Documentation Information Documentation Conventions Instruction Conventions Icon Description Indicates information that can help you make better use of your product. Indicates references that can further describe the related topics. Indicates situations that could cause data loss or equipment damage. Indicates situations that could cause minor personal injury. - Page 9 Documentation Information User Manual Operation Description Short press Press and release quickly. Long press Press and hold for preset time. Press and hold Keep the key pressed.
-
Page 10: Packing List
User Manual Packing List 1. Packing List Unpack carefully and check that you have received the following items. If any item is missing or damaged, contact your dealer. Item Quantity (PCS) Item Quantity (PCS) Radio USB Type-C Cable Power Adapter Strap Belt Clip Documentation Kit... -
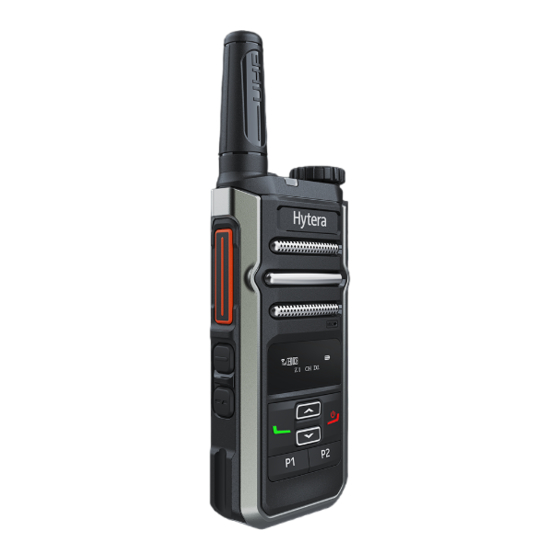
Page 11: Product Layout
Product Layout User Manual 2. Product Layout To assign other features to programmable keys, contact your dealer. -
Page 12: Before Use
User Manual Before Use 3. Before Use 3.1 Charge the Battery Read the Safety Information Booklet before charging. The remaining lithium-ion battery power is limited to 30% pursuant to the new lithium battery shipment regulation approved by the International Air Transport Association (IATA). Use the USB Type-C cable to connect the radio with battery attached to the power adapter, power bank, or PC. -
Page 13: Attach The Audio Accessory
Before Use User Manual 3.3 Attach the Audio Accessory For optimal waterproof and dustproof performance, do as follows: Attach the accessory with care to avoid scraping the silicone rubber surrounding the audio jack. Close the audio jack cover after removing the accessory. Open the audio jack cover. -
Page 14: Basic Operations
User Manual Basic Operations 4. Basic Operations 4.1 Turn On or Off the Radio Long press the Back/On-Off key. 4.2 Force Restart the Radio If the radio fails to work properly, you can force restart the radio. (Optional) Disconnect the USB Type-C cable from the radio. Long press the Back/On-Off key for over 13s. -
Page 15: Select A Contact
Basic Operations User Manual 4.6 Select a Contact On the home screen, press the OK/Menu key. Press the Up key or Down key to select Contacts, and then press the OK/Menu key. Select Contact List, and then press the OK/Menu key. Select Private Call, Group Call, or All Call, and then press the OK/Menu key. -
Page 16: Status Indications
User Manual Status Indications 5. Status Indications You can learn the radio status through status icons and the LED indicator. 5.1 Status Icons LCD Icon Radio Status More bars indicate more remaining battery power. The battery runs out. The battery is being charged. The BT is enabled. -
Page 17: Led Indicator
Status Indications User Manual 5.2 LED Indicator LED Indicator Radio Status Flashes green The radio is being turned on. Glows red The radio is transmitting. Glows green The radio is receiving. Once every minute The battery power is low. Flashes red Once every 0.2s The radio is being programmed. -
Page 18: Call On Digital Channel
User Manual Call on Digital Channel 6. Call on Digital Channel To ensure optimal voice quality on the receiving radio, keep the microphone about 2.5 cm to 5 cm away from your mouth during speaking. 6.1 Group Call A group call is a call from an individual user in a group to all the other members in the group. 6.1.1 Initiate a Group Call Through Preset Contact Rotate the Channel Selector knob to select the group contact preset for the digital channel. -
Page 19: Answer A Private Call
Call on Digital Channel User Manual 6.2.2 Answer a Private Call You can answer a private call without any operation. 6.2.3 End a Private Call A private call ends when the call hang time expires. 6.3 All Call An all call is a call from an individual user to all the other users on the current digital channel. 6.3.1 Initiate an All Call Through Preset Contact Rotate the Channel Selector knob to select the all call contact preset for the digital channel. -
Page 20: Settings
User Manual Settings 7. Settings 7.1 Enter the Settings Interface On the home screen, press the OK/Menu key. Press the Up key or Down key to select Settings, and then press the OK/Menu key. 7.2 Lock the Keypad You can lock the keypad to prevent misoperation. Auto Lock In the Settings interface, press the Up key or Down key to select Keypad Lock, and then press the OK/Menu key. -
Page 21: Set The Silent Mode And Tones
Settings User Manual If You Want to… Then… Select a time, and then press the OK/Menu key. Select Brightness, and then press the OK/Menu key. Adjust the brightness level Select a brightness level, and then press the OK/Menu key. 7.4 Set the Silent Mode and Tones 7.4.1 Radio Silent After Radio Silent is enabled, the radio does not produce tones for any operation. -
Page 22: Supplementary Services
User Manual Supplementary Services 8. Supplementary Services 8.1 VOX Voice Activated Transmit (VOX) allows the voice to trigger transmission. When the voice detected by the microphone reaches the value to trigger the transmission, the radio automatically transmits the voice without the PTT key pressed. VOX Gain preprogrammed by your dealer is used to control the sensitivity of microphone transmission. -
Page 23: Squelch Level
Supplementary Services User Manual Through Programmable Key Press the preprogrammed Squelch Off key. Through Squelch Interface In the Settings interface, press the Up key or Down key to select Squelch, and then press the OK/Menu key. Select Squelch, and then press the OK/Menu key. 8.4.2 Squelch Level Squelch Level refers to the squelch threshold required for the speaker of the radio to be turned on. -
Page 24: Monitor
To derive optimal communication quality, it is recommended that you use the BT devices approved by Hytera. If BT earpieces of other companies are used, you must use them with the wireless ring PTT of Hytera. Otherwise, transmission is unavailable through the earpieces. -
Page 25: Check The Bt Mac Address
8.8.3 Check the BT MAC Address In the BT interface, press the Up key or Down key to select My Device, and then press the OK/Menu key. Select Hytera, and then press the OK/Menu key. 8.8.4 Set the Radio to Be Always Discovered In the BT interface, press the Up key or Down key to select My Device, and then press the OK/Menu key. -
Page 26: Troubleshooting
Restart the radio. temporarily. The keys do not work. Contact your dealer or Hytera technicians for The keys may be damaged. maintenance. The indication may be abnormal. Restart the radio. The LED indicator Contact your dealer or Hytera technicians for is abnormal. -
Page 27: Care And Cleaning
Care and Cleaning User Manual 10. Care and Cleaning To guarantee optimum performance as well as a long service life of the product, follow the tips below. 10.1 Product Care Do not pierce or scrape the product. Do not drop the product. ... -
Page 28: Optional Accessories
Optional Accessories 11. Optional Accessories Use the accessories approved by Hytera only. Otherwise, we will not be liable for any loss or damage arising out of the use of unauthorized accessories. Contact your local dealer for the optional accessories used with the product. -
Page 29: Abbreviations
Abbreviations User Manual 12. Abbreviations Abbreviation Full Name IATA International Air Transport Association Liquid-Crystal Display Light-Emitting Diode Media Access Control Push-to-Talk Top Key... - Page 30 Hytera Communications Corporation Limited. © 2023 Hytera Communications Corporation Limited. All Rights Reserved. Address: Hytera Tower, Hi-Tech Industrial Park North, 9108# Beihuan Road, Nanshan District, Shenzhen, People's Republic of China Postcode: 518057 https://www.hytera.com...
Need help?
Do you have a question about the BP36X and is the answer not in the manual?
Questions and answers