Table of Contents
Advertisement
Advertisement
Table of Contents

Related Manuals for Singer featherweight


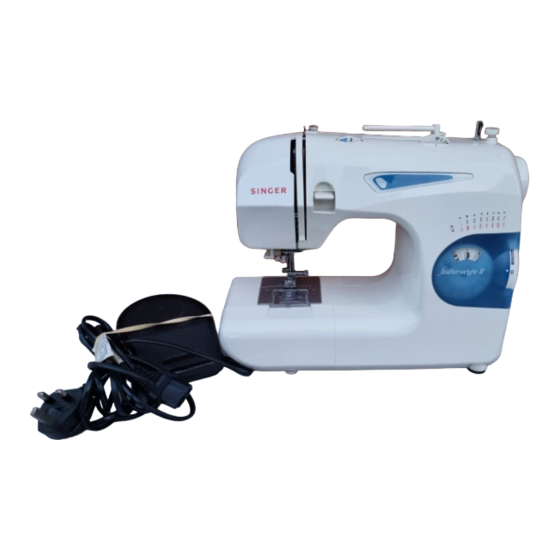
Summary of Contents for Singer featherweight
- Page 1 Ⅱ Ⅱ Ⅱ Ⅱ Ⅱ INSTRUCTION MANUAL MODE D’EMPLOI...
- Page 2 "IMPORTANT SAFETY INSTRUCTIONS" "When using an electrical appliance, basic safety precautions should always be followed, including the following." "Read all instructions before using this sewing machine." ”DANGER - To reduce the risk of electric shock: " 1. "This sewing machine should never be left unattended when plugged in. Always unplug this sewing machine from the electric outlet immediately after using and before cleaning."...
- Page 3 FOOT CONTROL (USA only Use Matsushita Electric, Model 4C-316B with this sewing machine. POLARIZED PLUGS CAUTION This appliance has a polarized plug (one blade wider than the other). To reduce the risk of electric shock, this plug is intended to fit in a polarized outlet only one way. If the plug does not fit fully in the outlet, reverse the plug. If it still does not fit, contact a qualified electrician to install the proper outlet.
- Page 4 «MESURES DE SÉCURITÉ IMPORTANTES» «Lorsqu’un appareil électrique est en usage, il faut toujours observer certaines mesures élémentaires de sécurité y compris les suivantes.» «Lire les instructions en entier avant d’utiliser cette machine à coudre.» «DANGER- Pour réduire le risque de décharge électrique:» 1.
-
Page 5: Table Of Contents
TABLE OF CONTENTS Machine identification ---------------------------------------------------- 4 - 6 Shell stitch ------------------------------------------------------------------------ 25 Setting up your machine ------------------------------------------------------ 7 Multi-stitch zigzag -------------------------------------------------------------- 26 Foot control, Power/light switch Double-action stitch ----------------------------------------------------------- 27 Accessories ----------------------------------------------------------------------- 8 Faggoting ------------------------------------------------------------------------- 27 Winding bobbin ------------------------------------------------------------------ 9 Stretch stitch --------------------------------------------------------------- 28 - 31 Threading the bobbin thread ----------------------------------------------- 10 Triple straight stitch --------------------------------------------------------- 28... -
Page 6: Machine Identification
MACHINE IDENTIFICATION 1. Bobbin winder tension disc 8. Extension table 15. Plug socket 22. Thread guide 2. Thread guide 9. Bobbin winder shaft 16. Presser foot lever 23. Needle clamp screw 3. Thread take-up 10. Bobbin winder stop 17. Thread cutter 24. - Page 7 1. ADJUSTING TOP THREAD 3. STITCH WIDTH/NEEDLE TENSION POSITION CONTROL 5. STITCH LENGTH/SUPER (STRETCH) STITCH Decrease or increase the tension of the The width of all the stitches produced on CONTROL top thread by using this control. The higher this machine can be made narrower or the number, the tighter the tension.
- Page 8 1. REGLAGE DE LA TENSION 3. LARGEUR DE POINT 5. COMMANDE DE ONGUEUR DU FIL SUPÉRIEUR DE POINT/POINT SUPER La largeur de tous les programmes de (EXTENSIBLE) Augmenter ou diminuer la tension cette machine peut être diminuée ou supérieure en utilisant cette molette. Plus augmentée en réglant ce levier comme Il est possible de sélectionner facilement le chiffre est grand, plus la tension est...
-
Page 9: Setting Up Your Machine
Power/light switch Interrupteur moteur/lumière Power/light switch Interrupteur moteur/lumière (OFF) (ON) Foot control Rhéostat SETTING UP YOUR MACHINE Be sure to wipe off any surplus oil from needle plate area before using your machine the first time. FOOT CONTROL POWER/LIGHT SWITCH Connect the plug of the foot control into the machine socket and Your machine will not operate until the power/light switch is turned your wall outlet as illustrated. -
Page 10: Foot Control, Power/Light Switch Accessories
REMOVING THE EXTENSION TABLE/ Open the accessory box by lifting the lid up and backward and you will ACCESSORY BOX find a variety of accessories inside. Remove the extension table by pulling it to the left. 1. Straight stitch foot 7. -
Page 11: Winding Bobbin
WINDING BOBBIN 1. Place a spool of thread on the spool pin. Secure it with the 4. Push bobbin winder shaft to far left position, if it is not already spool cap to ensure smooth flow of thread. there. Place bobbin onto shaft with end of thread coming from top of bobbin. -
Page 12: Threading The Bobbin Thread
THREADING THE BOBBIN THREAD 1. Raise the needle to its highest position by rotating the hand 4. Pull thread through the slot and then to the left. wheel towards you. With a finger held gently on top of the bobbin, pull thread through 2. -
Page 13: Threading Top Thread
4 5 6 THREADING THE TOP THREAD 1. Raise the presser foot lever. 3. Thread the machine in the order as illustrated. 2. Raise the needle to its highest position by rotating the hand wheel towards you. ENFILAGE DU FIL SUPÉRIEUR 1. -
Page 14: Using Automatic Needle Threader
USING AUTOMATIC NEEDLE THREADER Raise the needle to its highest position by rotating the hand wheel towards you. 1. Pull down lever and hook thread to 2. Guide thread into hooked end and pull 3. Release the lever and needle will be thread guide as illustrated. -
Page 15: Picking Up Bobbin Thread
PICKING UP BOBBIN THREAD 1. Raise the presser foot lever. 2. Lightly pull up the top thread, and 3. Pull both top and bobbin threads pick up bobbin thread, which will together towards back of machine Holding needle thread loosely with your left appear through the needle plate under the presser foot, leaving hand, turn hand wheel towards you one... -
Page 16: Changing Presser Feet
CHANGING PRESSER FEET Be sure needle is in the up position. Raise presser foot lever. 1. Push foot release lever to remove the foot. Foot 2. Place the desired foot on the needle plate aligning the release lever presser foot needle slot with the needle plate needle Levier de slot. -
Page 17: Converting To Free-Arm Sewing
CONVERTING TO FREE-ARM SEWING Your machine can be used either as a flat- bed, or as a free-arm model. With the extension table in position, it provides you with a large working surface as a standard flat-bed model. By removing the extension table (just pull it off to the left as shown), the machine converts into a free-arm model. -
Page 18: Machine Setting Chart
MACHINE SETTING CHART 1. INDICATOR STITCH STITCH PRESSER INDICATOR STITCH WIDTH LENGTH FOOT CON- CONTROL TROL A, B STRAIGHT 1 - 4 L, R 0.5 - 4 ZIGZAG 2. STITCH LENGTH CONTROL BLIND SHELL 1 - 4 1 - 5 MULTI-STITCH ZIGZAG 3. -
Page 19: Tableau De Réglage De La Machine
TABLEAU DE RÉGLAGE DE LA MACHINE 1. INDICATEUR COMMANDE CADRAN PIED POINT INDICATEUR PRESSEUR LONGUEUR LARGEUR DU POINT A, B DROIT 1 - 4 L, R 0.5 - 4 2. COMMANDE DE LONGUEUR ZIGZAG INVISIBLE COQUILLE 1 - 4 1 - 5 ZIGZAG MULTI-POINT 3. -
Page 20: Straight Stitch
STRAIGHT STITCHES Straight stitch is most frequently used for every aspect of sewing. Learn the correct method of your machine following the steps below. 1. SETTINGS 2. Pull both threads under the 5. a. Start to sew stepping on 6. a. Turn the hand wheel to the foot control. -
Page 21: Point Droit
POINT DROIT C’est le point le plus utilisé pour toute genre de couture. Apprenez à vous servir correctement de votre machine, en suivant les étapes ci-dessous : 1. Réglages 2. Tirer les deux fils sous le pied 5. a. Tourner le volant pour 6. -
Page 22: Securing Seams
Reverse stitch lever Levier couture arrière SECURING SEAMS INSERTING ZIPPERS PIPING Secure your seams by taking the first few To sew down the right side, attach left side To pipe soft furnishings, cover cord with a stitches in reverse. Then allow the machine of zipper foot to presser foot holder so that bias strip of fabric and pin or tack it to the to go forward. -
Page 23: Adjusting Thread Tension
Well balanced Tension bien equilibree Top side Under side Endroit Envers Top thread Top stitch too tight Threads lock on the top supérieur Decrease tension side. Tension supérieure Les fils se croisent sur Diminuer la tension trop tendue l’endroit Bobbin thread Fil de la canette Threads lock on the Top stitch too loose... -
Page 24: Needle, Thread And Fabric Chart
Utilisez, sauf cas particulier, Ie use the same size and type of thread in the bobbin as in the top même fil pour I’aiguille et la canette. thread supply. For best results always use Singer Brand Needles. FABRICS THREAD... -
Page 25: Zigzag Stitch
SATIN STITCH ZIGZAG STITCHING This is a closely spaced attractive stitch used POINT ZIGZAG for appliqué, bar-tacking, etc. Slightly loosen top thread tension for satin stitching. Use a backing of tissue paper or interfacing Stitch width control Stitch indicator for the sheer materials to avoid puckering. Cadran de largeur du point Indicateur de point POINT SATIN... -
Page 26: Blind Stitch
Medium to heavyweight fabric Tissus moyens et lourds Under side Under side Envers Envers Top side Endroit Fine fabric Tissus fins Under side Under side Envers Envers BLIND STITCH 1. First finish the raw edge. Do this by turning it under on fine fabrics and 3. -
Page 27: Shell Stitch
SHELL STITCH Shell stitch is for seaming and overcasting sheer, soft fabrics in SHELL TUCKS one operation. It also produces a delicate shell hem on lingerie Turn under the raw edge and press. Place the fabric right side up and other fine garments. so that the zigzag part of the stitch sews just over the folded edge, pulling the fabric in to form a shell hem. -
Page 28: Multi-Stitch Zigzag
MULTI-STITCH ZIGZAG This is a strong stitch because as its name implies, it makes It is also ideal for mending tears, patching, sewing towelling, patch- multiple short stitches where the normal zigzag makes only one. work and attaching flat elastic. At 0 stitch length the Multi-stitch Zigzag makes an excellent bartack. -
Page 29: Double-Action Stitch
DOUBLE-ACTION STITCH FAGGOTING Double-action stitch is ideal for producing flat overlapped seams This is a popular decorative stitch (used in sleeves or fronts of on almost any type of fabric and a bolder effect will result from blouses and dresses). To attach two separate pieces of fabric sewing with contrasting thread. -
Page 30: Stretch Stitch
TRIPLE STRAIGHT DROIT EXTENSIBLE RIC-RAC RIC RAC STRETCH OVERLOCK SURJET SERRE OVERLOCK SURJET FEATHER ÉPINE ELASTIC OVERLOCK SURJET MAILLE DOUBLE OVERLOCK SURJET DOUBLE HERRINGBONE TIGE TRIPLE STRAIGHT STITCH Triple straight stitch is far stronger than ordinary straight stitch because it locks STRETCH STITCHES three times - forwards, backwards and Stretch stitches are mainly for use on knit, or stretchable fabrics, but can also be used on... -
Page 31: Ric-Rac Stitch
RIC-RAC STITCH STRETCH OVERLOCK STITCH OVERLOCK STITCH Ric-rac is a quick method of finishing a raw Stretch overlock seams and overcasts in This is the same type stitch used by the edge and providing a decorative top-stitch one to produce a narrow, supple seam, garment industry in making sportswear - it in one operation. -
Page 32: Feather Stitch
ELASTIC OVERLOCK STITCH FEATHER STITCH Use this stitch in preference to regular The pleasing appearance of this stitch overlock stitch for overcasting stretch or knit enables it to be used for top stitching, or fabrics where strength and flexibility are attaching lace or inset panels when making required. -
Page 33: Double Overlock Stitch
DOUBLE OVERLOCK STITCH HERRINGBONE STITCH Double overlock has a number of uses. It is perfect for attaching flat elastic when making It is a versatile stitch used for joining fabric or repairing lingerie. It is ideal for overcasting a single layer of fabric or seaming and pieces and embroidery. -
Page 34: Buttonhole Making
Stitch length - Longueur du point - Buttonhole foot Pied boutonnière BUTTONHOLE MAKING Change the presser foot to buttonhole foot. Carefully mark the buttonhole length on your garment. Place the fabric with the buttonhole marked under the buttonhole foot. Slide Slide the buttonhole guide forward. - Page 35 PROCEDURE PROCÉDURE 1. Stitch forward to the end of 1. Coudre en marche avant buttonhole mark. Stop sewing jusqu’au repère à la fin de la at the left stitch and raise b o u t o n n i è r e . A r r ê t e r l a needle.
-
Page 36: Réglage Longueur De Points
Spur Less density Cordonnet Densité plus faible More density Densité plus forte CORDED BUTTONHOLES ADJUSTING STITCH LENGTH (DENSITY) AND WIDTH Hook filler cord (crochet thread or buttonhole twist) to the spur You can also change stitch density to your preference, within the and pull both ends of the cord forward under the foot. -
Page 37: Procedure, Corded Buttonhole, Adjusting Stitch Length Caring For Your Machine
Face cover Plaque frontale Screw Light bulb Ampoule d’éclairage CARING FOR YOUR MACHINE To ensure the best possible operation of your machine, it is necessary to keep the essential parts clean at all times. Always disconnect the machine from power supply by removing the plug from the socket-outlet. Cleaning the feed dogs and hook area Changing light bulb 1. -
Page 38: Cleaning The Feed Dogs And Hook Area, Changing Light Bulb Check Chart For Performance Problems
CHECK CHART FOR PERFORMANCE VERIFICATION DES PETITS PROBLÈMES DE PROBLEMS COUTURE GENERAL PROBLEMS PROBLÈMES GÉNÉRAUX Machine does not sew. La machine ne coud pas: * Foot control is not connected.- See page 7. * Le cordon électrique ou le rhéostat n’est pas branché - Voir page 7. * Power switch is turned off.- Turn on the switch. - Page 39 ENGLISH / FRANÇAIS 5/00...
- Page 40 Ⅱ Ⅱ Ⅱ Ⅱ Ⅱ INSTRUCTION MANUAL MODE D’EMPLOI...
- Page 41 "IMPORTANT SAFETY INSTRUCTIONS" "When using an electrical appliance, basic safety precautions should always be followed, including the following." "Read all instructions before using this sewing machine." ”DANGER - To reduce the risk of electric shock: " 1. "This sewing machine should never be left unattended when plugged in. Always unplug this sewing machine from the electric outlet immediately after using and before cleaning."...
Need help?
Do you have a question about the featherweight and is the answer not in the manual?
Questions and answers