Table of Contents
Advertisement
Available languages
Available languages
Quick Links
WARRANTY CONDITION
This product is guaranteed for a period of 2 years from the date of purchase* against
any failure resulting from a manufacturing or material defect. This warranty does not
EN
cover defects or damage resulting from incorrect installation, improper use or abnormal
wear of the product.
*as shown on the sales receipt.
CONDITION DE GARANTIE
Ce produit est garanti pour une période de 2 ans à partir de la date d'achat*, contre
toute défaillance résultant d'un vice de fabrication ou de matériau. Cette garantie ne
FR
couvre pas les vices ou les dommages résultant d'une mauvaise installation, d'une
utilisation incorrecte ou de l'usure anormale du produit.
*sur présentation du ticket de caisse.
GARANTIEVOORWAARDEN
Dit product wordt gegarandeerd voor een periode van 2 jaar vanaf de aankoopdatum*,
voor elke storing die het gevolg is van een fabricagefout of het materiaal. Gebreken of
NL
schade door slechte installatie, onjuist gebruik of abnormale slijtage van het product
worden niet gedekt door deze garantie.
*op vertoon van kassabon.
CONDICIONES DE GARANTÍA
El certificado de garantía de este producto tiene una duración de 2 años a partir de la
fecha de compra* que se limita a los defectos de fabricación y averías del material.
ES
Se excluyen de la garantía deficiencias o daños originados por una mala instalación,
errores en la manipulación o por un uso inadecuado.
*previa presentación del comprobante de compra.
ELECTRO DEPOT
1 route de Vendeville
59155 FACHES-THUMESNIL - FRANCE
11/2021-05
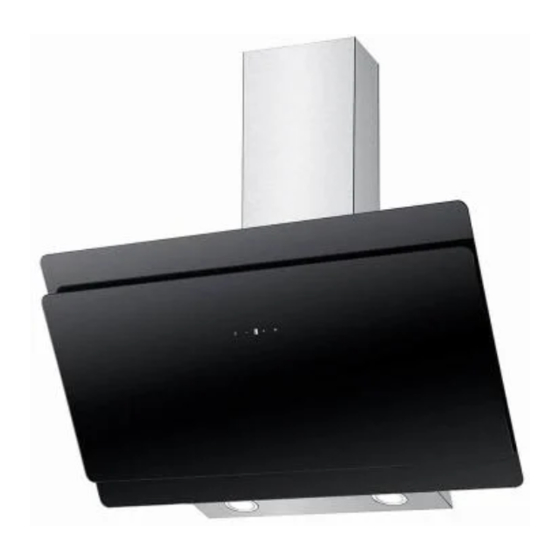
Extractor hood
Hotte aspirante
Dampkap
Campana extractara
970143 - FIH 60 EGK 756C (v3)
970145 - FIH 90 EGK 756C (v3)
INSTRUCTIONS FOR USE
....................02
CONSIGNES D'UTILISATION
....................14
GEBRUIKSAANWIJZINGEN
....................26
INSTRUCCIONES DE USO
....................38
Advertisement
Table of Contents

Subscribe to Our Youtube Channel
Summary of Contents for Electro Depot VALBERG FIH 60 EGK 756C
- Page 1 Se excluyen de la garantía deficiencias o daños originados por una mala instalación, errores en la manipulación o por un uso inadecuado. *previa presentación del comprobante de compra. INSTRUCTIONS FOR USE ....02 CONSIGNES D'UTILISATION ....14 GEBRUIKSAANWIJZINGEN ....26 INSTRUCCIONES DE USO ....38 ELECTRO DEPOT 1 route de Vendeville 59155 FACHES-THUMESNIL - FRANCE...
- Page 3 Operating Using the appliance Chosen, tested and recommended by ELECTRO DEPOT, Wall mounting installation t h e p ro d u c t s o f t h e VA L B E R G b r a n d a re e a s y t o u s e , Installation (Vent inside) re l i a b le a n d o f a n i m p e c c a b le s t a n d a rd .
- Page 4 Preview of the appliance Preview of the appliance Thank you for choosing this extractor hood. This instruction manual received instructions for using the appliance safely and that they has been designed to provide you with all the necessary instructions understand the risks involved. linked to the installation, use and maintenance of you appliance.
- Page 5 Using the appliance Using the appliance Operating Technical Information Touch controls 1 Product information sheet According to regulations EU 65/2014 and the harmonised standards in force. Trademark Valberg On/Off button It's used for turning on/off the fan. Product code 970143 / 970145 Speed decrease button Model reference FIH 60 EGK 756C (v3)
- Page 6 Using the appliance Using the appliance Wall mounting installation Air flow in m3/h measured at maximum efficiency point (Qbep) 225.5 Prepare for installation Air pressure in Pa measured at maximum efficiency point (Pbep) 181.1 f you have an outlet to the out side, your cooker hood can be connected as below picture by means Electric power input in W measured at maximum efficiency point (Wbep) 33.6 of an extraction duct (enamel, aluminum, flexible pipe or inflammable material with an interior...
- Page 7 Using the appliance Using the appliance Installation of the cookerhood Open the glass panel and remove the aluminum grease filter. Mark the four holes for the installation from the inside of the hood. Drill 3 x 8 mm holes for hood holding bracket. Tighten the bracket with the screws and plugs Take the hood back down again.
- Page 8 Using the appliance Using the appliance Upper decorative chimney (Inner) Lower Chimney bracket Lower decorative chimney (Outer) Put the chimney on the cooker hood. Fix the lower chimney bracket on the wall by 2 screws(4mm x30mm). Fix the lower chimney with 2 pcs of 4x8mm screws on the cooker hood. Then pulling out the upper chimney upwards to the target height.
- Page 9 Using the appliance Using the appliance Installation without external opening Recycling version Contact your supplier to obtain active carbon filters to transform the extractor hood into a Screw recycling hood. Installing the active carbon filter (cassette) • Check that the diameter of the active carbon filter corresponds to the outlet diameter.
- Page 10 Using the appliance Useful information Replacement the lamp Troubleshooting Fault Cause Solution The fan blade is jammed. Light on, but fan Switch of the unit and repair by does not work. qualified service personnel only. The motor is damaged. Light bulb burn. Replace the bulb with correct rating.
-
Page 11: Table Of Contents
Utilisation de VA L B E R G . Montage mural Choisis, testés et recommandés par ELECTRO DEPOT, l'appareil Installation sans ouverture vers l’extérieur l e s p ro d u i t s d e l a m a rq u e VA L B E R G s o n t s i m p l e s... -
Page 12: Aperçu De L'appareil
Aperçu de l’appareil Aperçu de l’appareil Nous vous remercions d'avoir choisi cette hotte aspirante. Le présent sensorielles ou mentales, ou présentant un manque d'expérience ou guide d'instructions a été conçu pour vous apporter L'ensemble des de connaissances, à condition qu'ils soient surveillés ou aient reçu instructions requises Liées à... -
Page 13: Fonctionnement
Utilisation de l’appareil Utilisation de l’appareil Fonctionnement Spécifications techniques Commandes tactiles Fiche produit Selon le règlement UE 65/2014 et les normes harmonisées en vigueur. Marque Valberg Bouton Marche/Arrêt Il permet d'allumer/d'éteindre la hotte. Code produit 970143 / 970145 Bouton de diminution de la vitesse Référence du modèle FIH 60 EGK 756C (v3) Il permet de réduire la vitesse de la hotte. -
Page 14: Montage Mural
Utilisation de l’appareil Utilisation de l’appareil Montage mural Indice d'efficacité énergétique (EEIhotte) 33.9 Préparation de l'installation Débit d'air en m3/h mesuré au point de rendement maximal (Qbep) 225.5 Si vous disposez d'une évacuation vers l'extérieur, vous pouvez raccorder votre hotte aspirante de la Pression d’air en Pa mesurée au point de rendement maximal (Pbep) 181.1 manière indiquée dans l'illustration ci-dessous, au moyen d'un conduit d'extraction (tuyau flexible... - Page 15 Utilisation de l’appareil Utilisation de l’appareil Installation de la hotte aspirante Ouvrez le panneau en verre et retirez le filtre à graisse en aluminium. Faites des repères depuis l'intérieur de la hotte pour les 4 trous nécessaires à l'installation. Percez 3 trous de 8 mm pour le support de la hotte. Fixez le support à l'aide des vis et chevilles Décrochez la hotte.
- Page 16 Utilisation de l’appareil Utilisation de l’appareil Fixez la cheminée supérieure sur le support de la cheminée supérieure à l'aide de 2 vis (4 x 8 mm). Fixez ensuite le support de la cheminée supérieure au mur. Avant de fixer ce support au mur, vous pouvez déterminer la position des trous de fixation correspondants pour l'installation.
-
Page 17: Installation Sans Ouverture Vers L'extérieur
Utilisation de l’appareil Utilisation de l’appareil Installation sans ouverture vers l’extérieur Fixez la cheminée inférieure sur la hotte aspirante à l'aide de 2 vis de 4 x 8 mm. Version recyclage Pour transformer la hotte version évacuation en version recyclage, demandez à votre vendeur des filtres à... -
Page 18: Remplacement De L'ampoule
Utilisation de l’appareil Informations utiles Remplacement de l'ampoule Dépannage Problème Cause Solution La pale du ventilateur est La lumière s'allume, Éteignez l'appareil et faites- coincée. mais la hotte ne le réparer uniquement par un Le moteur est fonctionne pas. technicien de maintenance qualifié. endommagé. -
Page 19: W W W. E Le C T Ro D E P O T . B E
Voorbeeldweergave van het toestel Inhoudstafel Veiligheidsinstructies Voorbeeldweergave Bedankt ! van het toestel D a n k u o m d i t VA L B E R G - p ro d u c t t e k i e z e n . Bediening Het toestel gebruiken D e p ro d u c t e n v a n h e t m e r k VA L B E R G , d i e g e k o z e n ,... - Page 20 Het toestel gebruiken Voorbeeldweergave van het toestel Het toestel gebruiken Voorbeeldweergave van het toestel Proficiat met uw keuze voor deze dampkap. Deze handleiding werd OPGELET ontworpen om u de instructies te geven voor het installeren, gebruiken De toegankelijke delen kunnen warm worden tijdens het en onderhouden van uw toestel.
- Page 21 Het toestel gebruiken Het toestel gebruiken Bediening Technische specificaties Aanraakbedieningsknoppen Technische specificaties Conform EU-verordening 65/2014 en de geldende normen. Merk Valberg Aan/Uit-knop Deze wordt gebruikt om de ventilator aan en uit te zetten. Productcode 970143 / 970145 Knop om de snelheid te verminderen Referentie van het model FIH 60 EGK 756C (v3) Om de snelheid van de ventilator te verminderen.
- Page 22 Het toestel gebruiken Het toestel gebruiken Montage aan de muur Bijkomende informatie volgens EU-verordening 66/2014 en de geldende geharmoniseerde Bijkomende informatie volgens EU-verordening 66/2014 en de geldende geharmoniseerde normen. normen. Installatie voorbereiden Factor van de toename in de tijd (f) Wanneer u een uitlaat naar buiten hebt, kan uw afzuigkap aangesloten worden zoals weergegeven Energie-efficiëntie-index (EEldampkap) Energie-efficiëntie-index (EEldampkap)
- Page 23 Het toestel gebruiken Het toestel gebruiken Installatie van de afzuigkap Open het glazen panel en verwijder de aluminium vetfilter. Markeer de vier gaten voor de installatie vanuit de binnenkant van de kap. Boor 3 gaten van 8 mm voor de houder van de afzuigkap. Bevestig de houder met de meegeleverde Neem de kap opnieuw van de houder.
- Page 24 Het toestel gebruiken Het toestel gebruiken Bevestig de bovenste schouw op de bovenste schouwhouder met 2 schroeven (4 x 8 mm) Bevestig vervolgens de bovenste schouwhouder op de muur. Alvorens de houder op de muur te bevestigen, kunt u beslissen waar de gaten moeten komen om de bovenste schouwhouder te bevestigen. Bovenste sierschouw (Binnenkant) Onderste schouwhouder Onderste sierschouw (Buitenkant)
- Page 25 Het toestel gebruiken Het toestel gebruiken Installatie zonder opening naar buiten Bevestig de onderste schouw met 2 schroeven van 4 x 8 mm op de afzuigkap. Filterversie Om de dampkap van de afzuigversie naar de filterversie om te bouwen, vraag uw dealer om Schroef actieve koolstoffilters.
- Page 26 Het toestel gebruiken Nuttige informatie De lamp vervangen Probleemoplossing Probleem Oorzaak Oplossing Het ventilatorblad is Lamp brandt maar Schakel het toestel uit en laat geblokkeerd. de ventilator werkt enkel door gekwalificeerd niet. servicepersoneel herstellen. De motor is beschadigd. Vervang de lamp door een lamp met Lamp is doorgebrand.
- Page 27 Funcionamiento Uso del aparato Elegido, probado y recomendado por ELECTRO DEPOT, Instalación de montaje en pared l o s p ro d u c t o s d e l a m a rc a VA L B E R G s o n f á c i le s d e Instalación (ventilación interior)
- Page 28 Vista previa del aparato Vista previa del aparato Vista previa del aparato Vista previa del aparato Gracias por haber elegido esta campana extractora. EL presente reducidas o por quienes no tengan los conocimientos y la experien- manual de instrucciones ha sido creado para proporcionarle todas cia necesarios siempre y cuando estén supervisados y hayan sido las instrucciones necesarias para la instalación, la utilización y el instruidos para el uso del aparato de forma segura y siempre que...
- Page 29 Uso del aparato Uso del aparato Funcionamiento Especificaciones técnicas Controles táctiles Ficha del producto Según el Reglamento UE 65/2014 y las normas armonizadas vigentes. Botón «On/Off» (Encendido/Apagado) Marca Valberg Se usa para encender y apagar el ventilador. Código del producto 970143 / 970145 Botón de disminución de velocidad Disminuye la velocidad del ventilador.
- Page 30 Uso del aparato Uso del aparato Instalación de montaje en pared Consumo de energía en W ponderado en el modo «parada» (Ps) 0.45 Preparación para la instalación Consumo de energía en W ponderado en el modo «en espera» (Po) Si dispone de una salida al exterior, su campana extractora se puede conectar como en la imagen Información adicional según el Reglamento UE 66/2014 y las normas armonizadas vigentes.
- Page 31 Uso del aparato Uso del aparato Instalación de la campana extractora Abra el panel de vidrio y retire el filtro antigrasa de aluminio. Marque los cuatro agujeros para la instalación desde el interior de la campana. Taladre 3 orificios de 8 mm para el soporte de sujeción de la cubierta de la campana extractora. Vuelva a bajar la cubierta.
- Page 32 Uso del aparato Uso del aparato Fije el tubo de extracción superior en el soporte del tubo superior con 2 tornillos (4 x 8 mm). Ahora fije el soporte superior del tubo de extracción en la pared. Antes de fijar el soporte en la pared, puede decidir la ubicación de los orificios de fijación del soporte del tubo de extracción superior para la instalación.
- Page 33 Uso del aparato Uso del aparato Instalación sin abertura hacia el exterior Fije el tubo de extracción inferior con 2 tornillos de 4 x 8 mm en la campana extractora. Función del aire de circulación Para transformar la campana versión evacuación en versión reciclaje, solicite filtros Tornillo de carbón activo a su vendedor.
- Page 34 Uso del aparato Información útil Cambio de la bombilla Solución de problemas Problema Causa Solución La hélice del ventilador Se enciende la luz, Apague la unidad y haga que está atascada. pero el ventilador no la repare personal de servicio funciona.
Need help?
Do you have a question about the VALBERG FIH 60 EGK 756C and is the answer not in the manual?
Questions and answers