
Summary of Contents for Velivi KMYL120-2
- Page 1 INSTRUCTION MANUAL MODEL: KMYL120-2 Support Phone : (213)432-5433 Support Email : Velivi@163.com...
-
Page 2: Table Of Contents
CONTENTS IMPORTANT SAFEGUIDES...........P.4 PRODUCT FEATURES..............P.6 INSTALLATION...................P.6 OPERATING THE APPLIANANCE..........P.7 CARE AND MAINTENANCE............P.9 TROUBLESHOOTING..............P.9... -
Page 3: Important Safeguides
Thanks for choosing our products, hope that our products can bring you different feelings. Please read the following safety and operating instructions carefully before using the wine cooler. IMPORTANT SAFEGUIDES Plug into a grounded 3-prong outlet, do not remove grounding prong, do not use an adapter, and do not use an extension cord. - Page 4 Before the appliance is used, it must be properly positioned and installed as described in this manual, so read the manual carefully. To reduce the risk of fire, electrical shock or injury when using the appliance. ● It is recommended that a separate circuit, serving only your appliance be provided. Use receptacles that cannot be turned off by a switch or pull chain.
-
Page 5: Product Features
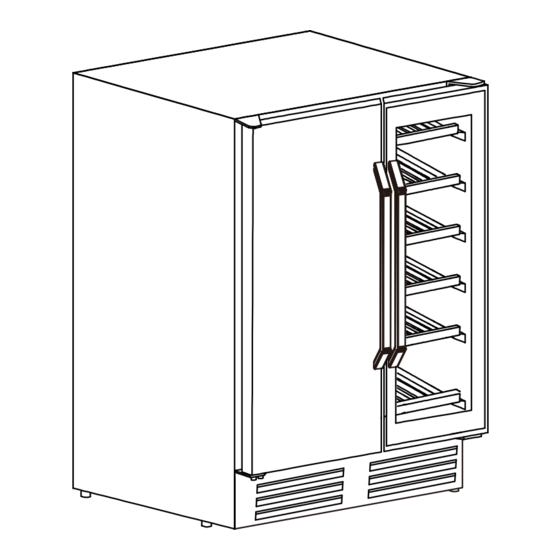
PRODUCT FEATURES • Dual cooling zones for storing different beverages and wines together. • Beverage Refrigerator (Left Zone) Capacity: 57 standard 12oz cans • Wine Refrigerator (Right Zone) Capacity:18 standard 750ml wine bottles • Stainless steel glass doors with sleek black cabinet •... -
Page 6: Operating The Applianance
How to install the handle: 1)Pull away the sealing gasket where the handle is to be installed as shown in Fig1. The gasket is easily displaced by hand. No tools are necessary. 2)Align the handle with the screws installed. Tighten the screws using a Phillips head screwdriver until the handle sets both flush and secured tightly against the door frame. - Page 7 Power On /Off ● When the appliance is plugged into a power outlet, it powers on automatically. ● Touch the power button to turn on the appliance. Press power button for 3 seconds to turn off the appliance if needed. Light Control ●...
-
Page 8: Care And Maintenance
Storage Beverage Cooler Zone ● Shelf one to two - 18 standard 12oz cans per shelf ● Shelf Three - 9 standard 12oz cans per shelf ● Bottom Section - 12 standard 12oz cans Wine Cooler Zone ● Shelf One to Five - 3 standard 750ml bottles per shelf ●... -
Page 9: Troubleshooting
Moving your wine chiller ●Remove all items (bottles) ●Tape down securely all loose items (shelves) inside your appliance. ●Turn the adjustable leg up to the base to avoid damage. ●Tape the door shut. Be sure the appliance stays secure in the upright position during transportation. - Page 10 15 days upon receipt of the product. 2. Customers are entitled to free repair service from velivi for any product proven defective in material or workmanship that results in product failure during normal consumer usage and conditions within the valid warranty period, which is 12 months counting from the date of selling.
Need help?
Do you have a question about the KMYL120-2 and is the answer not in the manual?
Questions and answers