
Related Manuals for Inno Torc EMAX Series


Summary of Contents for Inno Torc EMAX Series
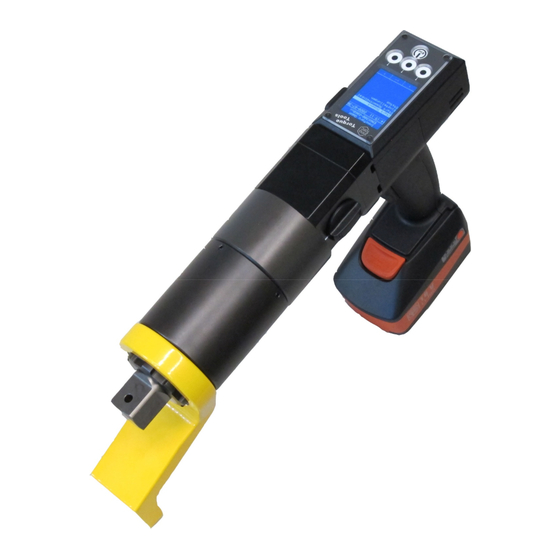
- Page 1 Instruction Manual Battery-Powered Torque Wrench, EMA series with TorcDoc InnoTorc GmbH Instruction Manual EMA Page 1...
- Page 2 Technical Data: EMA series Torque ranges in accordance with characteristic curve for type. Please consult the calibration certificate for precise values. All dimensions stated are approximate; technical specifications subject to change without notice Model Square drive shaft DIN 3121 ¾“ ¾“...
- Page 3 Incoming goods inspection and packaging Check the device and accessories for transport damage. If any damage is detected, please notify the carrier immediately and return the device in its original packaging to InnoTorc or the responsible sales partner. Please retain the original packaging. Read these instructions before putting the device into service and make yourself familiar with the procedure for handling it.
- Page 4 Safety precautions prior to commissioning and assembling the device Each time you use the device and accessories, inspect them for any damage. Devices that are damaged or defective must not be put into service. Repairs may only be performed by the manufacturer.
- Page 5 Safety precautions and performing the tensioning operation [RICHTIG = CORRECT; FALSCH = WRONG] Never hold the device at the front by the socket or support arm due to the risk of crushing and other injuries! Under no circumstances should you reach into the space between support arm and support point.
- Page 6 Setting the switch off torque in torque mode: Fig. 1: Main menu Fig. 2: Select switch off Fig. 3: Tool is ready for torque for gear 1 working in gear 1 Switch on the tool: The EMAX torque tool is switched on by pressing the button .
- Page 7 Setting the pre-torque and angle in torque + angle mode: Fig. 5: Select pre-torque Fig. 6: Select angle Fig. 7: Tool is ready for Fig. 4: Select torque and working angle mode Switch on the tool: The EMAX torque tool is switched on by pressing the button .
- Page 8 Controls Fig. 9: Tool is working: Fig. 8: Tool is working: torque mode torque + angle mode (Running clockwise) (Running clockwise) Switch off the tool: The tool is switched off by a long press on the button InnoTorc GmbH Instruction Manual EMA Page 8...
- Page 9 Options: Release Angle Fig. 11: Release angle Fig. 10: Options Fig. 12: Change release angle Change Release Angle: The automatic release angle of the tool can be specified in menu “Options” (figure 10 and 11). With the buttons – and + the angle can be changed (figure 12). The selection is done with the button .
- Page 10 Start a project without parameter import General Switch on the tool: The EMAX torque tool is switched on by pressing the button . The main menu is shown in figure 13. With the buttons and , the individual menu items can be selected. Select the “Start Project” function.
- Page 11 Fig.17: Maximum torque Fig. 16: Minimum torque After entering the number of screws (figure 18), an overview of the parameters entered appears (figure 19). The parameter set is given a name which is composed of the current date and time. After pressing the button , the project is started (figure 20) Fig.
- Page 12 Start a project with parameter import App installation: The Android App TorcDoc from InnoTorc GmbH is required for the import parameter. Download it and install it on a smartphone or tablet with Android. In the “Settings” menu item (figure 21), enter an e- mail address for the data export and select the desired format.
- Page 13 Start Project: Switch on the torque wrench. The previously created data file will now appear in the “Start project” submenu. The individual menu items can be selected with the buttons and . The selection is accepted by pressing the button . Select the user, then the project, an object and a parameter set (figure 24-27).
- Page 14 Export protocol: First, make sure that there is a connection to the tool. As soon as there is a connection to the torque tool, the data is automatically synchronized and the logs appear in the app. The desired protocol can now be selected and viewed in the app (figure 23).
- Page 15 Option: Testmode The testmode is used to check the torque of a screw connection. If the screw connections is tighten enough, the screw is not turned any further; with loose screw connections, the retightening angle is shown on the screwdriver's display until the required tightening torque is reached. Select Torque: With the buttons –...
- Page 16 InnoTorc GmbH Augsburger Str. 91 DE - 85290 Geisenfeld Description and identification of the machinery Product / Article Electric shut-off wrench EMAX Series Project number PRJ-2020-03-01-0001 Function Battery-Powered Torque Wrench, for tightening and loosening screw connections. It is expressly declared that the machinery fulfils all relevant provisions of the following EU...
- Page 17 Servicing and manufacturer’s details The device contains no components to be serviced or repaired by the end customer. In the event of a malfunction, the display flashes and shows "E" followed by a two-digit error number. Please make a note of this number and send the device to InnoTorc GmbH or the responsible sales partner.
Need help?
Do you have a question about the EMAX Series and is the answer not in the manual?
Questions and answers