Table of Contents
Advertisement
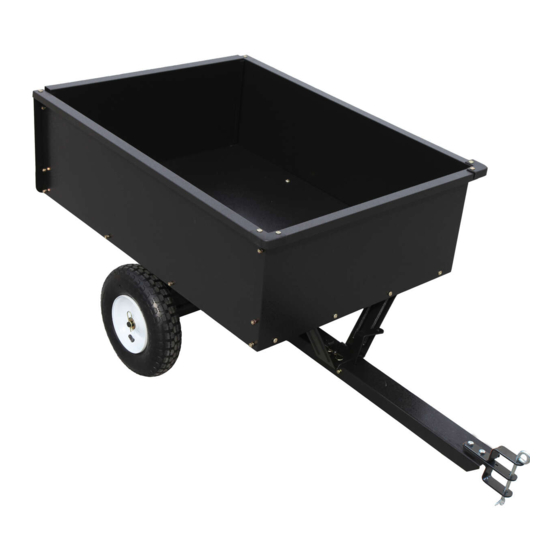
USE AND CARE GUIDE
10 CU. FT. STEEL DUMP CART
Model # YTL-590-043
Questions, problems, missing parts? Before returning to the store,
please call Customer Service
8 a.m. - 5 p.m., PST, Monday - Friday
1-888-723-6534
parts@ytlinternational.com
We appreciate the trust and con dence you have placed in Yard Commander through the purchase of this 10-cu. ft. Steel Dump Cart. We strive
to continually create quality products designed to enhance your home. Visit us online to see our full line of products available for your home
improvement needs. Thank you for choosing Yard Commander!
Advertisement
Table of Contents

Related Manuals for YARD Commander YTL-590-043

Summary of Contents for YARD Commander YTL-590-043
- Page 1 We appreciate the trust and con dence you have placed in Yard Commander through the purchase of this 10-cu. ft. Steel Dump Cart. We strive to continually create quality products designed to enhance your home. Visit us online to see our full line of products available for your home...
-
Page 2: Table Of Contents
Table of Contents Safety Information ........2 Assembly . -
Page 3: Warranty
Warranty Warranty For one year from the date of purchase, YTL International will replace for the original purchaser, or repair the steel dump cart. The warranty will not apply to any unit which was not assembled correctly, misused, overloaded or which has been used oroperated contrary to our instructions, or which has been repaired or altered by anyone other than an authorized representative. -
Page 4: Pre-Assembly
Pre-Assembly PLANNING ASSEMBLY Before beginning assembly of product, make sure all parts are present. Compare parts with package contents list and hardware contents list. If any part is missing or damaged, do not attempt to assemble the product. TOOLS REQUIRED Phillips Claw hammer Safety goggles... -
Page 5: Package Contents
Pre-Assembly (continued) PACKAGE CONTENTS Part Description Quantity Bottom Panel Assembly Hitch Tongue Assembly Side Panel Rear Card Slot U-Frame Connecting Plate Rear Panel Wheel Wheel Axle Hitch Pin Bracket Tongue Support Front Panel Corner Plate... -
Page 6: Assembly
Assembly Attach the Axle Support Attach Tongue Support Lay down the bottom panel assembly (A) on a at surface, Attach the tongue support (K) to the back of the bottom panel (A). and remove the two M6 wing nuts (X) on the wheel axle Pay attention to the orientation of the hole on the tongue support. -
Page 7: Gg Ø3 R Pin
Assembly (continued) Attach the Hitch Tongue Assembly Attach the Wheels Align the male receiver in the middle of the tongue assembly Add one Ø16 at washer (FF) on one side of the wheel axle (I), (B) with the hole on the tongue support (K). Slightly pull the put the wheel (H) on ensuring the male side of the wheel is release pedal (AF) back into the notch in the tongue support facing the axle as shown below, and then put on another... -
Page 8: Hh M8X30 Hex Bolt
Assembly (continued) Attach the Hitch Pin Bracket Attach the Side Panel Attach two hitch pin brackets (J) and the connecting plate Turn the bottom panel over onto the wheels and tighten (F) to the hitch tongue (B) using two sets of M8x30 hex hardware on the tongue support (K). - Page 9 Assembly (continued) Attach the Front Panel Attach the Corner Plate Attach the front panel (L) to the bottom panel (A) using Attach the two corner plates (M) to the side panels (C) and front four sets of M6x16 screws (AA), Ø6 lock washers (BB), panel (L) using four sets of M6x16 screws (AA), Ø6 lock washers and M6 hex nuts (CC).
- Page 10 Assembly (continued) Attach the U-frame Attach the Rear Panel Attach the U-frame (E) to the bottom panel (A) and side Slide the rear panel (G) through the rear card slots (D) on the panels (C) using six sets of M6x16 screws (AA), Ø6 lock back side panels.
-
Page 11: Operation
Operation WARNING: Before using the steel dump cart, review the instructions below and safety information. Failure to follow these instructions may result in property damage or injury to the operator or bystanders. DO NOT exceed rated capacity of 400 Lbs. (182 kg). ALWAYS secure and lock the steel cart to the vehicle hitch before operating. -
Page 12: Maintenance
Maintenance WARNING: Improper maintenance and storage of the steel dump cart may void your warranty. After each use clean material out of the cart box. Rinse/dry inside and outside of the dump cart after each use. Before operating make sure the tires have the RECOMMENDED TIRE PRESSURE 30 PSI. Regularly grease the axle and the wheel bearing area or when needed. -
Page 13: Service Parts
Service Parts P O N N O P O P X N O P N O P N O P Q R S P O N V R S Please contact 1-888-723-6534 for further assistance. - Page 14 Service Parts (continued) Part Drawing No. Description Quantity DC4002-00001 Bottom Panel DC4002-01000 Hitch Tongue DC400-00002 Side Panel DC400-00009 Rear Card Slot DC400A-20000 U-Frame DC400A-00004 Connecting Plate DC4002-00003 Rear Panel DC4002-02000 Wheel DC4002-00004 Wheel Axle N390-00002 Hitch Pin Bracket DC400-00007 Tongue Support DC4002-00002 Front Panel DC400-00003...
- Page 15 Questions, problems, missing parts? Before returning to the store, please call Customer Service 8 a.m. - 5 p.m., PST, Monday - Friday 1-888-723-6534 parts@ytlinternational.com Retain this manual for future use.
Need help?
Do you have a question about the YTL-590-043 and is the answer not in the manual?
Questions and answers