Advertisement
Quick Links
Advertisement

Summary of Contents for Kicker KXMARLC
- Page 1 Owner’s Manual Manual del Propietario Manuel d’utilisation Benutzerhandbuch KICKER KXMARLC ZONE VOLUME CONTROLLER CONTROL DE VOLUMEN DE ZONA RÉGLAGE DU VOLUME DE LA ZONE ZONENLAUTSTÄRKE-STEUERUNG select language seleccione el idioma choisir la langue sprache auswählen...
-
Page 2: Table Of Contents
Contents Overview ......2 Specifications ......3 Installation ...... 5 Power Wiring ......5 Audio Wiring ......7 Mounting ....... 9 Warranty ...... 11 English 48KXMARLC-c-23... -
Page 3: Overview
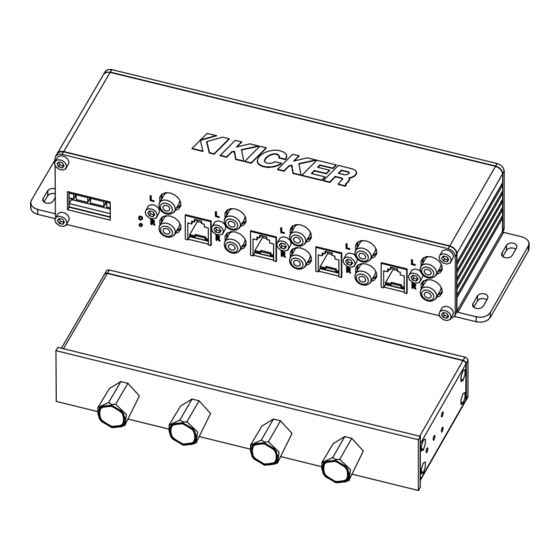
This means the output signal has double the input voltage, and is hot, clean and ready for any device. The KXMARLC can be mounted to the top or bottom of a surface, or mounted flush with a surface such as in your boat’s cockpit. -
Page 4: Specifications
100K Note: All specifications and performance figures are subject to change. Please visit www.kicker.com for the most current information. To get the best performance from your new KICKER speakers, we recommend using genuine KICKER accessories and wiring. Processor Unit 8-7/8”... - Page 5 Remote Unit FLUSH MOUNT 8-7/16” [213.5mm] 8-1/16” [204.5mm] 9/16” [15.0mm] 1-1/4” [31.0mm] 9-5/16” 11/16” [17.5mm] [237.0mm] 2-9/16” [65.0mm] 7” [178.0mm] UNDER DASH MOUNT 9-5/16” [237.0mm] 1-1/4” [31.0mm] 7” [178.0mm] 11/16” [17.5mm] 1-1/4” 2-9/16” [31.0mm] [65.0mm] 8-1/16” 9/16” [204.5mm] [15.0mm] 8-7/16” [213.5mm] English...
-
Page 6: Installation
3. Run power wire to the battery. 4. Install a 2A fuse within 7” (18cm) of the battery and in-line with the power cable connected to your amplifier. Use only KICKER KMPK Wiring Kits or other genuine KICKER marine accessories when installing in marine applications. - Page 7 7. Connect a remote wire from the REM OUT terminal of the Quick-Connect Power Plug to the remote input of your amplifier(s). KICKER recommends using the REM OUT of the KXMARLC to turn all amplifiers in the system on to ensure all amplifiers turn on and off correctly.
-
Page 8: Audio Wiring
Audio Wiring 1. Connect the Source Unit Output to the RCA Input of the KXMARLC. /SOURCE MENU PRESETS 2. Connect an RJ-11 cable from the KXMARLC Processor Unit to the corresponding zone of the Remote Volume Controller. English... - Page 9 3. Connect the zoned RCA Outputs of the KXMARLC Processor Unit to your amplifiers’ inputs. English...
-
Page 10: Mounting
A flat surface is required. Mount the KXMARLC Processing Unit in a location that is convenient for wiring to and from your audio source and amplifiere(s). Do NOT mount the Processor Unit or Remote Volume Controller in a location where it is exposed to direct spray or splash. - Page 11 Mount the KXMARLC to a surface, either above or underneath depending on the configuration of the mounting brackets. If the supplied mounting hardware is not applicable to your installation, some other means of securely attaching the Processor & Remote Units must be used.
-
Page 12: Warranty
Should service be necessary under this warranty for any reason due to manufacturing defect or malfunction during the warranty period, KICKER will repair or replace (at its discretion) the defective merchandise with equivalent merchandise. Warranty replacements may have cosmetic scratches and blemishes. - Page 13 Service performed by anyone other than KICKER HOW LONG WILL IT TAKE? KICKER strives to maintain a goal of one week turnaround for all electronics (amplifiers, crossovers, equalizers, etc.) & acoustic returns. Delays may be incurred if lack of replacement inventory or parts is encountered.
- Page 14 KICKER car stereos and the fact that we encourage our customers to strive for the best (“ Livin ’Loud”) in all aspects of their lives. KICKER loudspeakers and amplifiers are leaders in the mobile audio system market and are therefore the “fuel” for our customers’ car stereo experience.


Need help?
Do you have a question about the KXMARLC and is the answer not in the manual?
Questions and answers