Table of Contents
Advertisement
Quick Links
Advertisement
Table of Contents
Troubleshooting

Related Manuals for Seatronx IND-Series


Summary of Contents for Seatronx IND-Series
- Page 1 IND-Series Panel Mount LCD Monitor User Guide V1.2 The specification is subject to change without notice, would be in accordance with purchase order depicted. Manufacturer assumes no responsibility for Error contained For VGA / DVI/ HDMI Input Version 1.2...
-
Page 2: Table Of Contents
Contents CHAPTER 1 ................... 1 DECLARATION ..................1 CHAPTER 2 ................... 5 GETTING STARTED ................5 2-1 S ..................6 PECIFICATION 2-2 I ..................6 NTRODUCTION 2-3 M ....................7 OUNTING 2-4 C ................. 9 ONNECTING ERIPHERALS CHAPTER 3 ..................11 OPERATION .................. -
Page 3: Declaration
CHAPTER 1 Declaration Please read this chapter with some important notice before operations. -
Page 4: Chapter 1
FCC Regulation Statement This device complies with part 15 FCC rules. Operation is subject to the following two conditions: This device may not cause harmful interference. This device must accept any interference received including interference that may cause undesired operation. This equipment has been tested and found to comply with the limits for a class “a”... - Page 5 Warranty Our warranty that each of its products will be free from material and workmanship defects for a period of one year from the invoice date. If the customer discovers a defect, we will, at its option, repair or replace the defective product at no charge to the customer, provided it is returned during the warranty period of one year, with transportation charges prepaid.
- Page 6 Safety Instructions Always completely disconnect the power cord from your chassis whenever you work with the hardware. Do not make connections while the power is on. Sensitive electronic components can be damaged by sudden power surges. Only experienced electronics personnel should open the PC chassis.
- Page 7 Always ground yourself to remove any static charge before touching the CPU card. Modern electronic devices are very sensitive to static electric charges. As a safety precaution, use a grounding wrist strap at all times. Place all electronic components in a static-dissipative surface or static-shielded bag when they are not in the chassis. Please read these safety instructions carefully.
-
Page 8: Chapter 2
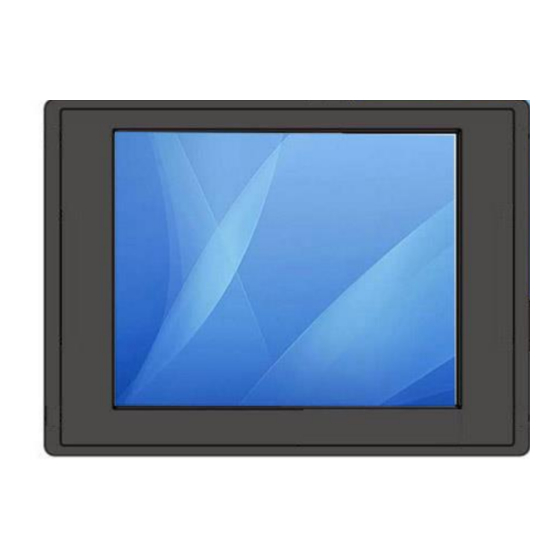
CHAPTER 2 Getting Started The design allows you to use it in radical industrial environments – places you would not take with normal commercial grade LCDs / Panel PCs. The mechanical is designed to be embedded in various kind of equipment. This chapter tells you will find instructions for the following procedures: •... -
Page 9: Specification
2-1 Specification Specification is subject to change with different configurations and requirement, it has to be accordance with datasheet or ordering context provided by dealers or distributors. Here are some common points for panel mount LCD monitors: 1. Mounting: Panel mount by mounting clips. (please refer to 2-3 Mounting) 2. -
Page 10: Mounting
Other connections 1. Compatible cable connection (Optional): The LCD monitor is designed to work with a variety of compatible video sources. Due to possible deviations between these video sources, you may have to make some adjustment to the monitor settings when switching between these sources. These adjustments are made from the OSD menu. - Page 11 2. Use the mounting kit to fix to the wall or fixture. Mounting clips hooks the monitor, and put the screws in to press front bezel and the fixture to be tight. 3. Finished...
-
Page 12: Connecting Peripherals
2-4 Connecting Peripherals The panel control port is designed for monitors that work with a variety of compatible video sources. Due to the possible deviations between these signal sources, you may have to make adjustments to the monitor settings from the OSD menu when switching between these sources. - Page 13 3. USB connector (for touch option) 4. HDMI connector (optional)
-
Page 14: Chapter 3
CHAPTER 3 Operation When using a device, be sure to read the instructions accompanying the device together with the relevant section in this chapter. This chapter gives guidelines on using the device... -
Page 15: Osd Key Functions
3-1 OSD Key functions The OSD menu varies based on your OSD control panel. 1. OSD Key functions Type A Type B Type C (optional) Icon Function Decrease the value / Select up Increase the value / Select down Power Swich Exit / Auto adjustment Enter/ Call main OSD menu... -
Page 16: Osd Menu Navigation
2. LED Indicators Icon Description Power Indicator Lights up in "Green when the monitor turns on Lights up in "Orange" when the device cannot detect any Standby Indicator input source 3-2 OSD Menu Navigation AUTO Scan BRIGHTNESS ANALOG BRICONTRAST CHANNEL CONTRAST HDMI Only support VGA... - Page 17 BRICONTRAST Brightness and contrast adjustment OSD Icon Sub-menu Settings Note BRIGHTNESS slider bar Default 50 Use to adjust the screen’s brightness. Range 0 to 100 CONTRAST slider bar Default 50 BRICONTRAST Use to adjust the screen’s contrast. Range 0 to 100 POSITION For VGA signal input only OSD Icon...
- Page 18 COLOR RGB color and color temperature adustment OSD Icon Sub-menu Settings Note USER R.G.B slider bar Choose RED/GREEN/BLUE to set value of color temperature brightness to suit your own preference 9300K Select and execute Use to set value of monitor for the CIE coordinate 9300 color temperature 6500K Select and execute...
- Page 19 OPTION For option, it only supports with optional hardware specification selected. Please check to your local dealer or distributor. OSD Icon Sub-menu Settings Note VR Brightness ON/OFF Default OFF Choose the brightness control mode by VR control Speaker (option) ON/OFF Default 10 OFF Use to set value of Volume Speaker OPTION...
-
Page 20: Chapter 45
CHAPTER 45 Trouble Shooting This chapter covers the following topics: • Storage Notice • Troubleshoot your LCD Monitor If your monitor fails to operate correctly, consult the following chart for possible solution before calling for repairs. -
Page 21: Trouble Shooting
If your terminal fails to operate correctly, consult the following chart for possible solution before calling for repairs: If you are unable to correct the fault by using this chart, stop using your monitor and contact your distributor or dealer for further assistance. Seatronx, LLC www.seatronx.com (1) 800 607 1460...
Need help?
Do you have a question about the IND-Series and is the answer not in the manual?
Questions and answers