Table of Contents
Advertisement
Quick Links
Advertisement
Table of Contents

Subscribe to Our Youtube Channel
Summary of Contents for Schluter Systems BTEET
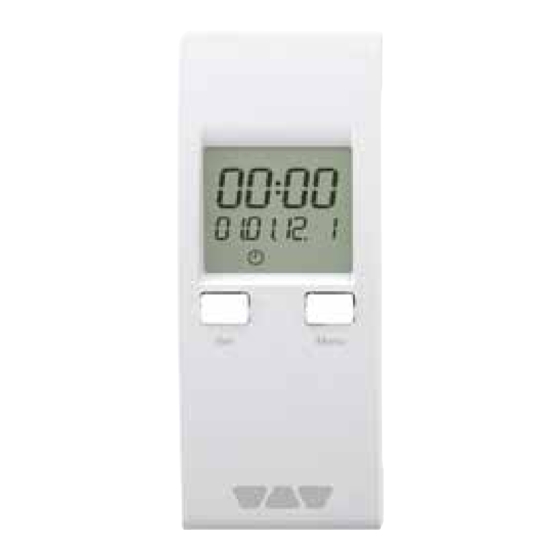
- Page 1 Timer unit Art.-No. BTEET Operating instructions...
-
Page 2: Information On Safety
1. About these operating instructions 1.1 About these operating instructions These operating instructions describe the timer unit (also referred to as “product” in these operating instructions). These operating instructions are part of the product. • You may only use the product if you have fully read and understood these operating instructions. •... -
Page 3: Transport And Storage
2.2 Intended use The single room temperature controller is used to control the temperature in rooms with an underfloor heating system (heat/cool). The product may only be used to program the temperature reduction and the additional pump running time. Any use other than the application explicitly permitted in these operating instructions is not permitted and causes hazards. -
Page 4: Product Description
4. Product description 4.1 Overview of the individual components Component Versions Explanation Power supply, including relay pump Base module Control switching, heating/cooling relay Timer unit Time-controlled temperature reduction Room sensor wired Room sensor ERWL Room sensor wireless EAR2 With 2 control circuits/wired Connection module (wired) EAR6 With 6 control circuits/wired... - Page 5 4.4 Technical specifications Parameter Value General specifications Dimensions (W x H x D) 37 x 92 x 28 mm Weight 33 g Housing material Temperature reduction 4K (min. temperature 12°C) Functions Timing Date, time, weekday (leap year detection) 2, independently programmable, see chapter Switching channels for temperature reduction “Assignment of the switching channels”...
- Page 6 5. Mounting 5.1 Mounting the product 1. Remove the cover from the base module Control. 2. Plug the product into the slot of the base module Control.
- Page 7 5.2 Electrical connection DANGER ELECTRIC SHOCK • Verify that the degree of protection against electric shock (protection class, double insulation) is not reduced by the type of electrical installation. Failure to follow these instructions will result in death or serious injury. DANGER ELECTRIC SHOCK CAUSED BY LIVE PARTS •...
-
Page 8: Betrieb
5. Increase selected adjustment values by briefly pressing the Menu key. 6. Hold down* the Menu key to activate fast forward. - The values then change at a higher speed. * Keep key pressed for more than 3 seconds. BTEET... - Page 9 Abbildung 2: Navigationsstruktur Betriebsmodus Tag, Nacht, Uhr Fig. 2: Navigation structure operating modes Day, Night, Timer Uhrzeit und Datum einstellen BTEET 1. Halten Sie die Set-Taste lang* gedrückt. - Die Ziffern „Stunde“ blinken. 2. Drücken Sie die Menü-Taste, um den gewünschten Wert einzustellen.
- Page 10 3. If you do not press a key for a period of 60 seconds, the product automatically returns to the main screen. * Keep key pressed for more than 3 seconds *Taste länger als 3 Sekunden gedrückt halten Menü Menü Menü Menü Menü Menü Abbildung 3: Navigationsstruktur Menü Fig. 3: Navigation structure menu BTEET...
- Page 11 (1: Mo – 7: So) G. Schaltkanal „Uhr2“ aktiv H. Schaltkanal „Uhr1“ aktiv I. Uhr-Modus aktiv To disable a memory block, the switching channels “Timer1” and “Timer2” must be inactive. The symbol “Timer” (I) flashes when both switching channels are inactive. BTEET...
- Page 12 A. Schaltkanal „Uhr1“ In the case of connection modules WL (wireless), switching channel “Timer1” controls all control circuits. Bei Anschlussmodulen WL (Funk) werden mit Schaltkanal „Uhr1“ alle Regelkreise angesteuert. Bei Anschlussmodulen WL (Funk) werden mit Schaltkanal „Uhr1“ alle Regelkreise angesteuert. BTEET BTEET...
- Page 13 8. Press the Set key to confirm and save the value. - The “Weekday” digits flash. 9. Press the Menu key to select the required weekday. 10. Press the Set key to confirm and save the value. * Keep key pressed for more than 3 seconds. BTEET...
- Page 14 Betrieb Pumpennachlauffunktion programmieren Sie können für die Pumpennachlauffunktion eine Einschaltdauer von 7.6.5 Programming the Additional Pump Running Time function 0 –15 Minuten programmieren. Sie müssen zum Deaktivieren die Pum- You can program an additional pump running time from 0 to 15 minutes. pennachlauffunktion für die Einschaltdauer der Wert „0“...
- Page 15 - The selected mode flashes. um zwischen "OFF" und "Auto" zu 2. Drücken Sie die Taste Menu (B), wechseln. um zwischen "OFF" und "Auto" zu - Der eingestellte Modus wird blin- wechseln. kend angezeigt - Der eingestellte Modus wird blin- kend angezeigt BTEET BTEET...
- Page 16 7.6.7 Restoring the factory settings A “Reset” restores the factory settings. Time and date are not reset. 1. Hold down the Menu key and the Set key simultaneously for 10 seconds. - The display shows “Reset”. - The factory defaults are restored. Parameter Function Default value...
-
Page 17: Maintenance
12. Spare parts and accessories NOTICE DAMAGE DUE TO UNSUITABLE PARTS • Only use genuine spare parts and accessories provided by the manufacturer. Failure to follow these instructions can result in equipment damage. Product Product designation Art.-No. Figure Timer unit “EET” BTEET... - Page 18 Schlüter-Systems KG · Schmölestraße 7 · D-58640 Iserlohn Tel.: +49 2371 971-1261 · Fax: +49 2371 971-1112 · info@schlueter.de · www.schlueter-systems.com Schlüter-Systems Ltd · Units 3-5 Bardon 22 Industrial Estate · Beveridge Lane · Coalville · Leicestershire · LE67 1TE Tel.: +44 1530 813396 ·...
Need help?
Do you have a question about the BTEET and is the answer not in the manual?
Questions and answers