Table of Contents
Advertisement
Quick Links
Advertisement
Table of Contents

Related Manuals for Nokia 6085


Summary of Contents for Nokia 6085
- Page 1 Nokia 6085 User Guide 9251038 Issue 1...
- Page 2 Hereby, NOKIA CORPORATION declares that this RM-198 product is in compliance with the essential requirements and other relevant provisions of Directive 1999/5/EC. A copy of the Declaration of Conformity can be found at http://www.nokia.com/ phones/declaration_of_conformity/. 0434 The crossed-out wheeled bin means that within the European Union the product must be taken to separate collection at the product end- of-life.
- Page 3 Under no circumstances shall Nokia be responsible for any loss of data or income or any special, incidental, consequential or indirect damages howsoever caused. The contents of this document are provided "as is". Except as required by applicable law, no...
-
Page 4: Table Of Contents
Contents For your safety......6 Nokia Xpress audio messaging..35 Instant messaging....... 36 General information....9 E-mail application ......40 Access codes..........9 Voice messages........43 Copyright protection......10 Info messages ........44 Configuration settings service ..10 Service commands......44 Download content and applications 11 Delete messages........ - Page 5 Stereo widening........79 17. Computer connectivity . 102 USB data storage......102 12. Push to talk ..... 80 Nokia PC Suite........102 Connect and disconnect....80 EGPRS, GPRS, HSCSD, and CSD ..102 Make and receive a PTT call ..... 81 Data communication applications 103 Callback requests.........
-
Page 6: For Your Safety
F o r y o u r s a f e t y For your safety Read these simple guidelines. Not following them may be dangerous or illegal. Read the complete user guide for further information. SWITCH ON SAFELY Do not switch the phone on when wireless phone use is prohibited or when it may cause interference or danger. - Page 7 F o r y o u r s a f e t y WATER-RESISTANCE Your phone is not water-resistant. Keep it dry. BACK-UP COPIES Remember to make back-up copies or keep a written record of all important information stored in your phone. CONNECTING TO OTHER DEVICES When connecting to any other device, read its user guide for detailed safety instructions.
- Page 8 BL-5C batteries. Warning: Use only batteries, chargers, and enhancements approved by Nokia for use with this particular model. The use of any other types may invalidate any approval or warranty, and may be dangerous. For availability of approved enhancements, please check with your dealer.
-
Page 9: General Information
G e n e r a l i n f o r m a t i o n General information Congratulations on your purchase of this Nokia mobile phone. Some of its other features include a calendar, a clock, an alarm clock, a radio, a music player, and a built-in camera. -
Page 10: Copyright Protection
G e n e r a l i n f o r m a t i o n PUK codes The personal unblocking key (PUK) code and the universal personal unblocking key (UPUK) code (eight digits) is required to change a blocked PIN code and UPIN code, respectively. -
Page 11: Download Content And Applications
Nokia product. On the Web site, you can get information on the use of Nokia products and services. If you need to contact customer service, check the list of local Nokia Care contact centers at www.nokia.com/customerservice. -
Page 12: Get Started
G e t s t a r t e d 1. Get started ■ SIM card and battery installation Always switch the device off, and disconnect the charger before removing the battery. Keep all SIM cards out of the reach of small children. For availability and information on using SIM card services, contact your SIM card vendor. -
Page 13: Charge The Battery
G e t s t a r t e d Gently press the SIM card holder into the phone until it clicks into place. 6. Replace the battery, by positioning it (with the label side facing up), so the gold-colored contacts match up with those on the phone. -
Page 14: Memory Card Installation
G e t s t a r t e d ■ Memory card installation Use only compatible microSD cards approved by Nokia for use with this device. Nokia uses approved industry standards for memory cards, but some brands may not be fully compatible with this device. Incompatible cards may damage the card and the device and corrupt data stored on the card.. -
Page 15: Switch The Phone On And Off
G e t s t a r t e d To format the memory card, see “Format memory card,” p. 72. ■ Switch the phone on and off Press and hold the end key until the phone switches on or off. If the phone asks for a PIN, enter the code, and select OK. -
Page 16: Normal Operating Position
G e t s t a r t e d ■ Normal operating position Use the phone only in its normal operating position. Your device has an internal antenna. Note: As with any other radio transmitting device, do not touch the antenna unnecessarily when the device is switched on. -
Page 17: Wrist Strap
G e t s t a r t e d ■ Wrist strap Remove the back cover from the phone and thread a strap as shown in the picture. -
Page 18: Your Phone
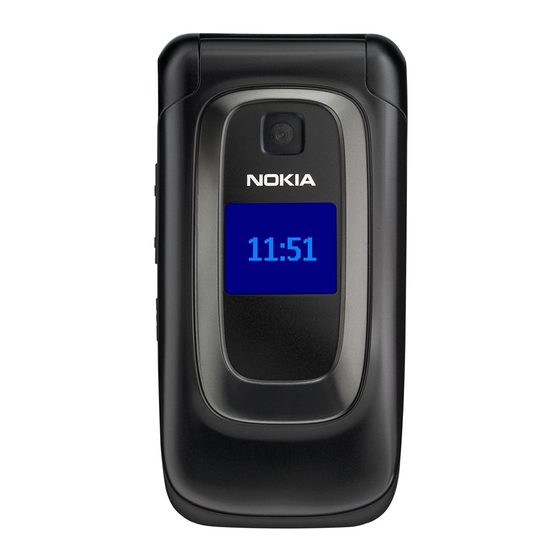
Y o u r p h o n e 2. Your phone ■ Keys and parts • Earpiece (1) • Main display (2) • Left, middle, and right selection keys (3) • Four-way navigation key (4) • Call key (5) •... -
Page 19: Standby Mode
Y o u r p h o n e volume down key (long keypress) and Push to talk (PTT) is activated by volume up key (long keypress) (16) ■ Standby mode When you turn on your phone, the first screen that appears is the start screen, which indicates your phone is in the standby mode. - Page 20 Y o u r p h o n e Active standby mode In the active standby mode, the phone can display separate content item windows, such as general indicators and operator logo (1), shortcuts (2), audio functions (3), and the calendar (4).
-
Page 21: Indicators And Icons
Y o u r p h o n e Countdown timer — To start the countdown timer, select the content item. The remaining time with a note is shown. General indicators — To show standby indicators, such as date, cell info display, info messages, PTT default group name, and closed user group index. -
Page 22: Keypad Lock (Keyguard)
Y o u r p h o n e The phone registered a missed call. You have received one or several instant messages, and you are connected to the instant messaging service. The keypad is locked. The alarm clock is set to On. The phone does not ring for an incoming call or text message. - Page 23 Y o u r p h o n e • To enable automatic keyguard, select Menu >Settings > Phone > Automatic keyguard > On. Set the delay in minutes and seconds in which the keypad locks. If the Security keyguard is set to On, enter the security code if requested.
-
Page 24: Call Functions
C a l l f u n c t i o n s 3. Call functions ■ Make a call 1. Enter the phone number, including the area code. To delete an incorrect character, select Clear. For international calls, press * twice for the international prefix (the + character replaces the international access code);... -
Page 25: Answer Or Reject A Call
C a l l f u n c t i o n s Note: Using voice tags may be difficult in a noisy environment or during an emergency, so you should not rely solely upon voice dialing in all circumstances. 1. -
Page 26: Options During A Call
C a l l f u n c t i o n s ■ Options during a call Many of the options that you can use during a call are network services. For availability, contact your service provider. To increase or decrease the volume during a call, press the volume up or down key on the side of the phone. -
Page 27: Phone Menus
P h o n e m e n u s 4. Phone menus Phone features are grouped according to function and are accessed through the main menus of your phone. Each main menu contains submenus and lists from which you can select or view items and personalize phone features. -
Page 28: Messaging
M e s s a g i n g 5. Messaging You can use mobile messages to keep in touch with friends, family, and business associates by using the short message service (SMS), which is a network service. Not all messaging features are available in all wireless networks. - Page 29 M e s s a g i n g Text entry To enter text while writing messages, use traditional or predictive text input. When using traditional text input, press a number key, 1 to 9, repeatedly until the character you want is displayed. In predictive text input you can enter a letter with a single keypress.
- Page 30 M e s s a g i n g Traditional text input Press a number key, 1 to 9, repeatedly until the character you want is displayed. Not all characters available under a number key are printed on the key. The characters available depend on the selected writing language.
-
Page 31: Sim Messages
M e s s a g i n g To read the message later, select Menu > Messaging > Inbox. If more than one message has been received, select the message that you want to read. indicates an unread message in Inbox. 2. - Page 32 M e s s a g i n g You cannot receive multimedia messages during a call or an active browsing session over GSM data. Because delivery of multimedia messages can fail for various reasons, do not rely solely upon them for essential communications.
- Page 33 M e s s a g i n g Message sending When you finish writing your message, to send the message, select Send, or press the call key. The phone saves the message in the Outbox folder, and sending starts. If you select Save sent messages >...
- Page 34 M e s s a g i n g 3. To reply to the message, select Options > Reply > Text message, Multimedia, Flash message, or Audio message. Write the reply message. If you want to change the message type for your reply message, select Options >...
-
Page 35: Nokia Xpress Audio Messaging
Options > detail. ■ Nokia Xpress audio messaging You can use the multimedia message service to create and send voice messages conveniently. Multimedia messaging service must be activated before you can use audio messages. -
Page 36: Instant Messaging
M e s s a g i n g To send the message to persons in a group, select Contact group the group you want. To retrieve the contacts to which you recently sent messages, select > Recently used. 5. To send the message, select Send. Receive an audio message When your phone receives audio messages, either 1 audio message... - Page 37 M e s s a g i n g network, the active instant messaging conversation may consume the phone battery faster, and you may need to connect the phone to a charger. Register with an instant messaging service You can do this by registering over the Internet with the IM service provider you have selected to use.
- Page 38 M e s s a g i n g select Login. When the phone has successfully connected, Logged in displayed. To disconnect from the instant messaging service, select Options > Logout. Sessions When connected to the instant messaging service your status as seen by others is shown in a status line: Status: Online,...
- Page 39 M e s s a g i n g Options > Search IM users — to search for other instant messaging users on the network by mobile phone number, alias, e-mail address, first name or last name. Options > Chat —...
-
Page 40: E-Mail Application
M e s s a g i n g Write your message; and select Send, or press the call key. Your message is displayed, and the reply message is displayed below your message. Add IM contacts When connected to the IM service, in the IM main menu select Options >... - Page 41 M e s s a g i n g the SMS e-mail function. To use the e-mail function on your phone, you need a compatible e-mail system. You can write, send, and read e-mail with your phone. You can also save and delete the e-mail on a compatible PC.
- Page 42 M e s s a g i n g 1. Select Menu > Messaging > E-mail > Write new e-mail. 2. If more than one e-mail account is defined, select the account from which you want to send the e-mail. 3.
-
Page 43: Voice Messages
M e s s a g i n g 1. Select Menu > Messaging > E-mail > Inboxes, the account name, and the desired message. 2. While reading the message, select Options to view the available options. 3. To reply to an e-mail, select Reply >... -
Page 44: Info Messages
M e s s a g i n g both. If you receive more than one message, your phone shows the number of messages received. To call your voice mailbox, select Menu > Messaging > Voice messages > Listen to voice messages. -
Page 45: Message Settings
M e s s a g i n g asks whether you want to keep them. To keep these messages, select Yes. To delete all messages from all folders, select Menu > Messaging > Delete messages > All messages > Yes. ■... - Page 46 M e s s a g i n g E-mail message centres > Add centre — to set the phone numbers and name of the e-mail center for sending SMS e-mails. If you select e-mail cntr., you can view the SIM e-mail center information. E-mail centre in use —...
- Page 47 M e s s a g i n g multimedia messages when outside your home network. The default setting of the multimedia message service is generally In home network. Incoming multimedia messages — to allow the reception of multimedia messages automatically, manually after being prompted, or to reject the reception.
- Page 48 M e s s a g i n g Display terminal window > — to perform manual user authentication for intranet connections...
-
Page 49: Contacts
C o n t a c t s 6. Contacts In Contacts, you can store and manage contact information, such as names, phone numbers, and addresses. You can save names and numbers in the internal memory of the phone, the SIM card memory, or in a combination of the two. -
Page 50: Copy A Contact
C o n t a c t s 5. To change the number type, scroll to the number you want, and select Options > Change type. To set the selected number as the default number, select Set as default. 6. Enter the number or text item; to save it, select Save. 7. -
Page 51: Business Cards
C o n t a c t s ■ Business cards You can send and receive a person’s contact information from a compatible device that supports the vCard standard as a business card. To send a business card, search for the contact whose information you want to send, and select Details >... -
Page 52: Service And My Numbers
C o n t a c t s Select Assign, or if a number has already been assigned to the key, select Options > Change. Select Search and the contact you want to assign. If the Speed dialling function is off, the phone asks whether you want to activate it. -
Page 53: Call Log
C a l l l o g 7. Call log The phone registers the phone numbers of identified missed, received, and dialed calls, and the approximate length of your calls. The phone registers missed and received calls only if the network supports these functions, and the phone is turned on and within the network’s service area. - Page 54 C a l l l o g phone displays 1 missed position request. To view the missed location request, select Show. To view the information on the 10 most recent privacy notifications and requests or to delete them, select Menu >...
-
Page 55: Settings
S e t t i n g s 8. Settings Use this menu to set or change your profiles, themes, personal shortcuts, time and date settings, call settings, connectivity settings, phone settings, main display settings, mini display settings, tone settings, enhancement settings, configuration settings, security settings, and to restore factory settings. -
Page 56: Tones
S e t t i n g s ■ Tones You can change the settings of the selected active profile. Select Menu > Settings > Tones. and edit the available settings. You can find the same settings when you personalize a profile in the Profiles menu. - Page 57 S e t t i n g s Standby mode font colour — to select the color for the texts on the display in the standby mode Navigation key icons — to set the scroll key icons that are shown in the standby mode Fold animation —...
-
Page 58: Time And Date
S e t t i n g s Screen saver Select Menu > Settings > Mini display > Screen saver > Analogue clock Digital clock . To enter the time after which the screen saver is activated, select Time-out. To activate the screen saver, select On. ■... - Page 59 S e t t i n g s process, if you want to move another function. When you have completed rearranging the functions you want, select Done > Yes. Right selection key To set a specific function (from a predefined list) to the right selection key, select Menu >...
-
Page 60: Connectivity
To ensure interoperability between other devices supporting Bluetooth technology, use Nokia approved enhancements for this model. Check with the manufacturers of other devices to determine their compatibility with this device. There may be restrictions on using Bluetooth technology in some locations. - Page 61 S e t t i n g s 3. To search for compatible Bluetooth audio devices, select Search for audio enhancements and the device that you want to connect to the phone. To search for any Bluetooth device in range, select Paired devices.
- Page 62 S e t t i n g s Enhanced GPRS (EGPRS) is similar to GPRS but enables faster connections. For more information on availability of EGPRS or GPRS and data transfer speed, contact your network operator or service provider. The applications that may use EGPRS or GPRS are MMS, video streaming, browsing sessions, e-mail, remote SyncML, Java application downloading, and the PC dial-up.
- Page 63 You can also set the EGPRS or GPRS dial-up service settings (access point name) on your PC, by using the One Touch Access software. See “Nokia PC Suite,” p. 102. If you have set the settings both on your PC and on your phone, the PC settings are used.
- Page 64 You can use the USB data cable to transfer data between the memory card inserted in the phone and a compatible PC or a printer supporting PictBridge. You can also use the USB data cable with Nokia PC Suite. To activate the memory card for data transfer or picture printing, connect the data cable;...
-
Page 65: Call
Data storage — to activate the memory card for data transfer To change the USB mode, select Menu > Settings > Connectivity > data cable > Nokia mode, Printing, or Data storage. ■ Call Select Menu > Settings > Call... -
Page 66: Phone
S e t t i n g s ■ Phone Select Menu > Settings > Phone and one of the following options: Language settings > Phone language — to set the display language of your phone. If you select Automatic, the phone selects the language according to the information on the SIM card. -
Page 67: Enhancements
S e t t i n g s Help text activation — to select whether the phone shows help texts Start-up tone — to select whether the phone plays a start-up tone when the phone is turned on Switch off tone —... -
Page 68: Security
S e t t i n g s instant messaging, synchronization, e-mail application, streaming, push to talk, and browser. Your service provider may also send you these settings as a configuration message. To save the configuration settings received as a configuration message, see “Configuration settings service,”... -
Page 69: Restore Factory Settings
S e t t i n g s Select Menu > Settings > Security and one of the following options: PIN code request — to set the phone to ask for your PIN or UPIN code every time the phone is switched on. Some SIM cards do not allow the code request to be turned off. -
Page 70: Phone Software Updates
S e t t i n g s ■ Phone software updates You may initiate phone software updates from the Phone updates menu. Also, your service provider may initiate the updates by sending them over the air directly to your device. This function is known as firmware over the air (FOTA). -
Page 71: Operator Menu
O p e r a t o r m e n u 9. Operator menu Your service provider may have programmed an operator-specific menu into your phone. If this menu exists in your phone, its functions depend entirely upon the service provider. Contact your service provider for more information. -
Page 72: Gallery
G a l l e r y 10. Gallery In this menu, you can manage graphics, images, recordings, and tones. These files are arranged in folders. Your phone supports an activation key system to protect acquired content. Always check the delivery terms of any content and activation key before acquiring them, as they may be subject to a fee. -
Page 73: Media
To take a photo when the lighting is dim, the camera automatically adjusts a longer exposure time so the photo quality is better. This Nokia device supports an image capture resolution up to 640 x 480 pixels. The image resolution in these materials may appear different. -
Page 74: Media Player
M e d i a Record a video clip Select Menu > Media > Camera > Options > Video > Record. To pause recording, select Pause; to resume recording, select Continue. To stop recording, select Stop. The phone saves the recording in Gallery >... -
Page 75: Music Player
MP3, MP4, WMA (Windows Media Audio), AAC, AAC+, or eAAC+ sound files that you have transferred to the phone with the Nokia Music Manager application. Music files are automatically detected and added to the default track list. Play music tracks 1. -
Page 76: Radio
M e d i a Add to Favourites — to add the current song to the Favourites track list. Play via Bluetooth — to connect and play music through a bluetooth enabled audio accessory using bluetooth connection. Use tone — to use the current song as a ring tone for example. You are presented a list of possible options for the tone. - Page 77 M e d i a Listen 1. Select Menu > Media > Radio. 2. To scroll to the channel you want, select , or press the headset key. 3. To select a radio channel location, briefly press the corresponding number keys. 4.
-
Page 78: Recorder
M e d i a Enable visual serv. — to set whether the Visual Radio application starts automatically when you turn on the radio, select Enable visual serv. > Automatically. You can normally make a call or answer an incoming call while listening to the radio. -
Page 79: Equalizer
Not all sets can be edited or renamed. ■ Stereo widening This function can only be used if your Nokia mobile phone is connected to a compatible stereo headset. To enhance the sound that is available in stereo with a wider stereo... -
Page 80: Push To Talk
P u s h t o t a l k 12. Push to talk Push to talk (PTT) over cellular is a two-way radio service available over a GSM/GPRS cellular network (network service). PTT provides direct voice communication. To connect, press the volume up key. -
Page 81: Make And Receive A Ptt Call
P u s h t o t a l k ■ Make and receive a PTT call Set the phone to use the loudspeaker or earpiece for PTT communication. When the earpiece is selected, use the phone normally by holding it to your ear. Warning: Do not hold the device near your ear when the loudspeaker is in use, because the volume may be extremely loud. - Page 82 P u s h t o t a l k To make a group call from Contacts, the recipients must be connected to the PTT service. Select Menu > Contacts > Groups, scroll to the group you want, and press the volume up key. Make a one-to-one call To start a one-to-one call from the list of contacts to which you added the PTT address, select...
-
Page 83: Callback Requests
P u s h t o t a l k ■ Callback requests If you make a one-to-one call and do not get a response, you can send a request for the person to call you back. Send a callback request You can send a callback request in the following ways: •... -
Page 84: Add A One-To-One Contact
P u s h t o t a l k ■ Add a one-to-one contact You can save the names of persons to whom you often make one-to-one calls in the following ways: • To add a PTT address to a name in Contacts, search for the desired contact, and select Details >... -
Page 85: Ptt Settings
P u s h t o t a l k To add a provisioned channel, select Menu > Push to talk > channel > Options > Edit add. manually. Enter the channel address provided by your service provider. Receive an invitation When you receive a text message invitation to a group, Channel invitation received:... - Page 86 P u s h t o t a l k service provider may offer some services that override these settings. To set the phone to first notify you of incoming one-to-one calls with a ringing tone, select Notify. PTT key default function >...
-
Page 87: Organizer
O r g a n i z e r 13. Organizer Your Nokia mobile phone has many useful features for organizing your everyday life. The following features are found in Organiser: alarm clock, calendar, to-do list, notes, calculator, countdown timer, and stopwatch. -
Page 88: Calendar
O r g a n i z e r device or to make and receive calls. Do not select when wireless phone use may cause interference or danger. ■ Calendar The calendar helps you keep track of reminders, calls that you need to make, meetings, and birthdays. -
Page 89: To-Do List
O r g a n i z e r ■ To-do list You can save a note for a task that you have to do, select a priority level for the note, and mark it as done when you have completed it. You can sort the notes by priority or by date. -
Page 90: Timer
O r g a n i z e r To save the exchange rate, select Options > Exchange rate. To perform the currency conversion, enter the amount to be converted, and select Options > In domestic foreign. ■ Timer 1. Select Menu >... -
Page 91: Applications
A p p l i c a t i o n s 14. Applications ■ Games Your phone software includes some games. Launch Select Menu > Applications > Games, scroll to the game you want, and select Open. For options related to a game, see “Other application options,” p. 91. Downloads Select Menu... - Page 92 Your device may have some bookmarks loaded for sites not affiliated with Nokia. Nokia does not warrant or endorse these sites. If you choose to access them, you should take the same precautions, for security or content, as you would with any...
-
Page 93: Web
W e b 15. Web Your phone has a built-in browser you can use to connect to selected services on the mobile Internet. Many wireless mobile Internet access features are network-dependent, and some features may not be available. Contact your service provider for more information. -
Page 94: Browse
W e b Activate the settings Ensure that the settings of the service you want to use are activated. 1. Select Menu > > Settings > Configuration settings > Configuration. Only the configurations that support the browsing service are shown. 2. - Page 95 W e b If EGPRS or GPRS is selected as the data bearer, either shown in the top left of the display during browsing. If you receive a call or a text message, or make a call during an EGPRS or GPRS connection, is shown in the top right of the display to indicate that the EGPRS or GPRS connection is suspended (on hold).
-
Page 96: Security Settings
W e b Alerts > Alert for unsecure items > — to set the phone to alert when a encrypted page contains an unsecure item. These alerts do not guarantee a secure connection. For more information, see “Browser security,” p. 98. Character encoding >... -
Page 97: Download Settings
Your device may have some bookmarks loaded for sites not affiliated with Nokia. Nokia does not warrant or endorse these sites. If you choose to access them, you should take the same precautions, for security or content, as you would with any Internet site. -
Page 98: Cache Memory
W e b To set whether you want to receive service message, select Service messages > or Off. To set the phone to receive service messages only from content authors approved by the service provider, select Message filter > On. To view the list of the approved content authors, select Trusted channels. - Page 99 W e b Select Menu > Settings > Security > Security module settings and one of the following options: Security module details — to show the security module title, manufacturer, and serial number Module PIN request — to set the phone to ask for the module PIN when using services provided by the security module.
- Page 100 W e b The security indicator is displayed during a connection, if the data transmission between the phone and the content server is encrypted. The security icon does not indicate that the data transmission between the gateway and the content server (or place where the requested resource is stored) is secure.
-
Page 101: Sim Services
S I M s e r v i c e s 16. SIM services Your SIM card may provide additional services that you can access. This menu is shown only if it is supported by your SIM card. The name and contents of the menu depend on the SIM card. For availability, rates, and information on using SIM services, contact your service provider. -
Page 102: Computer Connectivity
PC. ■ Nokia PC Suite Nokia PC Suite software is available for your phone. Nokia PC Suite is a collection of powerful tools that you can use to manage your phone features and data. Each component is a separate program that includes online helps. -
Page 103: Data Communication Applications
C o m p u t e r c o n n e c t i v i t y ■ Data communication applications For information on using a data communication application, refer to the documentation provided with it. Making or answering phone calls during a computer connection is not recommended, as it might disrupt the operation. -
Page 104: Enhancements
E n h a n c e m e n t s 18. Enhancements If you want to enhance phone functionality, a range of enhancements is available for you. You can select any of these items to help accommodate your specific communication needs. -
Page 105: Battery Information
The battery can be charged and discharged hundreds of times, but it will eventually wear out. When the talk and standby times are noticeably shorter than normal, replace the battery. Use only Nokia approved batteries, and recharge your battery only with Nokia approved chargers designated for this device. -
Page 106: Nokia Battery Authentication Guidelines
B a t t e r y i n f o r m a t i o n ■ Nokia battery authentication guidelines Always use original Nokia batteries for your safety. To check that you are getting an original Nokia battery, purchase it from an authorized Nokia dealer, look for... - Page 107 You should receive a message indicating whether the code can be authenticated. What if your battery is not authentic? If you cannot confirm that your Nokia battery with the hologram on the label is an authentic Nokia battery, please do not use the battery. Take it to the nearest authorized Nokia service point or dealer for assistance.
-
Page 108: Care And Maintenance
C a r e a n d m a i n t e n a n c e Care and maintenance Your device is a product of superior design and craftsmanship and should be treated with care. The suggestions below will help you protect your warranty coverage. -
Page 109: Additional Safety Information
A d d i t i o n a l s a f e t y i n f o r m a t i o n Additional safety information Your device and its enhancements may contain small parts. Keep them out of the reach of small children. - Page 110 A d d i t i o n a l s a f e t y i n f o r m a t i o n • Always keep the device more than 15.3 centimeters (6 inches) from the pacemaker •...
- Page 111 A d d i t i o n a l s a f e t y i n f o r m a t i o n depots, storage, and distribution areas; chemical plants; or where blasting operations are in progress. Areas with a potentially explosive atmosphere are often but not always clearly marked.
- Page 112 1.15 W/kg. Use of device accessories and enhancements may result in different SAR values. SAR values may vary depending on national reporting and testing requirements and the network band. Additional SAR information may be provided under product information at www.nokia.com.
-
Page 113: Index
SIM 31 delete 50 templates 35 delete details 50 text 28 edit 50 voice 43 memory in use 51 music player 75 my numbers 52 my shortcuts 58 search 49 service numbers 52 network services 7 Nokia PC Suite 102... - Page 114 I n d e x notes 89 service commands 44 inbox 97 settings operator logo 57 call 65 operator menu 71 configuration 67 enhancement 67 message 45 modem 62 phone software updates 70 phone 66 plug and play service 15 restore factory 69 profiles 55 security 68...
Need help?
Do you have a question about the 6085 and is the answer not in the manual?
Questions and answers