Advertisement
Adjustment or Calibration of Trådlös väderstation
(14759)
Note: The calibrated value can only be adjusted on the console. The remote sensor(s) always displays the un-
calibrated or measured value.
Note: The measured humidity range is between 10 and 99%. Humidity cannot be accurately measured outside
of this range. Thus, the humidity cannot be calibrated below 10% or above 99%.
The purpose of calibration is to fine tune or correct for any sensor error associated with the devices margin of
error. The measurement can be adjusted from the console to calibrate to a known source.
Calibration is only useful if you have a known calibrated source you can compare it against, and is optional. This
section discusses practices, procedures and sources for sensor calibration to reduce manufacturing and
degradation errors. Do not compare your readings obtained from sources such as the internet, radio, television or
newspapers. They are in a different location and typically update once per hour.
The purpose of your weather station is to measure conditions of your surroundings, which vary significantly from
location to location.
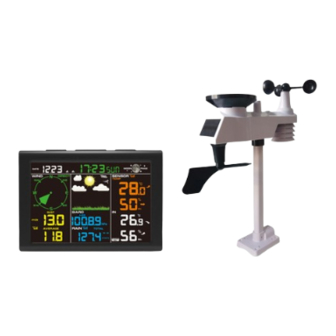
The Trådlös väderstation supports up to eight remote sensors. Each of the eight sensors can be calibrated.
1.
Temperature Calibration
In normal mode, press and hold the SET and CHANNEL/+ buttons at the same time for five seconds to enter the
temperature calibration mode. The indoor temperature will begin flashing.
Press the [+] or [-] button to increase or decrease the temperature reading (in increments of 0.1). Press and hold
the [+] or [-] button for three seconds to increase or decrease rapidly.
Press the ALARM button to reset to the current value.
Press the SET button to switch between temperature channels 1 through 8. To exit the calibration mode at any
time, press the SNOOZE/LIGHT button on the top of the display console. If no operation is performed, the
calibration mode will timeout in 30 seconds.
2.
Humidity Calibration
In normal mode, press and hold the SET and MIN/MAX/- buttons at the same time for five seconds to enter the
humidity calibration mode. The indoor humidity will begin flashing.
Press the [+] or [-] button to increase or decrease the humidity reading (in increments of 1%). Press and hold the
[+] or [-] button for three seconds to increase or decrease rapidly.
Press the ALARM button to reset current value.
Press the SET button switch to channel humidity 1through 8. To exit the calibration mode at any time, press the
SNOOZE/LIGHT button on the top of the display console. If no operation is performed, the calibration mode
will timeout in 30 seconds.
Note: Humidity is a difficult parameter to measure accurately and drifts over time. The calibration feature
allows you to zero out this error. To calibrate humidity, you will need an accurate source, such as a sling
psychrometer or Humidipaks One Step Calibration kit.
3.
Absolute and Relative Barometer, Wind and Rain Calibration
3.1.
Quick Reference Guide:
Command
Mode
Copyright © 2023 Telldus Technologies AB. All rights reserved.
Default
Settings
Page 1
Advertisement
Table of Contents

Related Manuals for Telldus 14759


Summary of Contents for Telldus 14759
- Page 1 To calibrate humidity, you will need an accurate source, such as a sling psychrometer or Humidipaks One Step Calibration kit. Absolute and Relative Barometer, Wind and Rain Calibration 3.1. Quick Reference Guide: Command Mode Default Settings Copyright © 2023 Telldus Technologies AB. All rights reserved. Page 1...
- Page 2 To compare pressure conditions from one location to another, meteorologists correct pressure to sea-level conditions. Because the air pressure decreases as you rise in altitude, the sea-level corrected pressure (the pressure Copyright © 2023 Telldus Technologies AB. All rights reserved. Page 2...
- Page 3 Note: that debris and insects can collect inside the tipping mechanism (they make a good spiders nest). Carefully remove the funnel and inspect the tipping mechanism for debris prior to calibration. Copyright © 2023 Telldus Technologies AB. All rights reserved. Page 3...
Need help?
Do you have a question about the 14759 and is the answer not in the manual?
Questions and answers