Table of Contents
Advertisement
Quick Links
Advertisement
Table of Contents

Summary of Contents for Steris AMSCO
- Page 1 AMSCO Case Carts ® Operator Manual 11003604 Revision F...
-
Page 2: Word From Steris
STERIS for replacement copies, providing the serial number and model of the case cart. 1.2 Intended Use The AMSCO Case Cart is intended to transport surgical instrument sets, endoscopes and other accessories in a hospital setting. -
Page 3: Addresses
1 — A Word From STERIS • Water temperatures in the range of 110-194°F (43 - 90°C) for less than 10 minutes total. • Hot air drying is allowed with the temperatures not to exceed 200°F (93°C) and an exposure period not to exceed 10 minutes. -
Page 4: Table Of Contents
TABLE OF CONTENTS Section Number Description Page A Word From STERIS............................. 2 Introduction..........................2 Intended Use ..........................2 Service Information ........................2 Associated Publications ......................2 Environmental Conditions......................2 Addresses............................ 3 Safety Precautions ............................5 Operating Instructions ..........................7 Component Repair and Replacement......................11 Replacing Bumper Assembly .................... -
Page 5: Safety Precautions
IMPORTANT: Please read this Operator Manual to get the best understanding and to help ensure best performance of this equipment, which has been thoroughly inspected, tested, and adjusted by factory-trained personnel. Equipment maintenance other than described in the manual (unless by authorized representatives of the STERIS Corporation), shall be at the risk of invalidating the equipment warranty. - Page 6 Carefully read all cleaning product labels before using on this stainless-steel case cart. Use only products recommended for use with stainless steel. Cleaning the case cart with chloride-containing solutions (e.g., saline) can cause corrosion and is not recommended by the manufacturer. 11003604_F AMSCO Case Carts Operator Manual ®...
-
Page 7: Operating Instructions
Then tilt up the shelf to free the first two rollers from the rail and continue to slide out until the second set of rollers are visible. Then lift out the shelf. See Figure 3-3. 11003604_F Operator Manual AMSCO Case Carts ®... - Page 8 5. Pull the rail forward and down so that the release button appears. 6. Then re-install the shelf after both rails have been adjusted. Adjusting Shelf Height for Non-Roll Out Shelves Figure 3-5. 11003604_F AMSCO Case Carts Operator Manual ®...
- Page 9 Standard Case Carts come with four total casters: two total lock and two directional lock casters. See Figure 3-6. Figure 3-6. Casters 1. Push down on the tab to engage caster lock. 2. Lift up on tab to disengage caster lock. 11003604_F Operator Manual AMSCO Case Carts ®...
- Page 10 Cool touch handles provide a grasping surface that resists becoming hot during automated washing. The user can grip the cool touch handles to remove case cart from cart washer after processing. See Figure 3-8. Figure 3-8. Cool Touch Handles 11003604_F AMSCO Case Carts Operator Manual ®...
-
Page 11: Component Repair And Replacement
Figure 4-1. Screw Location 2. Remove ¼” SS Cap nuts (4) and ¼” SS washers (4) from the top of the bracket and set aside to be used for reinstalling . See Figure 4-2 Figure 4-3. 11003604_F Operator Manual AMSCO Case Carts ®... - Page 12 4 — Component Repair and Replacement Figure 4-2. Top of Bracket Figure 4-3. Removed Bracket 3. Obtain new Bumper assembly and assembly following these instructions in reverse order. See Figure 4-4. 11003604_F AMSCO Case Carts Operator Manual ®...
-
Page 13: Replacing Casters
2. Carefully tip the cart onto the backside. 3. Remove the caster by removing the hex head screw (4), lock washer (4), and flat washer (4) from the caster support plate. Figure 4-5. Remove caster 11003604_F Operator Manual AMSCO Case Carts ®... -
Page 14: Replacing Clean/Dirty Indicator
2. Remove the stem knob by removing the nut on the backside of the indicator. See Figure 4-7. Figure 4-7. Remove Stem Knob 3. Remove the nylon nut from the back side of the indicator. See Figure 4-8. 11003604_F AMSCO Case Carts Operator Manual ®... - Page 15 6. Place the nylon nut on the shoulder screw to secure the assembly in place. 7. Tighten the nylon nut down fully verifying the threads are engaged to the end of the nut. 11003604_F Operator Manual AMSCO Case Carts ®...
-
Page 16: Replacing Door Latch
NOTE: If the opening or closing function of the door is hindered the latch or latch trap may need to be adjusted. Loosening the screws slightly will allow for minor adjustments Figure 4-10. Door latch 4.5 Latch Trap Assembly 1. Open case cart doors and anchor with door catch assembly. See Figure 4-11. 11003604_F AMSCO Case Carts Operator Manual ®... - Page 17 Loosening the screws slightly will allow for minor adjustments. 5. Apply Red Loctite® 262 to the threads on the cap nut once the door function is verified. 6. Secure assembly in place by fully tightening the screws and nuts. 11003604_F Operator Manual AMSCO Case Carts ®...
-
Page 18: Replacing Door Catch Assembly
2. Obtain new door catch and spring and place spring into door catch Figure 4-14. Spring location 3. Place catch frame into door catch 4. Place door stop support catch into door catch and align holes with catch frame. 11003604_F AMSCO Case Carts Operator Manual ®... - Page 19 8. Open doors fully and make sure door is anchored by catch. Figure 4-17. Test catch 9. Tighten down and secure the door catch to the case cart using the phillips screwdriver and 5/16” wrench 11003604_F Operator Manual AMSCO Case Carts ®...
- Page 20 4 — Component Repair and Replacement Figure 4-18. Tighten down catch 10. Verify the door opens and closes properly and can be held by the door catch 11003604_F AMSCO Case Carts Operator Manual ®...
-
Page 21: Cleaning And Maintenance
Carefully read all cleaning product labels before using on this stainless-steel case cart. Use only products recommended for use with stainless steel. Cleaning the case cart with chloride-containing solutions (e.g., saline) can cause corrosion and is not recommended by the manufacturer. 11003604_F Operator Manual AMSCO Case Carts ®... -
Page 22: Precautions For Use
Two Solid options for all sizes: • Adjustable Solid Shelf • Adjustable Solid Roll Out Shelf Wire Shelf (WS) Two Wire options for all sizes: • Adjustable Wire Shelf • Adjustable Wire Roll Out Shelf 11003604_F AMSCO Case Carts Operator Manual ®... -
Page 23: Illustrated Parts Breakdown
Contact STERIS regarding service options. CAUTION POSSIBLE EQUIPMENT DAMAGE To prevent voiding the warranty or damaging the equipment, use only STERIS replacement parts. 1. Determine the function and application of the part required. Examine the list of illustrations and select the most appropriate title. -
Page 24: Main Assembly
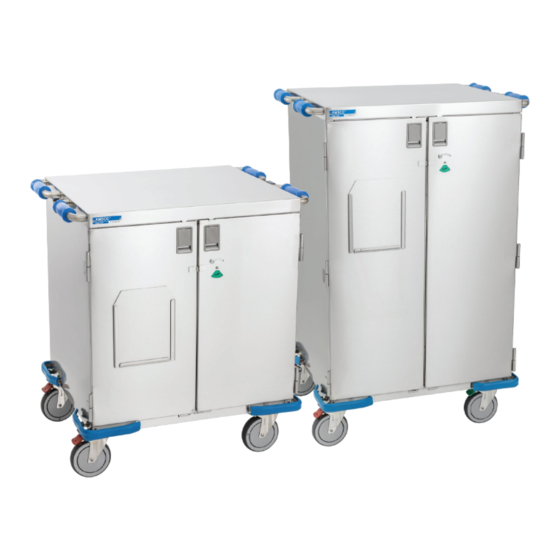
6 — Illustrated Parts Breakdown 6.2 Main Assembly Figure 6-1. AMSCO Case Carts 11003604_F AMSCO Case Carts Operator Manual ®... - Page 25 6 — Illustrated Parts Breakdown Table 6-1. AMSCO Case Carts Description Units per Fig & Item Part Number Ass’y ACC242639 Case Cart 27.5 X 36 X 39 ACC243739 Case Cart 27.5 X 47 X 39 ACC244439 Case Cart 27.5 X 54 X 39 ACC242654 Case Cart 27.5 X 36 X 54...
- Page 26 6 — Illustrated Parts Breakdown Table 6-1. AMSCO Case Carts (continued) Fig & Description Units per Part Number Item Ass’y 11020802 HANDLE WELDMENT 11002359 ¼" SS WASHER, .625" OD X .281" ID 10037268 NUT, KEP SS, 1/4-20 P117064261 ACCESSORIES HANDLE SILICONE 11002995 NUT, SS, M3 X 0.5MM A/I_304...
- Page 27 6 — Illustrated Parts Breakdown Table 6-1. AMSCO Case Carts (continued) Fig & Description Units per Part Number Item Ass’y P117950865 SCREW, TRUSS, SS, 10-32 X 1/4", W SEALANT 11028173 LOCKNUT, CAP,SS, 1/4-20 11038989 Bracket, Bottom 10102636 ¼-20 x ¾ Hex Button Head screw 10100653 ¼-20 SS Flange Nylon Locking Nut...
Need help?
Do you have a question about the AMSCO and is the answer not in the manual?
Questions and answers