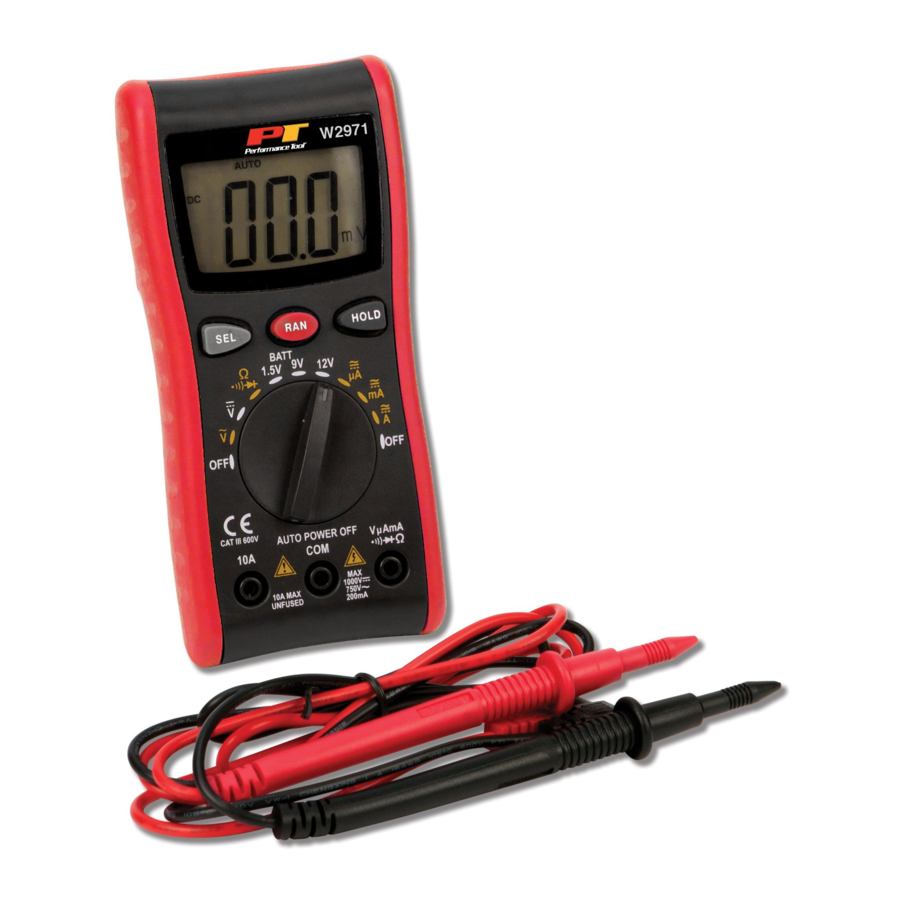
Performance Tool W2971 - Multi-Meter With Automatic Ranging Manual
- Owner's manual (2 pages)
Advertisement
GENERAL CHARACTERISTICS
| Display | LCD, 1999 counts updates 2/sec |
| LCD size | 46 x 24mm |
| Polarity Indication | "-" displayed automatically |
| Over-range Indication | "OL" displayed |
| Low Battery Indication | "  " displayed " displayed |
| Range select | auto or manual |
| Operation Temperature | 0°C to 40°C, less than 80%RH |
| Storage Temperature | -10°C to 50°C, less than 85%RH |
| Battery Type | 1.5V x 2, AAA size |
| Dimension (H×W×D) | 150×70×22mm |
| Weight | Approx. 150g |
SPECIFICATIONS
Accuracy is guaranteed for 1 year 23°C±5°C less than 80%RH
DC VOLTAGE (Auto ranging)
| Range | Resolution | Accuracy |
| 200mV | 0.1mV | ±(0.8% of rdg + 5dgts) |
| 2V | 1mV | ±(1% of rdg + 2dgts) |
| 20V | 10mV | |
| 200V | 100mV | |
| 600V | 1V | ±(1.2% of rdg + 5dgts) |
Input Impedance: 10MΩ
Overload Protection: 600V DC/AC rms
Max. Input voltage: 600V DC
DC CURRENT
| Range | Resolution | Accuracy |
| 200µA | 0.1µA | ±(0.8% of rdg + 5dgts) |
| 2000µA | 1µA | |
| 20mA | 10µA | |
| 200mA | 100µA | |
| 10A | 100mA | ±(2.0% of rdg + 5dgts) |
Overload Protection: F0.5A/600V fuse
Max. Input Current: 500mA
Voltage Drop: 200µA and 20mA ranges: 20mV
2000µA and 200mA ranges: 200mV
AC CURRENT
| Range | Resolution | Accuracy |
| 200µA | 0.1µA | ±(1.0% of rdg + 5dgts) |
| 2000µA | 1µA | |
| 20mA | 10µA | |
| 200mA | 100µA | |
| 10A | 100mA | ±(3.0% of rdg + 5dgts) |
Overload Protection: F0.5A/600V fuse
Max. Input Current: 500mA
Voltage Drop: 200µA and 20mA ranges: 20mV 2000µA and 200mA ranges: 200mV
Frequency Range: 40Hz ~ 400Hz
Response: Average, calibrated in rms of sine wave
AC VOLTAGE (Auto ranging)
| Range | Resolution | Accuracy |
| 2V | 1mV | ±(1.2% of rdg + 3dgts) ±(1.2% of rdg + 8dgts) |
| 20V | 10mV | |
| 200V | 100mV | |
| 600V | 1V |
Input Impedance: 10MΩ
Frequency Range: 40Hz ~ 400Hz
Overload Protection: 600V DC/AC rms
Response: Average, calibrated in rms of sine wave
Max. Input voltage: 600V AC rms
Diode and Continuity
| Range | Introduction | Remark |
 | The approximate forward voltage drop will be displayed | Open circuit voltage: about 1.5V |
 | The built-in buzzer will sound if the resistance is less than about 30Ω. | Open circuit voltage: about 0.5V |
Overload Protection: 250V DC/AC rms
For continuity test: When the resistance is between 30Ω and 100Ω, the buzzer may sound or may not sound. When the resistance is more than 100Ω, the buzzer won't sound.
RESISTANCE (Auto Ranging)
| Range | Resolution | Accuracy |
| 200Ω | 0.1Ω | ±(1.5% of rdg + 3dgts) |
| 2KΩ | 1Ω | |
| 20KΩ | 10Ω | |
| 200KΩ | 100Ω | |
| 2MΩ | 1KΩ | |
| 20MΩ | 10KΩ |
Open Circuit Voltage: about 0.25V
Overload Protection: 250V DC/AC rms
BATTERY TEST
| Range | Resolution | Internal Resistance |
| 12V | 10mV | 1.2KΩ 900Ω 3KΩ |
| 9V | 10mV | |
| 1.5V | 1mV |
OPERATION
Measuring Voltage
- Connect the BLACK test lead to the "COM" jack and the RED to the "INPUT" jack.
- Set the function switch to V or V range.
Select auto range or manual range with the "RANGE" button. - In manual range, if the voltage magnitude to be measured is unknown beforehand, select the highest range.
- Connect the test leads across the source or load to be measured.
- Read LCD display. The polarity of the RED lead connection will be indicated when making a DC measurement.
NOTE:
- In small range, the meter may display an unstable reading when the test leads have not been connected to the load to be measured. It is normal and will not affect the measurements.
- In manual range mode, when the meter shows the over range symbol "OL", a higher range must to be selected.
- To avoid damage to the meter, don't measure a voltage which exceeds 600Vdc (for DC voltage measurement) or 600Vac (for AC voltage measurement).
Measuring Current
- Connect the BLACK test lead to the "COM" jack.
- Set the range switch to desired µA or mA range. If the current magnitude to be measured is not known beforehand, set the ranges switch to the highest range position and then reduce it range by range until satisfactory resolution is obtained.
- Select DC current measurement or AC current measurement with the "SELECT" Button.
- Select auto range or manual range with the "RANGE" button. In manual range, if the current magnitude to be measured is not known beforehand, select the highest range.
- Connect test leads in series with the circuit to be measured.
- Read the reading on the display. For DC current measurement, the polarity of the red test lead connection will be indicated as well.
NOTE:
When the display shows the over range symbol "OL", a higher range must be selected.
Measure Resistance
- Connect the BLACK test lead to the "COM" jack and the RED to the "INPUT" jack (Note: The polarity of the red test lead is positive "+").
- Set the range switch to Ω range
- Select auto range or manual range with the "RANGE" button. In manual range, if the current magnitude to be measured is not known beforehand, select the highest range.
- Connect the test leads across the load to be measured.
- Read the reading on the display.
NOTE:
- For resistance measurements >1MΩ, the meter may take a few seconds to stabilize reading. This is normal for high-resistance measurement.
- When the input is not connected, i.e. at open circuit, the symbol "OL" will be displayed as an over range indicator.
- Before measuring in-circuit resistance, be sure that the circuit under test has all power removed and all capacitors are fully discharged.
Continuity Test
- Connect the BLACK test lead to the "COM" jack and the RED to the "INPUT" jack (Note: The polarity of the red test lead is positive "+").
- Set the range switch to range
- Press the "SELECT" Button to select continuity measurement mode, and the symbol " " will appear as an indicator.
- Connect the test leads across the load to be measured.
- If the circuit resistance is lower than about 30Ω, the built-in buzzer will sound.
Diode Test
- Connect the BLACK test lead to the "COM" jack and the RED to the "INPUT" jack (Note: The polarity of the red test lead is positive "+").
- Set the range switch to range
- Press the "SELECT" Button to select continuity measurement mode, and the symbol " " will appear as an indicator.
- Connect the red test lead to the anode of the diode to be tested and the black test lead to the cathode.
- The meter will show the approximate forward voltage of the diode. If the connections are reversed, "OL" will be shown on the display.
Battery Test
- Red lead to "VΩmA", Black lead to "COM"
- RANGE switch to desired "BATT" position.
- Connect red test lead to the battery's negative.
- The display will read the battery's voltage.
Auto Power Off
If you don't operate the meter for about 15 minutes, it will turn off automatically. To turn on it again, just rotate the range switch or press a button.
If you press the "SELECT" button and turns on meter, the automatic power-off function will be disabled.
Battery Replacement
If the sign " " appear on the display, it indicates battery should be replaced. Remove screws and open the back case, replace the exhausted battery with new batteries (Size AAA, 1.5V x2 or equivalent).
Fuse Replacement
Fuse rarely needs replacement and is blown almost always as a result of operator's error. To replace the fuses, open the battery cover; replace the damaged fuse with a new fuse of the specified ratings.
Reinstall the battery cover and lock this cover.
Disposal
If you intend to dispose of this article, then please keep in mind that many of its components consist of valuable materials, which can be recycled. Please do not dispose it in the garbage, but check with your local council for recycling facilities in your area.
LIMITED LIFETIME WARRANTY
PERFORMANCE TOOL extends only the following warranties, and only to original retail purchasers. These warranties give specific legal rights. Except where prohibited by local law, the law of the State of Washington governs all warranties and all exclusions and limitations of warranties and remedies. There may be other rights which vary from state to state.
PERFORMANCE TOOL warrants the product to be free from defects in materials and workmanship under normal use and service. A defective product may be returned for a free replacement within 90 days from the date of purchase, provided that product is returned to place of purchase immediately after discovery of defect. These warranties shall be valid only when a sales receipt showing the date of purchase accompanies the defective product being returned. These warranties exclude blades, bits, punches, dies, bulbs, fuses, hoses, and other consumables which must be replaced under normal use and service. These warranties shall not apply to any product or part which is used for a purpose for which it is not designed, or which has been repaired or altered in any way so as to affect adversely its performance or reliability, nor shall these warranties apply to any product or part which has been subject to misuse, neglect, accident or wear and tear incident to normal use and service.
PERFORMANCE TOOL does not authorize any other person to make any warranty or to assume any liability in connection with its products. Except for warranties of title and the limited express warranties set forth above, PERFORMANCE TOOL makes no express or implied warranties of any kind with respect to its products. In particular,
PERFORMANCE TOOL makes no implied warranty of merchantability and no implied warranty of fitness for any particular purpose, except that for goods purchased primarily for personal, family or household use and not for commercial or business use,
PERFORMANCE TOOL makes an implied warranty of merchantability (and, if otherwise applicable, an implied warranty of fitness for a particular purpose), but only for the particular qualities or characteristics, and for the duration, expressly warranted above. The laws on limitation of implied warranties may differ from state to state, so the above limitations may not apply in all cases.
PERFORMANCE TOOL shall not be liable for consequential, incidental or special damages resulting from or in any manner related to any product, or to the design, use, or any inability to use the product. The sole and exclusive remedy for a defective product or part shall be the repair, or replacement thereof as provided above. The laws on limitation of remedies or on consequential, incidental or special damages may vary from state to state, so the above limitations may not apply in all cases.

Documents / ResourcesDownload manual
Here you can download full pdf version of manual, it may contain additional safety instructions, warranty information, FCC rules, etc.
Download Performance Tool W2971 - Multi-Meter With Automatic Ranging Manual
Advertisement


Need help?
Do you have a question about the W2971 and is the answer not in the manual?
Questions and answers