
Summary of Contents for Redvision RV-HUB-1
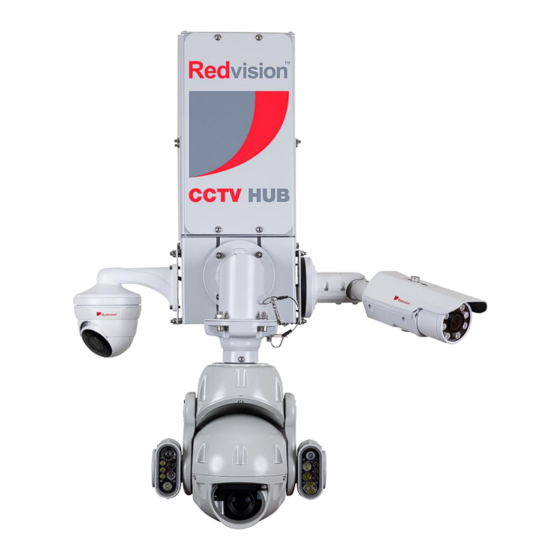
- Page 1 Redvision CCTV Hub This Guide covers these products: RV-HUB-1 RV-24-HUB-1 Quick guide on page 4! RV-HUB-2/4 RV-24-HUB-2/4 Proud UK Design and Manufacture-----UK Service and Support Revision – v2.0...
-
Page 2: Table Of Contents
Welcome to Redvision Thank you for choosing Redvision. Your Hub has been carefully developed and manufactured in the United Kingdom. This guide is intended to cover the basic installation of your hub, up to and including accessing the internal... -
Page 3: Quick-Guide For Essential Configuration
Connecting remotely to the hub: Redvision offer data packages with either a fixed public IP address, or a dynamic public IP address. The hub will be configured for connecting to each camera, or the recorder directly, as per the below. - Page 4 Router Login via web browser If connecting locally (over Wi-Fi or LAN), type the router’s IP address into the web browser address bar; e.g. 192.168.0.1 and press enter. If connecting remotely, type in the DDNS followed by port 8888 e.g. rc303010.ddns.net:8888. The login page is then shown, as per below: •...
-
Page 5: Safety Guide
ii. Safety guide THIS CAMERA SYSTEM MUST BE INSTALLED, OPERATED AND MAINTAINED IN ACCORDANCE WITH THE MANUFACTURER’S SPECIFICATIONS. 1. Installation of this system must be carried out by a skilled person in accordance with local electrical codes. 2. This equipment must be connected to a protected earth. 3. - Page 6 Redvision accepts no responsibility for damages of any kind resulting from delays or errors in data transmitted or received using the router, or for failure of the router to transmit or receive such data.
-
Page 7: Installing The Hub
1.0 Installing the Hub 1.1 Pole Mounted Contents: 1 x Hub Pole Bracket 4 x M6 x 25 Hex Head Bolts 4 x M6 Plain Nuts 4 x M6 Nyloc Nuts 4 x M6 Plain Washer 1) Using three off stainless steel Jubilee bands, fasten the pole bracket to the pole. Note, there are wide and narrow slots in the pole bracket, use the suitable slots for the pole diameter. - Page 8 2) Using a M6 plain nut, M6 washer, and M6 Nylon Nut, secure 4 off M6 x 25 Hex Head bolts at the extremities of the Hub rails. Allow a sufficient gap between two off M6 nuts. M6 Plain Washer M6 Plain Nut M6 x 25 Hex Head M6 Nylon Nut...
-
Page 9: Wall Mounted
1.2 Wall Mounted It is important to use adequate quality fixings to safely support the complete Hub assembly when mounting the Hub to a wall. Contents: 2 x Hub Wall Brackets 4 x M6 x 12 CSK Bolts 4 x M6 Plain Nuts 1 x M4 Allen Key 1) Position the 4 off M6 Nuts in the rails (2 per each rail). - Page 10 3) Use the external mounting holes to fix the Hub to a wall. Wall Mounting Holes OBSERVE THE FOLLOWING PRECAUTIONS WHEN INSTALLING: 1. Mount the Hub in a position where it cannot be interfered with either intentionally or accidentally. 2. The mounting surface should be capable of supporting the weight of the hub, the camera(s) and mounting brackets under all expected conditions of load, vibration and temperature.
-
Page 11: Camera Installation
Note, please ensure correct weatherproofed cable fittings are used. WARNING: Only use Redvision supplied Hub mains cable to power mains version of Hub. 3) Slide the camera mount assembly back flush with the main Hub enclosure, and fasten the 4 off M6 nuts on the side plates to secure. -
Page 12: Power Supply Installation & Setup
UMBILICAL CABLE: A pre-made cable with connector must be purchased with all Redvision Hubs. The female connector connects directly to the male connector on the base of the Hub. If a 24VDC version, mount the Redvision PSU in a position so it cannot be interfered with •... -
Page 13: 24Vdc Power Supply Layout
2.2 24VDC Power supply layout It is the installer’s responsibilty that a regulated 24VDC, 5A supply is used for powering the Hub. 2.3 24VDC PSU connections Umbilical 24VDC POWER Wire +24VDC BROWN 24VDC 0VDC BLUE 0VDC EARTH GREEN/YELLOW SAFETY: ENSURE MAINS INPUT & EARTH CONNECTIONS ARE SECURELY STRAIN RELIEVED. CAUTION: TAKE CARE WITH POLARITY OF POWER CONNECTIONS 2.4 Mains power connections Umbilical... -
Page 14: Hub Network And Power Connections
Hub Network and Power Connections Ensure the hub is mounted with all connections facing down. The Hub is equipped with the following connections POE Port 3 – 15.5W 802.3af Power input POE Port 1 – 90W 802.3bt/ 24VDC Camera Port LAN port POE Port 2 –... -
Page 15: Technical Specifications
3.0 Technical Specifications 2022 Hub Install Guide v2.0... -
Page 16: Warranty Information
2022 Hub Install Guide v2.0 Copyright © 2008 - 2023 Redvision CCTV Ltd. Content subject to change without prior notice. E&OE. All rights reserved. Redvision CCTV Limited, Alpha House, Blacknest Road, Blacknest, Alton, GU34 4PX, United Kingdom Company registration: UK3952814 ©Redvision CCTV Ltd.
Need help?
Do you have a question about the RV-HUB-1 and is the answer not in the manual?
Questions and answers