Advertisement
Quick Links
ASSEMBLY INSTRUCTIONS
INSTRUCTIONS DE MONTAGE
INSTRUCCIONES DE MONTAJE
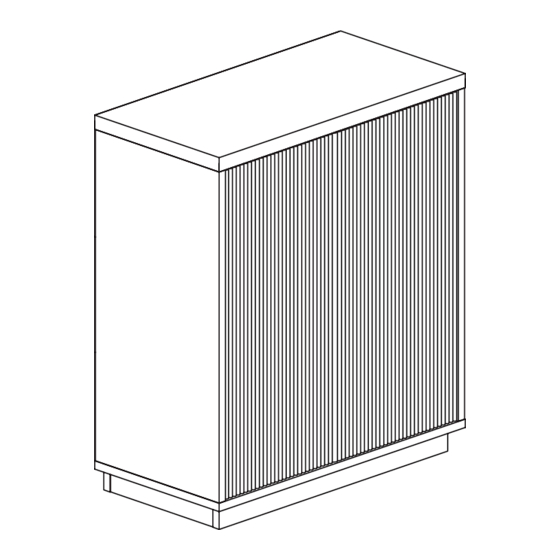
ACCENT CABINET
ARMOIRE D'APPOINT
GABINETE DE ACENTO
PRE-ASSEMBLY:
Two people are recommended to assemble this furniture.
Carefully remove all parts and hardware from carton, along with any protective packaging.
Locate and set aside the hardware kit before discarding packaging.
Do not discard any contents until after assembly is complete to avoid accidentally discarding small parts
or hardware.
Assemble the furniture on a soft surface, and take extra care not to scratch or damage parts during the
assembly.
PRÉASSEMBLAGE :
Deux personnes sont recommandées pour assembler ce meuble.
Retirez soigneusement de la boîte toutes les pièces, toute la quincaillerie, et tout emballage de protecteur.
Localisez et mettez de côté le jeu de quincaillerie avant de jeter l'emballage.
Ne mettez aucun élément de contenu au rebut avant de terminer l'assemblage au complet, afin d'éviter de
jeter accidentellement de petites pièces ou un élément de quincaillerie.
Assemblez le meuble sur une surface douce et faites particulièrement attention à ne pas rayer ou
endommager les pièces lors du montage.
ANTES DEL ENSAMBLADO:
Se recomiendan dos personas para montar este mueble.
Retire con cuidado todas las piezas y herramientas de la caja, junto con todo el envoltorio protector.
Localice y separe el equipo de accesorios antes de desechar el embalaje.
No deseche nada hasta después de haber terminado de ensamblar para evitar botar por accidente piezas
pequeñas o herramientas.
Ensamble el mueble sobre una superficie blanda y tenga mucho cuidado de no rayar ni dañar las piezas
durante el montaje.
Save these instructions
Conservez ces instructions
Guarde estas instrucciones
Made in China
Fabriqué en Chine
Hecho en China
1
AC1694 AC1695 rev070522EFS FG2B
Advertisement

Related Manuals for Hailey Home AC1694


Summary of Contents for Hailey Home AC1694
- Page 1 Ensamble el mueble sobre una superficie blanda y tenga mucho cuidado de no rayar ni dañar las piezas durante el montaje. Save these instructions Conservez ces instructions Guarde estas instrucciones Made in China Fabriqué en Chine Hecho en China AC1694 AC1695 rev070522EFS FG2B...
- Page 2 PRECAUTIONS — READ ALL BEFORE BEGINNING ASSEMBLY Do not place items on the shelf which exceed the maximum weight limits of: Top shelf: 45 lbs. (20.4 kg) Middle Shelf: 25 lbs. (11.3 kg) Bottom Shelf: 35 lbs. (15.9 kg) Usage with loads heavier than the maximum weights specified may result in instability, causing tip-over and resulting in death or serious injury.
- Page 3 PARTS / PIÈCES / PIEZAS NOTE: This illustration is for parts identification/orientation purposes only. For assembly, see following pages. REMARQUE : Cette illustration est uniquement à des fins d’identification / d’orientation des pièces. Pour le montage, voir pages suivantes. NOTA: Esta ilustración es solo para fines de identificación / orientación de piezas. Para el montaje, consulte las páginas siguientes.
- Page 4 PARTS / PIÈCES / PIEZAS Part Description Quantity Part Description Quantity Pièce Description Quantité Pièce Description Quantité Pieza Descripción Cantidad Pieza Descripción Cantidad...
- Page 5 HARDWARE / QUINCAILLERIE / FERRETERÍA Part Description Quantity Part Description Quantity Pièce Description Quantité Pièce Description Quantité Pieza Descripción Cantidad Pieza Descripción Cantidad...
-
Page 6: Care Instructions
HARDWARE / QUINCAILLERIE / FERRETERÍA Part Description Quantity Pièce Description Quantité Pieza Descripción Cantidad TIPPING RESTRAINT HARDWARE VISSERIE DU ANTI-BASCULEMENT HARDWARE DE PROTECCIÓN ANTIVUELCOS (See pages 21-23 for installation) (Voir les pages 21-23 pour l’installation) (Consulte las páginas 21-23 para la instalación) CARE INSTRUCTIONS: •... - Page 7 INSTALLING THE CAM LOCKS COMMENT INSTALLER LES SERRURES À CAME CÓMO INSTALAR LAS CERRADURAS DE LEVA Do not overtighten! Ne pas trop serrer! ¡No apriete demasiado! Screw the Cam Screw into the prethreaded hole. Tighten with a screwdriver until snug. Vissez la vis à...
- Page 8 MAKE SURE THE ASSEMBLY IS DONE ON A LEVEL AND SOFT SURFACE (SUCH AS BLANKETS) TO PREVENT DAMAGING THE PARTS DURING ASSEMBLY. ASSUREZ-VOUS QUE L’ASSEMBLAGE EST EFFECTUÉ SUR UNE SURFACE PLANE ET DOUCE (COMME DES COUVERTURES) POUR ÉVITER D’ENDOMMAGER LES PIÈCES L’ASSEMBLAGE. ASEGÚRESE DE QUE EL MONTAJE SE REALICE EN UNA SUPERFICIE NIVELADA Y SUAVE (COMO MANTAS) PARA EVITAR DAÑAR LAS PIEZAS DURANTE EL MONTAJE.
- Page 9 NOTE: DO NOT OVERTIGHTEN SCREWS. REMARQUE : NE PAS TROP SERRER LES VIS. NOTA: NO APRIETE DEMASIADO LOS TORNILLOS.
- Page 14 NOTE: DO NOT OVERTIGHTEN SCREWS. REMARQUE : NE PAS TROP SERRER LES VIS. NOTA: NO APRIETE DEMASIADO LOS TORNILLOS.
- Page 15 NOTE: DO NOT OVERTIGHTEN SCREWS. REMARQUE : NE PAS TROP SERRER LES VIS. NOTA: NO APRIETE DEMASIADO LOS TORNILLOS.
- Page 16 With the help of an assistant, turn accent cabinet upright. Avec l’aide d’un assistant, tournez le armoire d’appoint à la verticale. Con la ayuda de un asistente, coloque el gabinete de acento vertical.
- Page 17 NOTE: DO NOT OVERTIGHTEN SCREWS. REMARQUE : NE PAS TROP SERRER LES VIS. NOTA: NO APRIETE DEMASIADO LOS TORNILLOS.
- Page 18 NOTE: DO NOT OVERTIGHTEN SCREWS. REMARQUE : NE PAS TROP SERRER LES VIS. NOTA: NO APRIETE DEMASIADO LOS TORNILLOS. SEE PAGE 20 FOR DOOR ALIGNMENT INSTRUCTIONS. VOIR PAGE 20 POUR LES INSTRUCTIONS SUR L’ALIGNEMENT DES PORTES. CONSULTE LA PÁGINA 20 PARA OBTENER INSTRUCCIONES SOBRE CÓMO ALINEAR LAS PUERTAS.
- Page 19 Finished Fini Terminado NOTE: Use the leveling feet to make sure furniture is level on the floor before using. REMARQUE: Utilisez les pieds de nivellement pour vous assurer que les meubles sont à niveau sur le sol avant de les utiliser. NOTA: Use los pies niveladores para asegurarse de que el mueble estén nivelados en el piso antes de usar la mesa.
- Page 20 Adjusting the doors / Réglage des portes / Ajuste de las puertas IMPORTANT — The furniture MUST be level on a flat, solid floor surface for the doors to work properly. Turn the leveling feet under the cabinet to make sure the furniture is level. Once the furniture is level, align the doors as shown for proper operation.
- Page 21 FURNITURE TIPPING RESTRAINT DISPOSITIF ANTI-BASCULEMENT TRABA DE PROTECCIÓN ANTIVUELCOS WARNING: This product is only a deterrent. It is not a substitute for proper adult supervision. Manufacturer assumes no liability for improper installation or excessive loads placed on screws, brackets, or straps. Young children may be injured by tipping furniture and the use of a tipping restraint is required.
- Page 22 FURNITURE TIPPING RESTRAINT DISPOSITIF ANTI-BASCULEMENT TRABA DE PROTECCIÓN ANTIVUELCOS NOTE: DO NOT OVERTIGHTEN SCREWS. REMARQUE : NE PAS TROP SERRER LES VIS. NOTA: NO APRIETE DEMASIADO LOS TORNILLOS.
- Page 23 FURNITURE TIPPING RESTRAINT DISPOSITIF ANTI-BASCULEMENT TRABA DE PROTECCIÓN ANTIVUELCOS 1. Hold Bracket (K1) up to the wall and mark hole locations using a pencil. 2. Drill pilot holes 1-1/4" deep. Use only Screws (K2) if going directly into wood studs. If going into drywall (no stud), use Wall Anchors (K3) with Large Screws (K2).