Advertisement
Quick Links
This version is copyright © 2005-2023 Nyle Steiner / Patchman Music. All rights reserved.
What's Included
The following items are included with the MIDI EVI:
• The MIDI EVI Brass Style MIDI Wind Controller
• AC adaptor. 9 Volt DC. Tip/Center is Positive (+). 1/8" male plug
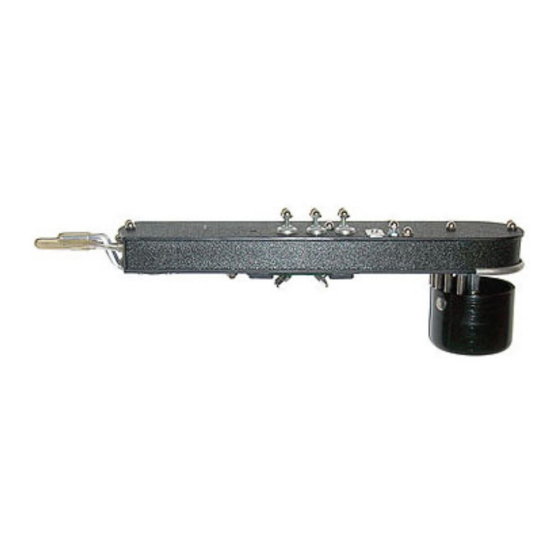
MIDI EVI Description
Congratulations and thank you for purchasing a Nyle Steiner MIDI EVI. This EVI, or "Electronic Valve
Instrument, is a brass style MIDI wind controller developed by trumpet player, inventor, studio musician,
Nyle Steiner. The concept of a "brass-type synthesizer" was first conceived in the late 1960s when Nyle
Steiner wanted to give brass players the ability to control synthesizers. The first units were hand made, as is
this one, by Nyle Steiner in the early 1970's. The MIDI EVI is the latest in what has turned out to be decades
of development and refinements.
What is a MIDI EVI?
The MIDI EVI is a "MIDI controller". That is- it does not make a sound on its own. It sends MIDI data from
its MIDI OUT jack which is then connected to the MIDI IN jack on a MIDI synth. The connected synth is the
source of all the sound. The MIDI EVI simply converts the players' performance gestures into appropriate
Version 1.12 - 6/30/2023
Original manual by Nyle Steiner / Revised by Matt Traum
Advertisement

Summary of Contents for Steiner MIDI EVI
- Page 1 Steiner wanted to give brass players the ability to control synthesizers. The first units were hand made, as is this one, by Nyle Steiner in the early 1970's. The MIDI EVI is the latest in what has turned out to be decades of development and refinements.
- Page 2 What Else is Needed to Play the MIDI EVI? The MIDI EVI is a MIDI controller- that is, it generates a MIDI signal that is used to control a MIDI sound source. It must be connected to a MIDI sound source to create sound. There are numerous MIDI sound modules, keyboards, and computer soft synths that will work with the MIDI EVI.
- Page 3 The Electronic Woodwind Instruments have two more rollers since the thumb needs something to rest on in the bottom octave. The pitch range is the same as the EVI. The AKAI EVI's have an extra roller on the bottom but it is a dummy and has the same pitch range. The mouthpiece end of the instrument is supported by the front teeth biting lightly on the soft rubbery mouthpiece.
- Page 4 The main advantages for having a closed air path are: 1. The resistance feel of playing is under player control at all times by varying the lip tightness; much like the way a bird can control its aerodynamics during flight. Some styles of playing feel better with different amounts of resistance.
-
Page 5: Fingering Chart
fingers, like a lotion, will make them conductive for reliable contact with the valves and octave rollers. Glycerin is a thick clear harmless liquid that is water soluble. FINGERING CHART Here is a Fingering Chart for the Akai EVI1000. These fingerings apply to the MIDI EVI as well... - Page 7 Trill Keys Beside each valve on top of the instrument is an extra key. These make certain alternate fingerings and trills possible that would otherwise be difficult. You will easily discover your own uses for them. The one beside 1st valve raises the pitch 1 whole tone. The one beside 2nd valve raises the pitch 1 semitone and the one...
- Page 8 The effect of vibrato and pitchbend are combined and converted into MIDI pitchbend information. Turning On and Power Sources The MIDI EVI can be powered from any one of three sources of power: • 9 volt battery • 9 volt DC wall wart plugged into the1/8" power jack.
- Page 9 Turn on Default Settings The MIDI EVI has default settings when switched on. At first you may find it easiest to use the default power up settings. The closer you can come to having all of your sound modules set up to use this default setting, the easier and quicker things will be when you turn it on.
- Page 10 B, C, and T each have a uniqueness of their own that makes each of them easy to identify without looking at the rollers. B has the quality of not touching any rollers at all. The C has the quality of touching the roller that makes the thumb exactly in the middle of the instrument.
-
Page 11: Programming Button
keys will turn on various dynamic breath controls as follows: 1st valve - MIDI Volume (MIDI Controller # 7) 2nd valve - Aftertouch 3rd valve - MIDI Breath Control ( MIDI Controller # 2) Side button - MIDI Expression Controller ( MIDI Controller # 11) 1st trill - Breath to variable MIDI Velocity 2nd trill - Extra Controller to variable MIDI Velocity No keys at all - All dynamic controllers off and Velocity at fixed value... - Page 12 Key Deglitch Time so that they can be played with a minimum amount of glitching between notes. The default Key Deglitch Time on the MIDI EVI when turned on is approximately 40 milliseconds (ms). This can be changed to values ranging from OFF (0 ms) to well above the range of playability.
- Page 13 Slur Sustain. Hit and release while holding side button. What is Slur Sustain? When it is on, a tongued note attack also sends a MIDI sustain pedal on command. This stays on during all slurred notes until the breath is stopped; at which time a MIDI sustain pedal off command is sent.
- Page 14 equipment that may have implementation on the two extra MIDI pins. There are three kinds of MIDI cables that I have found in my collection... 1. Standard three wire MIDI cable as described above. Best kind to use if EVI is being powered from battery or wall wart.
- Page 15 No. 3 above can really throw you. Many sound modules now automatically respond to MIDI volume and MIDI expression. Suppose that you are playing on MIDI channel 1 with MIDI expression; you then set the EVI to MIDI channel 2. You then change the EVI to send MIDI volume and you play for a while. If you change back to MIDI channel 1 and leave the EVI set to MIDI volume, you will get nothing because the last time you played on channel 1, a low value of MIDI expression was sent as the breath was released.
- Page 16 The "unused" pins in the connector are used to remotely (phantom) power the MIDI EVI and also to provide a true ANALOG CV (control voltage) signal from the breath sensor. The power applied to the power input pin can be anywhere between +7.5 and +12 volts DC and must supply at least 15ma.
- Page 17 When everything is set up right in your patches, it will feel very natural to play the MIDI EVI. You will be able to blow softer, harder, crescendo, and decrescendo, just like on an acoustic instrument.
- Page 18 3. Set the amplifiers and filters to be controlled by Breath Control- or whatever MIDI controller you set the MIDI EVI to send from its breath sensor. Sometimes this can be done directly and completely. Other times, such modulation effectively acts as a valve between the envelope generator and the amplifier, letting anywhere from all or none of the value from the envelope...
Need help?
Do you have a question about the MIDI EVI and is the answer not in the manual?
Questions and answers