Advertisement
Table of Contents
Contents
Shark GI435 55 - Iron Manual
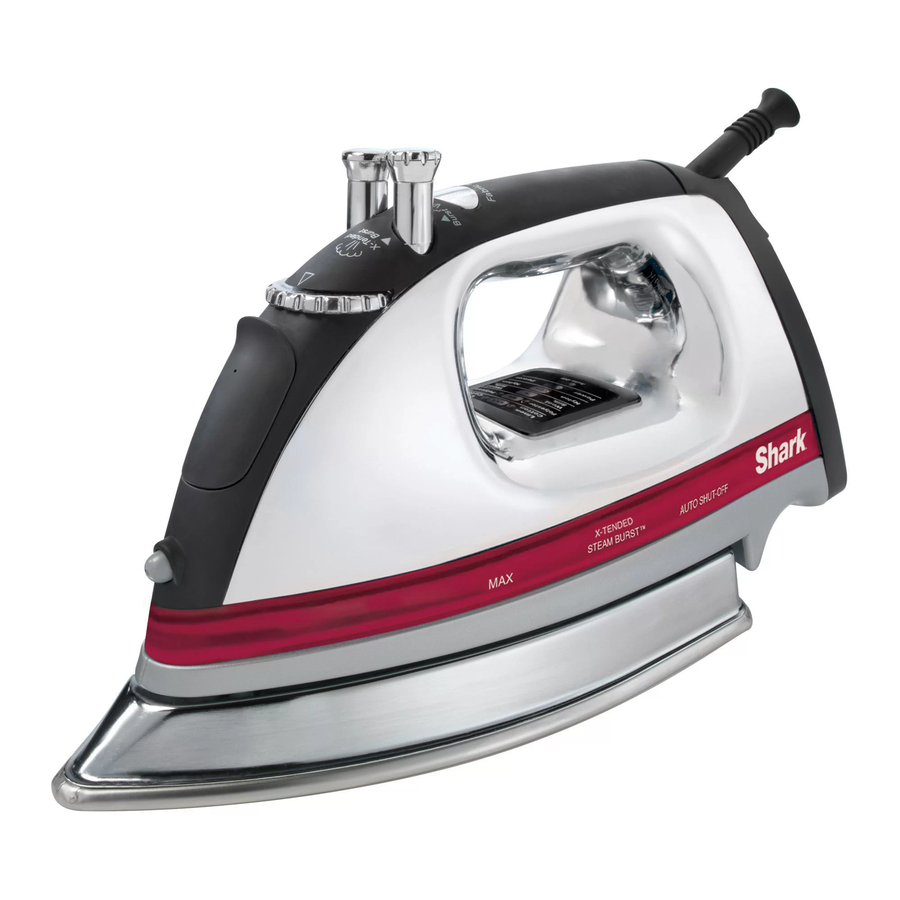
FEATURES

- Stainless Steel Soleplate
- Water Inlet Door
- Atomizer Spray Button
- Electronic Temperature Control
- Spray Nozzle
- Variable Steam/Self-Clean Control
- X-Tended Steam Burst Burst Button
- Water Level Window
- Pivot Cord
- Fabric Settings
- Temperature Indicators
- Power Light
- Auto-Off Light
- Anti-Drip Function (not shown)
- Built-In Anti-Calcium Filter (not shown)
TECHNICAL SPECIFICATIONS: 120 Volts, 60 Hz., 1600 Watts

This appliance has a polarized plug (one blade is wider than the other).
As a safety feature, this plug will fit into a polarized outlet only one way. If the plug does not fit fully into the outlet, reverse the plug. If it still does not fit, contact a qualified electrician. Do not attempt to defeat this safety feature.
BEFORE FIRST TIME USE
- Before using your iron for the first time, please remove all the packaging material.
- When you turn on the iron for the first time it might emit an odor for the first ten minutes. This is because the materials used in making the iron are heating up. The odor is safe and should not re-occur after the initial heating.
USING YOUR IRON

- F ill water carefully into the water tank without going over "Max" line. Make sure the water inlet cover is closed to avoid spilling.
- P lug in the iron into any 120V AC polarized electrical outlet.
- S et the desired fabric/temperature by pressing the Electronic Temperature Control.
- T he temperature indicator light on the LED Display Panel will flash when the iron is heating up. The green light will stop flashing and stay on when the iron reaches the preset temperature.
- T urn the variable steam control to select high or low steam setting. Select "0" on the steam control for dry ironing. You can now start ironing.
- U se the steam burst/X-tended steam burst button to remove stubborn wrinkles. Turn the button counter-clockwise to the burst of steam position (for quick bursts of steam); or turn the button clockwise to the X-tended steam burst position (for prolonged bursts of steam). Press the button in the steam burst position once or several times if in the X-tended steam burst position to prime the pump. Allow an interval of 3 seconds between each burst. Overuse of the steam burst may cause water spitting or weak steam performance.
- T he steam burst feature also works in the vertical position. This is especially useful to remove wrinkles from hanging clothes, delicate garments and other fabrics. Hold the iron in the upright position several inches away from the article.
- U se the atomizer spray to moisten the fabric to tackle tough wrinkles, if necessary.
ANTI-DRIP FEATURE
- The anti-drip feature is built in to this iron. It prevents water spitting when the temperature is too low.
- Steam cannot be produced if the soleplate is not hot enough. It may result in water spitting or leaking from the soleplate. The anti-drip feature reduces water dripping and leaking when ironing at low temperatures.
ANTI-CALCIUM
- This iron has built in the anti-calcium system that prolongs the life of the iron.
- If you have very hard water, we recommend using distilled water instead of tap water.
ELECTRONIC MULTI POSITION AUTO-OFF
- This iron is equipped with an electronic auto-off feature that switches the iron off if it has been idle in the sideways, flat or upright positions for 7-9 minutes.
- The auto-off light will flash in red on the LED display when the iron is in auto-off mode. To turn the iron back on, just gently rock the iron back and forth several times until the "Power ON" green light is re-illuminated. Reset the temperature to the desired setting; wait for the green light to stop flashing. The iron might have to warm up for a minute if the auto-off feature was activated for an extended time.
SELF-CLEANING
- Fill the water tank to the "MAX" level. Do not overfill.
- Stand the iron on its heel, standing up on a protected surface and plug into the electrical outlet
- Set the Electronic Temperature Controls to "
![]() " setting. Wait until the green light stops flashing. The iron is now on the preset temperature.
" setting. Wait until the green light stops flashing. The iron is now on the preset temperature. - Hold the iron horizontally over the sink. Turn and hold the steam control all the way to the right to the SELF CLEAN position.
- Move the iron back and forth. Boiling water and steam will now be ejected from the holes in the soleplate. Use caution when doing this as the water and the steam are hot enough to cause burns.
- Continue step 21 until the impurities and scale are washed away.
- Empty any excess water from the tank. Don't touch the hot surfaces, water or steam because injury may occur.
- Turn the steam control to "0".
- Place the iron in upright position and let it cool down.
 " setting. Wait until the green light stops flashing. The iron is now on the preset temperature.
USEFUL TIPS
- Read all garment care labels before you start ironing. You can also test the temperature of the iron on a hem or an inside seam.
- Iron similar fabrics together and in sequence of synthetic fibers acrylic, nylon, silk/wool, polyester, and cotton/linen. This will reduce the need to adjust the temperature frequently.
IRONING GUIDE

STORAGE AND CARE
- Always turn the variable steam control to "0" after you have emptied the water tank.
- Allow the iron to cool down before putting it away.
- Place the iron in the upright position during heating up, cooling down and storage.
- Avoid any sharp material contacting the soleplate.
- Every two weeks, clean the exterior of the iron with a damp cloth and wipe dry.
- If you use spray starch, wipe the soleplate occasionally with a soft, damp cloth to prevent deposit build-up.
- If the iron hasn't been used in a few weeks, hold the iron horizontally and allow steaming for 2 minutes before ironing.
ALWAYS REMEMBER
- Unplug the iron from the electrical outlet before pouring water into the iron.
- Always empty the water in the iron after each use.
- Never iron or steam clothes while they are being worn.
- Be very careful when filling the iron with water. Injuries may occur if the hot metal parts, hot water or steam are contacted.
TROUBLE SHOOTING
The iron doesn't heat up | Iron should be plugged into a 120V AC electric outlet only. Make sure the plug is securely in the socket. Temperature setting might be too low. Try turning to a higher setting. Auto-off feature is activated. |
| An odor is being emitted from the new iron or small particles are coming out | This is normal. Follow the instructions for first-time use and allow iron to steam through 2-3 fillings and press the steam burst button occasionally to eliminate small white particles. |
Iron doesn't steam | Water tank may be empty or water level is very low. Add water. Make sure the fabric/temperature setting and the variable steam control are correctly set. For maximum steam, set "MAX" on steam control and the temperature setting should be set on " " Steam control is set on "0." The soleplate is not hot enough and the anti-drip feature switches off the steam. Always allow the iron to reach the selected temperature with the variable steam control setting at "0." For more steam, turn temperature dial to a higher setting and the steam control to "MAX." If the temperature setting and steam control settings are correct and there is no steam, gently move the iron left or right a couple of times. Move the Steam Control from "0" to "MAX" a few times. " Steam control is set on "0." The soleplate is not hot enough and the anti-drip feature switches off the steam. Always allow the iron to reach the selected temperature with the variable steam control setting at "0." For more steam, turn temperature dial to a higher setting and the steam control to "MAX." If the temperature setting and steam control settings are correct and there is no steam, gently move the iron left or right a couple of times. Move the Steam Control from "0" to "MAX" a few times. |
Water droplets coming from steam vents | Variable Steam Control lever may be set in "self clean" position. Align the lever to the "0" to "Max" steam setting. Iron may not be hot enough. Set temperature to "" position. Always allow iron sufficient time to heat up before activating the variable steam control. Overuse the steam burst. Allow more time between each burst. |

Documents / ResourcesDownload manual
Here you can download full pdf version of manual, it may contain additional safety instructions, warranty information, FCC rules, etc.
Advertisement


Need help?
Do you have a question about the GI435 55 and is the answer not in the manual?
Questions and answers