Table of Contents
Advertisement
Quick Links
NOTICE DE MONTAGE
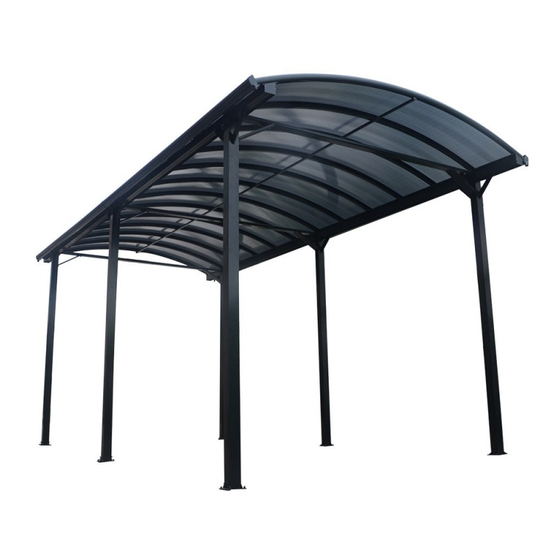
Carport X-Metal 3,59x7,62m
ASSEMBLY INSTRUCTIONS
EN
Carport X-Metal 3,59x7,62m
AUFBAUANLEITUNG
DE
Carport X-Metal 3,59x7,62m
INSTRUCCIONES DE MONTAJE
ES
Cochera X-Metal 3,59x7,62m
ISTRUZIONI DI MONTAGGIO
IT
Tettoia X-Metal 3,59x7,62m
INSTRUKCJA MONTAŻU
PL
Wiata Garażowa X-Metal 3,59x7,62m
13457 | 13462
Advertisement
Table of Contents

Related Manuals for X-METAL 13457

Summary of Contents for X-METAL 13457
- Page 1 NOTICE DE MONTAGE Carport X-Metal 3,59x7,62m ASSEMBLY INSTRUCTIONS Carport X-Metal 3,59x7,62m AUFBAUANLEITUNG Carport X-Metal 3,59x7,62m INSTRUCCIONES DE MONTAJE Cochera X-Metal 3,59x7,62m ISTRUZIONI DI MONTAGGIO Tettoia X-Metal 3,59x7,62m INSTRUKCJA MONTAŻU Wiata Garażowa X-Metal 3,59x7,62m 13457 | 13462...
-
Page 2: Conseils De Sécurité
FRANÇAIS nettoyer le carport. IMPORTANT חLorqu’il est encombré, débarrassez le toit et les gouttières de la neige, de la saleté et Veuillez lire attentivement les instructions avant de commencer à assembler ce des feuilles qui s’y sont entassés. produit. ... -
Page 3: Safety Advice
ENGLISH חPut small component parts (screws etc) in a box, so they will not be missing. IMPORTANT חSome parts maybe surplus after assembly, it is recommended to keep them in a safe Please read the instructions carefully before you start to assemble this carport. place for future use. -
Page 4: Reinigung Und Pflege
DEUTSCH WICHTIG REINIGUNG UND PFLEGE Bitte lesen Sie die Anweisungen sorgfältig durch, bevor Sie mit dem Zusammenbau חWenn Ihr Carport gereinigt werden muss, verwenden Sie eine milde Reinigungslösung dieses Produkts beginnen. und spülen Sie das Produkt mit klarem Wasser ab. Achten Sie darauf, dass alle im Karton enthaltenen Teile mit den Angaben in der ... -
Page 5: Consejos De Seguridad
ESPAÑOL sopletes, etc. IMPORTANTE חNo coloque objetos pesados contra los postes. Lea atentamente las instrucciones antes de empezar a montar este producto. חNo se cuelgue ni se ponga de pie en los postes. Asegúrese de que todas las piezas de la caja coinciden con la lista mostrada. ... -
Page 6: Consigli Di Sicurezza
ITALIANO חLiberate sempre il tetto e le grondaie dall’eccesso di neve, terra e foglie che possono IMPORTANTE esservi accumulate. Si prega di leggere attentamente le istruzioni prima di procedere al montaggio di חOggetti caldi come griglie subito dopo l’utilizzo, torce, ecc. non devono essere questo prodotto. -
Page 7: Wskazówki Dotyczące Bezpieczeństwa
POLSKI חPod wiatą garażową nie należy przechowywać gorących przedmiotów, takich jak WAŻNE niedawno używane grille, pochodnie itp. Przed rozpoczęciem montażu tego produktu należy uważnie przeczytać instrukcje. חCiężkich przedmiotów nie należy umieszczać przy słupkach. Upewnij się, że wszystkie części w kartonie są zgodne z przedstawioną listą. ... - Page 8 Componentry / Eléments / Bestandteile / Elementos / Elementi / Części PART Nº PART Nº PART Nº PART Nº PART Nº TOOL PART Nº...
- Page 9 Post height. Hauteur du poteau. Höhe der Pfosten. Altura del poste. Altezza del palo. Wysokość słupka. From ground to bottom of horizontal beam. Make sure there is enough space to assemble the carport. Du sol au bas de la poutre horizontale. Assurez-vous d’avoir l’espace nécessaire à...
- Page 10 PART Nº...
- Page 11 PART Nº...
- Page 12 There are 2 assembling holes There is no on this side of L11, see page 19 to assembling hole assemble W18. on this side. Il y a 2 trous d’assemblage sur le Il n’y a pas de côté de la pièce L11 (voir p.19 pour trous d’assem- installation de la pièce W18) blage sur ce côté...
- Page 13 PART Nº...
- Page 14 PART Nº...
- Page 16 PART Nº...
- Page 17 PART Nº...
- Page 18 PART Nº...
- Page 19 PART Nº...
- Page 20 Pre-sliding bolt S01 x 1 before assembling L01, it will be used in fix L14 in next step. When assembling L01, please keep both ends at the same distance from L12. Insérez un boulon S01 avant d’assembler la pièce L01, cela servira à fixer la pièce L14 dans une prochaine étape. Assurez-vous que l’extrémité des pièces L01 sont à distance égale des pièces L12. Fügen Sie vor dem Zusammenbau von Teil L01 eine S01-Schraube ein, diese wird im nächsten Schritt zur Befestigung von Teil L14 verwendet.
- Page 21 Pre-sliding bolt S01 x 1 before assembling L01, it will be used in fix L14 in next step. When assembling L01, please keep both ends at the same distance from L12. Insérez un boulon S01 avant d’assembler la pièce L01, cela servira à fixer la pièce L14 dans une prochaine étape. Assurez-vous que l’extrémité des pièces L01 sont à distance égale des pièces L12. Fügen Sie vor dem Zusammenbau von Teil L01 eine S01-Schraube ein, diese wird im nächsten Schritt zur Befestigung von Teil L14 verwendet.
- Page 22 Pre-sliding bolt S01 x 1 before assembling L02, it will be used in fix L14 in next step. When assembling L01, please keep both ends at the same distance from L12. Insérez un boulon S01 avant d’assembler la pièce L02, cela servira à fixer la pièce L14 dans une prochaine étape. Assurez-vous que l’extrémité des pièces L02 sont à distance égale des pièces L12. Fügen Sie vor dem Zusammenbau von Teil L02 eine S01-Schraube ein, diese wird im nächsten Schritt zur Befestigung von Teil L14 verwendet.
- Page 23 PART Nº...
- Page 24 PART Nº...
- Page 25 Transparent film PC sheet Opal white film POLYCARBONATE PANEL Two sides of PC sheet are covered with thin film. One side film is transpar- ent, another side’s film is opal white. The UV-protected side of PC sheet is covered with transparent film and must face towards the sun. PANNEAU POLYCARBONATE La plaque polycarbonate est recouverte d’un film de chaque côté...
- Page 26 PART Nº...
- Page 27 PART Nº...
- Page 28 PART Nº...
- Page 29 PART Nº...
- Page 30 PART Nº...
- Page 31 PART Nº...
- Page 32 PART Nº...
Need help?
Do you have a question about the 13457 and is the answer not in the manual?
Questions and answers