Table of Contents
Advertisement
Quick Links
AUTOMATIC POOL CLEANER
• Before installing the cleaner, review and understand all
• Please use the convenient, water resistant "EASY STEPS" card.
About Safety .............................................................2
About Your Pool and Filter System ...........................2
About Installation .....................................................3
About the Cleaner Operation....................................4
About "Fine Tuning" Vacuum Adjustments............4,5
About the Cleaner and Accessories...........................6
Sta-Rite Pool/Spa Group
293 Wright Street, Delavan, WI 53115
International: 262-728-5551, FAX: 262-728-7550
www.starite.com
Union City, TN • Delavan, WI • Mississauga, Ont. • Murrieta, CA
© 2005, Sta-Rite Industries
O
W
N
E
R '
OPERATION, TROUBLESHOOTING & PARTS
ABOUT SAFETY
warnings and safety information on inside cover of manual.
ABOUT INSTALLATION
S
M
A
N
1873 0795
Model GW9500
INDEX
About Troubleshooting .............................................7
About Disassembly ...................................................8
About Assembly........................................................9
Repair Parts.............................................................10
About Maintenance ................................................11
Warranty.................................................................12
U
A
L
S364 (Rev. 3/16/05)
Advertisement
Table of Contents

Summary of Contents for Great White GW9500
-
Page 1: Table Of Contents
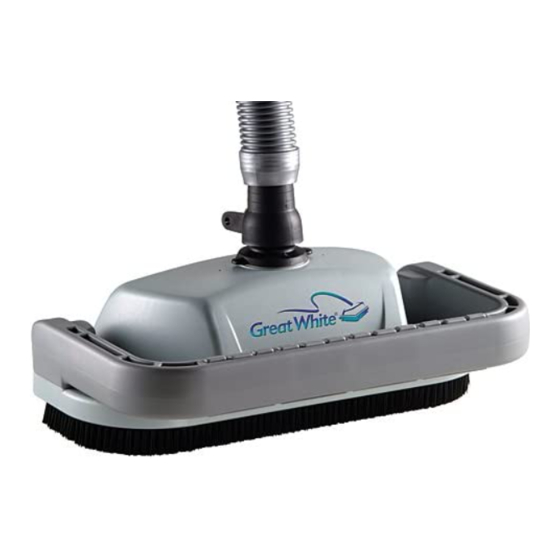
AUTOMATIC POOL CLEANER R ’ 1873 0795 Model GW9500 OPERATION, TROUBLESHOOTING & PARTS ABOUT SAFETY • Before installing the cleaner, review and understand all warnings and safety information on inside cover of manual. ABOUT INSTALLATION • Please use the convenient, water resistant “EASY STEPS” card. -
Page 2: About Safety
Please read the following before installing your new automatic pool cleaner! ABOUT SAFETY: This is the safety alert symbol. When you see Hazardous suction. this symbol on your system or in this manual, Can trap and tear look for one of the following signal words and be hair or body parts. -
Page 3: About Installation
ABOUT INSTALLATION Please use the convenient, water resistant, “EASY-STEPS” card. Step 1: Straighten hose (Figure 1) Remove and uncoil the hose from the carton. Lay it out in the sunlight, flat and straight. Step 2: Check parts (Figure 2) • Cleaner assembly •... -
Page 4: About The Cleaner Operation
HOSE CONNECTIONS: Follow drawing that most closely resembles your skimmer installation. Elbow Water (User Water Water Level Supplied) Level Level 4" Hose Vacuum Regulator To Pump Suction Vacuum Vacuum Regulator Reducer Regulator Cone Reducer Cone Hose Adapter Skimmer Vac Plate Skimmer (Skimmer Dedicated... -
Page 5: About "Fine Tuning" Vacuum Adjustments
ABOUT “FINE-TUNING” VACUUM ADJUSTMENTS AND CONNECTIONS: still climbs out and sucks air, open the main drain valve Pool pump suction is hazardous and slightly. can cause entrapment with severe personal injury or Not enough vacuum ? drowning. Use vacuum regulator (see instructions below) in pool cleaner system at all times. -
Page 6: About The Cleaner And Accessories
ABOUT THE CLEANER AND ACCESSORIES: Swivel assembly (Figure 9) Reducer cone (Figure 12) Installing the swivel assembly is a snap. The reducer cone is required to make Just insert it into the cleaner body and most hose connections. When used, it give it a quarter turn. -
Page 7: About Troubleshooting
ABOUT TROUBLESHOOTING SITUATION SOLUTIONS: Cleaner does not move. 1. Backwash and/or clean filter. Empty all baskets. This should help your cleaner attain the Oscillator is very slow. desired oscillation rate of 400-600 times per minute. 2. Clear all debris from oscillator chamber, hose, or vac plate by-pass (if you have one). 3. -
Page 8: About Disassembly
ABOUT DISASSEMBLY 1. Remove swivel assembly (Figure 15) from the top of Swivel "Click" at the cleaner by turning it 1/4-turn counterclockwise assembly this point and pulling straight up on it. 2. Turn cleaner upside down. Remove 4 screws and remove lower body assembly from shroud. -
Page 9: About Assembly
ABOUT ASSEMBLY 1. Put both white seals in the oscillator; hold them in place. 2. Install the oscillator on the long gear shaft. Install the ratchet gear on the shaft so that the teeth engage the ratchet on the oscillator. Install the spring, ratchet drum, pinion gear (large gear first), and cam (gear end first) on the shaft (See Figure 21). -
Page 10: Repair Parts
Repair Parts Optional Accessories Vacpole Unidapt Handle No. GW9019 1897 0795 Part Part Description Swivel Assembly GW9012 Bumper GW9502 Bumper Insert Kit (Set of 4) GW9520 Screw Kit (4 short, 2 long) GW9504 Shroud GW9501 Brush Ring GW9505 Oscillator Chamber Cap GW9506 Cam Kit (2 &... -
Page 11: About Maintenance
ABOUT MAINTENANCE AND CARE • If necessary to remove oscillator, see "Disassembly", Hazardous suction. Stop pump before Page 8. attempting to clean pool cleaner. • Don’t store the cleaner with the hose connected to the • Keep skimmer basket and pump strainer basket clean cleaner body or with the hose coiled. -
Page 12: Warranty
2 Years Footpad and Seal Flaps - 1 Yr FOR A PARTICULAR PURPOSE, SHALL NOT EXTEND BEYOND THE DURATION OF THE APPLICABLE EXPRESS Cleaners: Great White 2 Years WARRANTIES PROVIDED HEREIN. * Commercial and multi-family application. Some states do not allow the exclusion or limitation of incidental...


Need help?
Do you have a question about the GW9500 and is the answer not in the manual?
Questions and answers