Kenmore Elite KKEB1.3HSS - 1.3 HP Blender with Single Serve Cup Manual
- Use & care manual (11 pages)
Advertisement
IMPORTANT SAFEGUARDS
When using electrical appliances, basic safety precautions should always be followed, including the following:
- READ all instructions
![shock hazard]() To protect against the risk of electric shock, do not put Hand mixer in water or other liquid.
To protect against the risk of electric shock, do not put Hand mixer in water or other liquid.- Close supervision is necessary when any appliance is used by or near children.
- UNPLUG from outlet when not in use, before putting on or taking off parts and before cleaning.
- AVOID contact with moving parts. Keep hands, hair, clothing, as well as spatulas and other utensils away from all accessories during operation to reduce the risk of injury to persons and/or damage to the hand mixer.
- DO NOT operate any appliance with a damaged cord or plug, or after the appliance malfunctions or has been dropped or damaged in any manner. Take the appliance to a qualified service dealer or repair.
![burn hazard]()
![shock hazard]()
The use of attachments not recommended or sold by the manufacturer may cause fire electric shock or personal injury.- DO NOT use outdoors.
- DO NOT let the cord hang over the edge of the table or counter.
- Keep hands and utensils out of container while blending to reduce the risk of severe injury to persons or damage to the blender. A scraper may be used, but must be used ONLY when the blender is not running.
- Blades are sharp. Handle carefully.
- To reduce the risk of injury, never place cutter-assembly blades on base without jar properly attached.
- ALWAYS operate blender with cover in place.
- When blending hot liquids remove measuring cup from the two-piece lid. Do not fill jar beyond 3-cup level.
![shock hazard]() To protect against electrical shock this appliance is equipped with a cord having a 3-prong grounding-type plug for insertion into a proper grounding-type receptacle DO NOT alter the Plug for use in a 2-prong receptacle. lf the plug will not fit into a receptacle, have the proper receptacle installed by a qualified electrician.
To protect against electrical shock this appliance is equipped with a cord having a 3-prong grounding-type plug for insertion into a proper grounding-type receptacle DO NOT alter the Plug for use in a 2-prong receptacle. lf the plug will not fit into a receptacle, have the proper receptacle installed by a qualified electrician.- A short power supply cord (or detachable power supply cord) is to be provided to reduce risks resulting from becoming entangled in or tripping over a longer cord. This appliance is equipped with a short power supply cord.
- This product is designed for household use only.
 To protect against the risk of electric shock, do not put Hand mixer in water or other liquid.
SAVE THESE INSTRUCTIONS!
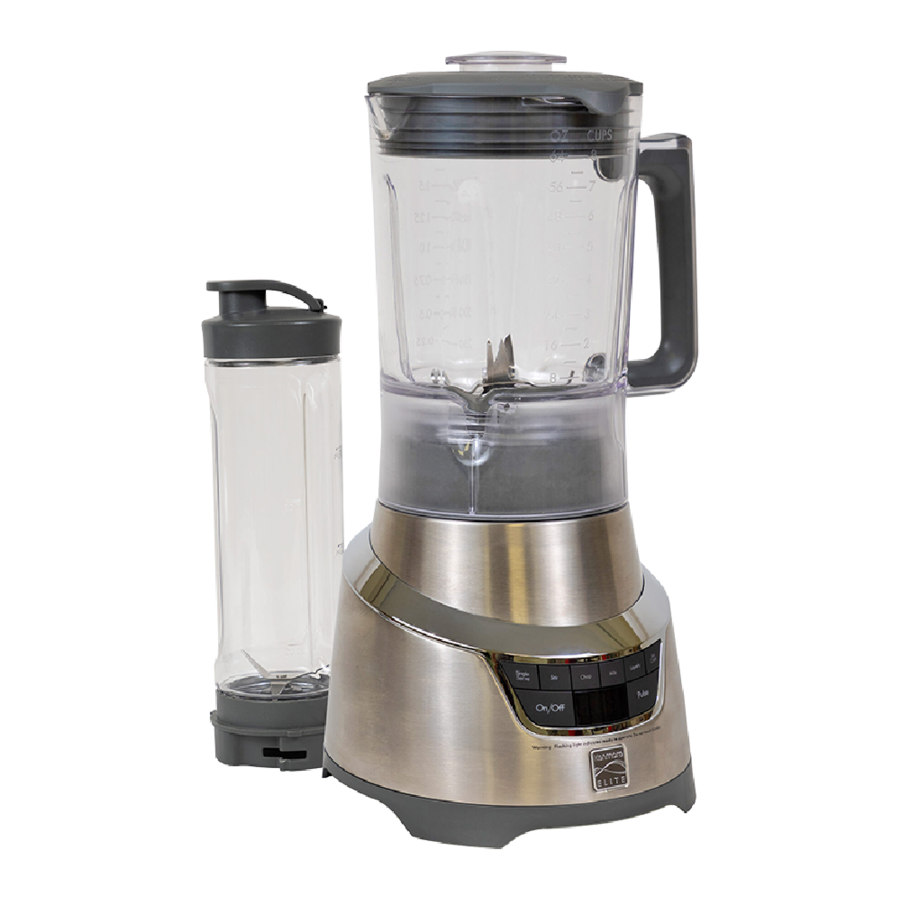
PARTS AND FEATURES

PREPARING YOUR DEVICE
- Before assembling your blender, wipe blender base with a warm sudsy cloth, then wipe clean with a damp cloth. Dry with a soft cloth. Wash blender jar, lid, and blades in warm, sudsy water. Rinse and wipe parts dry.
![]()
NEVER place blender motor base in water or other liquid.
![]()
Blades are sharp. Handle carefully - Align the guide ribs inside the jar collar with the guide grooves on the motor base and lower the jar securely into place.


Injury Hazard
Unplug mixer before touching beaters or other accessories. Failure to do so, can result in broken bones, cuts or bruises.
CONTROL PANEL
Your blender has been designed to work in a variety of ways to suit your blending needs. You can easily control its blending function by means of the control panel buttons: Single Serve, Stir, Chop, Mix, Liquefy, Ice Crush and Pulse Single Serve and Pulse allow intermittent operation. Stir, Chop, Mix and Liquefy are continuous operation in an ascending scale of speed from Stir (slowest) to Liquefy (fastest). Ice Crush contains a programmed series oof short operation bursts and pauses followed by a continuous blending period.

OPERATING YOUR DEVICE
- Place Blender motor base on a dry, level, stable surface.
- Set jar assembly into place on motor base.
- Place the food solids and liquids to be blended into the jar and put the lid on the jar before blending. Secure the lid onto the jar by snapping the Lid Lock Flaps over the tabs on the side of the jar. Be sure the measuring cup is in place in the middle of the lid.

NOTE - For easy lid removal, hold hand over Lock Flap on one side of lid. With other hand, release Lock Flap on other side of lid and lift lid up. - Plug power cord into a standard 120-V, 60 Hz AC-only, 3-prong electrical outlet. Press the On/Off button to turn on the blender controls. The blue LED will flash 0:00 for the timer, and the On/Off button words will flash.
![]()
Always rest one hand on top of blender jar with lid securely in place when operating blender.


UNIT FUNCTIONS
When a function button is pressed, the function operates continuously (except Ice Crush) at one speed for a 1 minute cycle and then stops. Press the button again to turn the function off prior to 1 minute. To reactivate the function past the 1 minute cycle, simply repress the button.
NOTE - Once the On/Off button is pressed, the button and window display will go out if no function button is pressed within 2 minutes.
SINGLE SERVE
Use SINGLE SERVE function only when the Single Serve Cup is inserted onto the motor base. See USING THE SINGLE SERVE CUP section in this Use & Care Guide.
STIR, CHOP, MIX or LIQUEFY
Press the On/Off button. The button words will flash and timer will flash 0:00 in window. Press Stir, Chop, Mix or Liquefy function button to start blender blade rotation. Timer will count up to 1 minute and blender will stop. Press On/Off or function button at any time during cycle to cancel operation.
ICE CRUSH
Press the On/Off and then the Ice Crush button. the Blender will spin for one second and rest for two seconds. This will repeat 5 times. The blender will then run continuously for 45 seconds and then turn off. See CRUSHING ICE in BLENDER TIPS AND TECHNIQUES section for further ice crushing details.
PULSE MODE
The blender has a Pulse function that is controlled by pressing one of the other function buttons after the Pulse button has been pressed. To run the blender intermittently (pulse mode) rather than continuously, first press the PULSE button. The PULSE button words will illuminate. P will flash in the display window. Now select, press and hold the Stir, Chop, Mix or Liquefy button. When you release the button the blender will stop and turn off. Press the Pulse button again if you want to leave Pulse operation.
MEASURING CUP LID HOLE
To add food or pour liquid into the jar while blender is in operation, remove the measuring cup in the middle of the lid.
Add the ingredients through the hole in the middle of the lid, and then replace the measuring cup

After adding ingredients, DO NOT allow the blender to run without the lid and measuring cup securely in place. The speed of the blades will throw contents high up in the jar, and without the lid could spill out.
Do not touch blades. Always turn blender o and wait until blades have stopped rotating before removing jar or lid.

When removing jar from motor base after recent blender operation, avoid contact with the metal gear on the underside of the blade assembly. The gear will be hot from use.
USING THE SINGLE SERVE CUP
- Insert the appliance plug into an appropriate wall socket.
- Fill the single serve cup with desired food and secure the blade assembly lid onto the cup as shown.
![]()
- Turn the single serve cup upside down and place it onto the motor base, aligning the tabs on the cup with the motor base. Press the On/Off button. The Single Serve button words will flash 3 times and then go out. The On/Off button words and the timer in the window display will begin flashing.
- Press the Single Serve button to start blending. The timer in the window display will count the number of seconds each time the Single Serve button is pressed. Operate blender with Single Serve button until ingredients are satisfactorily blended. Press On/Off button to leave Single Serve function.
- Rotate the single serve cup counterclockwise and take it out from the motor base.
![]()
- Turn the single serve cup over and rest it on a flat surface. Replace the blade assembly with the drinking lid.
![]()


Raise the cap on the drinking lid to drink the blended contents directly out of the cup.
DEVICE TIPS AND TECHNIQUES
- For quicker, easier blending, cut food into 2-in. long pieces before adding to blender jar. To chop or grate either fresh or frozen fruit, cut fruit into pieces about 3/4 -inch long.
- To best circulate foods or fruit that are to be blended with liquid, pour the liquid into the jar first, then add the solid foods or fruit.
- The following tasks cannot be performed efficiently with a blender: beating egg whites, whipping cream, mashing potatoes, grinding meats, mixing dough, and extracting juices from fruit and vegetables.
- The following items should never be placed in the blender jar, as they can cause damage: bones, large pieces of solid frozen foods, or dense, tough foods such as turnips.
CRUSHING ICE
- To crush ice, ALWAYS have liquid in the jar. Start out with 2 cups of liquid, and add about 2 cups of ice cubes. Hold one hand firmly on the lid. Push the Ice Crush button.
- If more ice is needed, remove the measuring cup in the middle of the lid and add cubes one at a time through the hole in the lid. DO NOT CRUSH ICE WITHOUT LIQUID.
Failure to follow all of the above directions can result in damage to the blades, jar, blender motor, and possibly result in personal injury.
CARE AND CLEANING
- Before cleaning, unplug the blender.
- Rinse parts (jar with fixed blade assembly, jar lid and measuring cup, and single serving cup blade assembly) immediately after blending for easier clean up.
- All removable parts can be washed by hand or in a dishwasher. The jar lid and measuring cup, and single serve lid and blade assembly should be placed in the top rack only. Disassemble all parts from each other before placing in the dishwasher. The jar with fixed blade assembly and single serve cup are bottom rack dishwasher-safe. Do not place the jar or any other parts in boiling liquids.
![]()
The blender blades are sharp.
Be very careful when washing them by hand to avoid being cut. - The motor base is designed to be resistant to liquids. If liquids spill into the motor base:
- Unplug the motor base.
- Wipe with a damp cloth and dry thoroughly.
- NEVER immerse the motor base in water.
- Do not use abrasive scouring pads or cleaners on motor base as finish may become scratched or damaged.

Documents / ResourcesDownload manual
Here you can download full pdf version of manual, it may contain additional safety instructions, warranty information, FCC rules, etc.
Download Kenmore Elite KKEB1.3HSS - 1.3 HP Blender with Single Serve Cup Manual
Advertisement

Need help?
Do you have a question about the Elite KKEB1.3HSS and is the answer not in the manual?
Questions and answers