Advertisement
IMPORTANT SAFEGUARDS
Read all instructions.
When using electrical appliances, basic safety precautions should always be followed to reduce the risk of fire, electric shock, and/or injury to persons, including the following:
- Read all instructions. Use this product only as described in this manual.
- Keep the packaging material (cardboard, plastic, etc.) out of the reach of children (danger of asphyxiation or injury).
- To protect against fire, electric shock, and injury to persons, do not immerse cord, plug or Grinder in water or other liquid.
- Close supervision is necessary when any appliance is used by or near children.
- Always use the appliance on a dry, level surface.
- Do not place the appliance near the edge of a bench or table during operation. Vibration during operation may cause the appliance to move.
- Do not place on or near a hot gas or electric burner, or in a heated oven.
- Do not let cord hang over edge of table or counter, or touch hot surfaces.
- Avoid contact with moving parts.
- Check the bean hopper for presence of foreign objects before using.
- Do not put any substances other than coffee beans and Grinder cleaner into the Grinder.
- Unplug Grinder from outlet when not in use, before putting on or taking off parts, and before cleaning.
- Do not use appliance without lid properly placed on hopper.
- The use of attachments not sold or recommended by OXO may cause fire, electric shock or injury.
- Do not leave the appliance unattended when in use.
- This appliance is not intended for use by young children without supervision. Young children should be supervised to ensure that they do not play with the appliance.
- Regularly inspect the power plug, power cord, burrs and appliance for any damage. Do not operate if damaged in any way or after the appliance malfunctions. Immediately cease use of the appliance and visit www.oxo.com or call OXO Customer Service for replacement, repair or adjustment.
- This appliance is for household use only. Do not use the appliance for anything other than its intended purpose as described in this book. Do not use outdoors. Do not use in moving vehicles or boats.
- To avoid an electrical circuit overload, do not use any high wattage appliance on the same circuit as this appliance.
![]()
Shock Hazard: This appliance has a polarized plug (one wide blade) that reduces the risk of electric shock. The plug fits only one way into a polarized outlet. Do not defeat the safety purpose of the plug by modifying the plug in any way or using an adapter. If the plug does not fit, reverse the plug. If it still does not fit, have an electrician replace the outlet. Do not plug this appliance into an outlet with a voltage other than specified on the bottom of this appliance. Do not use an adapter with this appliance. - The length of the cord used on this appliance was selected to reduce the hazards of becoming tangled in, or tripping over a longer cord. If you need to use a longer cord, an approved extension cord may be used. The electrical rating of the extension cord must be equal to or greater than the rating of this appliance. Make sure the extension cord is arranged so that it cannot be pulled by children or tripped over..

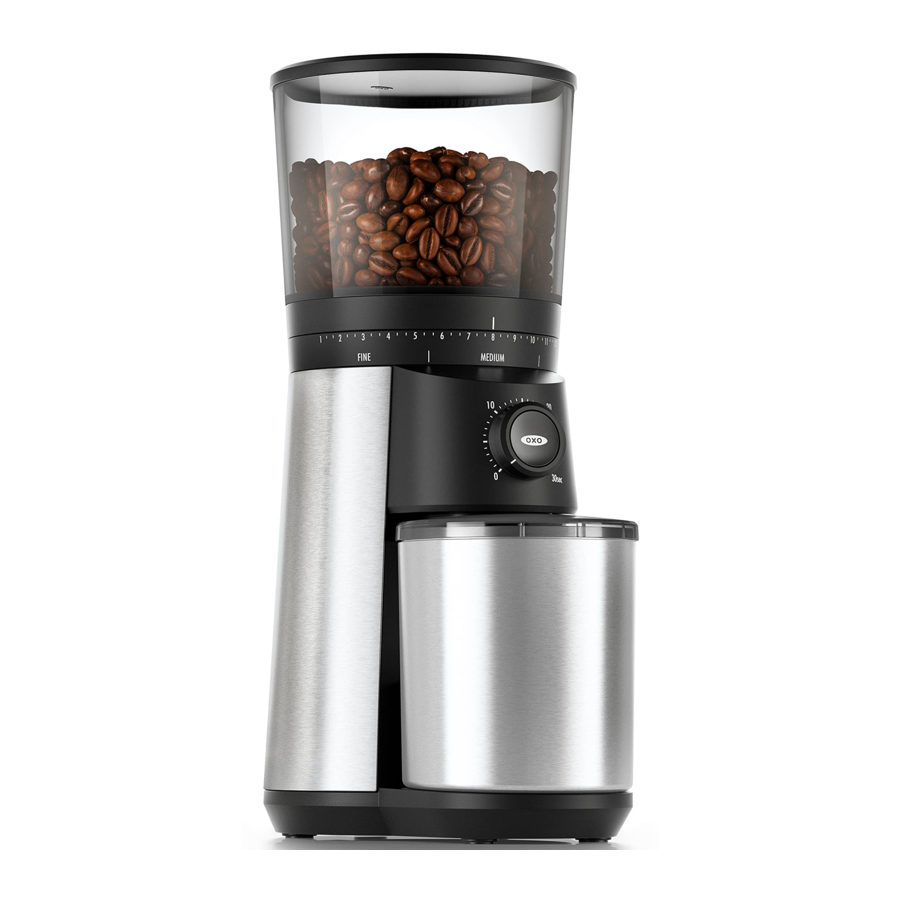
Meet Your Grinder

1Static is a common issue in coffee grinding. We've given you a stainless steel grounds container to help reduce the buildup of static electricity.
2Holds approximately 8 grams of medium-ground coffee.
Before You Begin
- Remove all packaging
- Clean and wash all parts For detailed cleaning instructions
- Replace Grounds Container Slide grounds container on base until it lightly clicks into place
- Plug in Grinder

Do not use abrasive pads, harsh chemicals or spray cleaners. These may damage the Grinder's surface. Grinder is not dishwasher safe.
A Note About Time
Grinding time depends on how much coffee you're making, your method of brewing, and how strong or mild you like your brew. The best way to find your ideal grinding time is through experimentation.
Grind Size Recommendations
| Brewing Method | Espresso | Pour Over/Drip Coffee | French Press/Cold Brew |
| Grind Size/Setting | Fine / 1-5 | Medium / 6-10 | Coarse / 11-15 |
Note: Amount of grounds will vary based on type of bean and grind size setting used. Use a scale or the scoop to weigh or measure grounds. A level scoop holds approximately 8 grams of medium-ground coffee, perfect for one cup of coffee.
Using Your Grinder

- Select Grind Size Setting
Rotate hopper to adjust grind size (1= fine, 15 = coarse).
Note: If beans are in the hopper, adjust the grind size with Grinder running to prevent jamming. - Fill Hopper With Coffee Beans
Remove hopper lid and fill with coffee beans. Replace lid. Ensure grounds container is securly in place. - Select Desired Grinding Time
Turn dial to set timer. When using Grinder for the first time, start by grinding beans for 10 seconds. Adjust as needed. Dial will remain at selected time — no need to reset. - Press OXO Button to Start
The Grinder automatically stops after running for the selected time. Press the OXO button to stop at any time
![warning]() Never fill the grounds container past the fill line. Excess grounds can block the grounds chute and jam the burrs.
Never fill the grounds container past the fill line. Excess grounds can block the grounds chute and jam the burrs.
Cleaning Your Grinder
Always unplug your Grinder before cleaning it. Any service or maintenance other than cleaning should be performed by an authorized service representative. For more information, call OXO Customer Service at (800) 545-4411.
- Run Grinder
Run for 10 seconds with an empty bean hopper to clear beans/grounds from the burrs and grounds chute. Unplug Grinder.
![shock hazard]() Always unplug power cord from outlet before removing or replacing hopper.
Always unplug power cord from outlet before removing or replacing hopper. - Remove hopper
Turn knob inside hopper counterclockwise until it clicks. The "trap door" feature will keep beans securely inside while hopper is removed. - Remove upper burr
Clear any coffee beans from between Grinder burrs. To remove upper burr, lift metal burr handle and twist counterclockwise, then pull straight up.
![]()
Note: Only the upper burr is removable. - Clean burrs and grounds chute
Use a small bristle brush. Never use water or other liquids to clean the inside of the Grinder/burrs. - Replace upper burr
Align indents in burr with tabs inside lower burr. Turn clockwise until burr clicks into place. To test burr installment, pull handle straight up. If properly positioned, burr will stay in place.
Note: If coffee beans have not been emptied from area around burrs, burr may not lock into place properly. - Wipe base and body
Clean Grinder exterior with a soft, damp cloth. - Replace hopper
Align the tabs of the hopper with the notches in the Grinder. Press down gently and turn knob clockwise until hopper locks into place.
 Always unplug power cord from outlet before removing or replacing hopper.

Hand wash hopper and grounds container
Rinse and dry thoroughly.

Coffee Scoop is Dishwasher Safe
Do not use abrasive pads, harsh chemicals or spray cleaner chemicals to clean. These may damage the surface of the appliance. Do not put any part of your Grinder in the dishwasher.
Caring for Your Grinder
Let cool
Let Grinder cool for at least two minutes after each use. If the Grinder is used for more than five minutes within a 10-minute period, it may become inoperable for 30 minutes. Once the Grinder has cooled down, you may resume use.
Clear grounds from chute
If you don't grind regularly, make sure to clear the ground coffee from the chute before each use. To clear the chute: Run your Grinder for 10 seconds before adding beans. Discard the grounds. You are now ready to grind your fresh beans.
Use fresh beans
Old/dry beans will create static which can result in dust sticking to walls of Grinder. Do not store beans in the bean hopper for an extended period of time.
We recommend grinding only coffee in this Grinder.
Never fill the grounds container past the fill line. Excess grounds can block the grounds chute and jam the burrs.
Troubleshooting
| Problem | Possible Cause | Solution |
| Grinder does not start after pressing the OXO button | Grinder not plugged in | Plug power cord into 110V/120V outlet. |
| Bean hopper is not attached properly | Gently remove and reinstall bean hopper ensuring it is seated properly. | |
| Grinder overheated | Wait 30 minutes to allow Grinder to cool down; after 30 minutes try the Grinder again. | |
| Grinder stops mid-cycle | Foreign item trapped in burrs | Unplug power cord and remove hopper. Inspect hopper, upper and lower burrs. Remove any foreign objects. |
| Grinder overheated | Wait 30 minutes to allow Grinder to cool down; after 30 minutes try the Grinder again. | |
| Grinder is louder than normal | Grinder blocked with foreign item | Unplug power cord and remove hopper. Inspect hopper and burrs, and remove any foreign objects. |
| One type of roast continuously clogs Grinder | Dark, oily beans can Use a small flexible brush to clean grounds chute, clog grounds chute | Unplug power cord and remove hopper. where grounds dispense. If problem persists, use coffee Grinder cleaning tablets. |
| Grounds container overfills and coffee grounds back up into chute | Grinder is clogged | Unplug power cord and remove hopper. Use a small flexible brush to clean grounds chute. |
| Grinder starts but produces no coffee grounds | Hopper trap door is blocked | Check to ensure there are no beans stuck in the hopper's trap doors. |
| Grounds chute is clogged | Use a small flexible brush to clean grounds chute. | |
| Beans not flowing out of hopper | Remove hopper lid and stir beans in hopper with a wooden spoon to help separate oily beans that can stick together. Replace lid and try grinding again. If problem persists, empty hopper completely and wipe down the inside with a damp cloth or hand wash with warm, soapy water. Let dry before refilling with beans. | |
| Upper burr is not fully locked into place | Turn handle clockwise firmly to ensure burr is locked in place; it will click into place when secure. | |
| More static than usual | Many factors contribute to the amount of static created while grinding coffee, including different types of coffee beans and roasts and the humidity level in the air. | Wipe down surfaces with damp towel and dry thoroughly. You may also let the grounds rest in the grounds container for 30 seconds before moving the container from the Grinder. This will allow the static to dissipate. |
| Grounds container not seated properly underneath chute | Ensure Grinder base is completely clear of coffee grounds. Position grounds container onto base, pushing back until it's fully seated under chute. The container will lightly click into place. |
For the most up-to-date troubleshooting information, visit www.oxo.com

Documents / Resources
References
Download manual
Here you can download full pdf version of manual, it may contain additional safety instructions, warranty information, FCC rules, etc.
Advertisement


Need help?
Do you have a question about the BREW Conical Burr Coffee Grinder and is the answer not in the manual?
Questions and answers