Table of Contents
Advertisement
Quick Links
INSTRUCTIONS
CAMCORDER
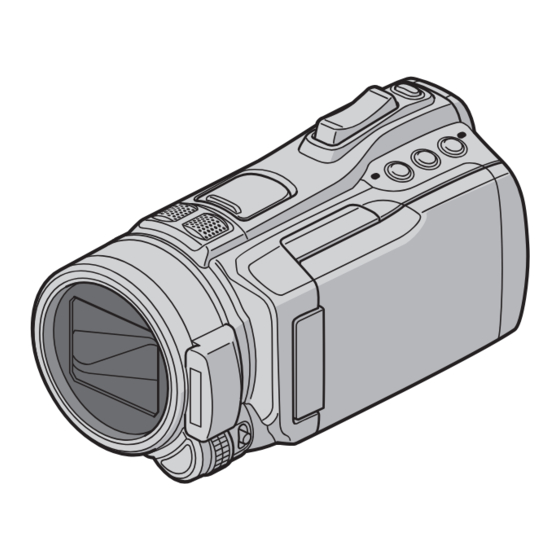
GZ-HM400EK
Read these INSTRUCTIONS to
enjoy your CAMCORDER.
For more details on the
operations, refer to the
Advanced INSTRUCTIONS in
the supplied CD-ROM.
Dear Customers
Thank you for purchasing this camcorder.
Before use, please read the safety
information and precautions contained in
pages 2 and 3 to ensure safe use of this
product.
EN
Advertisement
Table of Contents

Related Manuals for JVC GZ-HM400EK


Summary of Contents for JVC GZ-HM400EK
- Page 1 INSTRUCTIONS CAMCORDER GZ-HM400EK Dear Customers Thank you for purchasing this camcorder. Before use, please read the safety information and precautions contained in pages 2 and 3 to ensure safe use of this product. Read these INSTRUCTIONS to enjoy your CAMCORDER.
- Page 2 Safety Precautions IMPORTANT (for owners in the U.K.) Caution on Replaceable lithium battery Connection to the mains supply in the United The battery used in this device may present a fire Kingdom. or chemical burn hazard if mistreated. DO NOT cut off the mains plug from this Do not recharge, disassemble, heat above 100°C equipment.
- Page 3 If you wish to dispose of this product, please enjoyment, it is strongly recommended that you visit our web page http://www.jvc.eu to obtain obtain permission beforehand.) information about the take-back of the product.
- Page 4 The battery pack is not Battery Pack charged at the time of purchase. AC Adapter To AC Outlet (110V to 240V) CAUTION Fire or injury may result if batteries NOT approved by JVC are used. Only use the batteries specified on page 41.
- Page 5 Date/Time Setting Select the city closest to the area where you use Open the LCD monitor to the camcorder turn on the camcorder Power button Select [ON] if daylight LCD monitor saving time is observed Select [YES] within 10 seconds Slide your finger up and down on the sensor.
- Page 6 Video recording CAUTION Before recording an important scene, it is recommended to conduct a trial recording. Slide the mode switch to select (video) mode Select recording mode (REC) The mode changes when you press the button. The auto recording indicator appears. Start recording Remaining space on the recording media...
- Page 7 Playing back Select playback mode (PLAY) The mode changes when you press the button. Select the desired file Index screen Select (Touch OK) Playback screen To perform operations such as forward search or reverse search (Z p. 22) To view files on TV (Z p. 24) ...
-
Page 8: Table Of Contents
Contents GETTING STARTED USING WITH TV Accessories ..........10 Viewing Files on TV ........24 Shoe Adapter ..........10 Connection with TV........24 Preparing the Remote Control ...... 11 Playback Operation ........25 Attaching the Core Filter to the USB Cable ... 11 COPYING Index ............ - Page 9 After the menu is displayed on the LCD recorded data to a DVD or other recording monitor: media for storage. JVC will not be responsible for any lost data. Make a trial recording Before the actual recording of important data,...
-
Page 10: Getting Started
GETTING STARTED Accessories Shoe Adapter An optional microphone or light can be attached to the shoe adapter. Slide the shoe cover AP-V21M in the direction of the AC Adapter Power Cord arrow to reveal the shoe adapter mounting socket. Mount the accessory BN-VF815U shoe adapter. -
Page 11: Preparing The Remote Control
Preparing the Remote Control Attaching the Core Filter to the USB Cable A battery is included inside the remote control at the time of purchase. The core filter reduces interference caused Remove the insulation sheet before use. when connecting to other devices. Connect the end of the cable with the core filter to the Beam Effective Area camcorder. -
Page 12: Index
Index NOTE • Be careful not to cover 2, 3, 5, and C during shooting. • The LCD monitor can rotate 270°. -
Page 13: Tripod Mounting
Camcorder Remote Control ! Power Button Q Infrared Beam Transmitting Window # SD Card Slot R ZOOM (T/W) Buttons (Zoom in/Out) $ OPEN knob (Z p. 18) S Up Button % Speaker T Skip Backward Button & PLAY/REC Button (Z p. 19, 20, 22, 23) U Left Button ( SNAPSHOT Button (Z p. -
Page 14: Indications On Lcd Monitor
Indications on LCD Monitor During both Video and Still Image During Video Recording Only Recording 1 . 1 1 . 2 0 0 9 1 6 : 5 5 ! Mode Indicator # High Speed Recording Indicator ! Selected Recording Mode Indicator $ Upload Mode Indicator (Z p. - Page 15 During Video Playback During Still Image Playback 1 . 1 1 . 2 0 0 9 1 6 : 5 5 1 . 1 1 . 2 0 0 9 1 6 : 5 5 ! Mode Indicator ! Mode Indicator # High Speed Recording Indicator # Quick Review Indicator (Z p.
-
Page 16: Necessary Settings Before Use
Necessary Settings before Use NOTE Charging the Battery Pack • You can also use the camcorder with just the AC adapter. • The actual recording time may shorten Close the LCD monitor to turn off the depending on the recording environment, camcorder. -
Page 17: Language Setting
Select [ON] if daylight saving time is Language Setting observed. The language on the display can be changed. Open the LCD monitor to turn on the camcorder. Touch MENU. Set the date and time. Select [DISPLAY SETTINGS]. Change the setting by using the touch &... -
Page 18: Other Settings
Other Settings Close the SD card cover. Using an SD Card The camcorder is programmed to record on the built-in memory when it is shipped from the factory. You can change the recording medium to an SD card. • Operations are confirmed on the following SD cards. -
Page 19: Recording/Playback
RECORDING/PLAYBACK Recording Files Video Recording Slide the mode switch to select Press PLAY/REC to select the (video) mode. recording mode. SNAPSHOT Press START/STOP to start recording. Approximate remaining time for recording You can also start/stop recording by selecting [REC] on the LCD monitor. (On-screen recording control) To stop recording NOTE... -
Page 20: Still Image Recording
Recording Files (Continued) Still Image Recording Slide the mode switch to select Press PLAY/REC to select the (still image) mode. recording mode. Press and hold SNAPSHOT halfway. indicator becomes green when the captured image is focused. Press SNAPSHOT fully to take a still image. -
Page 21: Zooming
NOTE Zooming • The flash does not work during [CONTINUOUS SHOOTING] and [BRACKETING]. Preparation: • The flash does not work with the following • Select mode. SCENE SELECT settings. • Select the recording mode. [LANDSCAPE] [TWILIGHT] [NIGHT] [SNOW] [BEACH] [FIREWORKS] [SUNSET] Zoom in Zoom out •... -
Page 22: Playing Back Files
Playing Back Files Video Playback Press PLAY/REC to select the Slide the mode switch to select (video) mode. playback mode. The index screen appears. Select the desired file. To move to the previous or next page Operations during Video Playback — ... -
Page 23: Still Image Playback
Still Image Playback Press PLAY/REC to select the Slide the mode switch to select (still image) mode. playback mode. The index screen appears. Select the desired file. To move to the previous or next page Operations during Still Image Playback ... -
Page 24: Viewing Files On Tv
USING WITH TV Viewing Files on TV This camcorder is designed to be used with NOTE high-definition or PAL-type color television • When connecting to the HDMI cable, the signals. It cannot be used with a television of a image or sound may not appear on the TV different standard. -
Page 25: Playback Operation
To connect using the AV connector Playback Operation AV Connector After the connection with TV is completed Turn on the camcorder and the TV. Set the TV to its VIDEO mode. (Only when connecting the camcorder to the VCR/DVD recorder) Turn on the VCR/DVD recorder, and set the VCR/DVD recorder to its AUX input mode. -
Page 26: Copying
USB Connector DC Connector NOTE • It is recommended to use the JVC DVD burner CU-VD50 or CU-VD3. If you use CU-VD20 or CU-VD40, the recording time may take approx. 2 times longer than the time that is described in the instruction manual of DVD burner. - Page 27 • When connecting to a BD burner, use a USB cable with Mini-A(Male) to B(Male) Select [EXECUTE]. connectors. JVC’s QAM0852-001 (optional) is • The files are copied on the disc. When recommended. Refer to page 35 for information [COMPLETED] appears, touch OK.
-
Page 28: Dubbing Files To A Vcr/Dvd Recorder
Copying Files (Continued) Press the < (Power) button for To quit the screen more than 2 seconds to turn on the 1) Select [QUIT]. camcorder. 2) When [QUIT?] appears, select [YES]. Set the VCR/DVD recorder to its AUX NOTE input mode. -
Page 29: Pc Operation
PC OPERATION Creating a Disc Using a PC You can copy the data from the camcorder and Click [Easy Installation]. create a disc using a PC. Installing the software to the PC System Requirements Windows Vista Windows Vista ® Follow the on-screen instructions. Home Basic (SP1) Home Premium (SP1) Click [Next]. - Page 30 Creating a Disc Using a PC (Continued) Making Backup on the PC Click [All volume in camcorder] and click [Next]. Preparation: • Install the software to the PC. • Make sure that enough free space is left in the PC’s HDD. •...
- Page 31 Making User Lists to Arrange the Click the recording date. Files You can make a user list of a certain subject (such as Travel, Athletic meet) and put the files related to the subject into the user list. Preparation: Make backup on the PC. The files recorded on the day are displayed.
- Page 32 Creating a Disc Using a PC (Continued) Copying Files to a disc Drag and drop the file, into the part at the bottom and click [Next]. Everio MediaBrowser supports 3 disc formats. Select the one that suits your purpose. DVD-Video Suitable if you will give the disc disc: to your friends and relatives.
- Page 33 [EXTMOV] management information are [DEM_XXXX.MTS] [DEM_XXXX.MTS] saved. [MOV_XXXX.MTS] [MOV_XXXX.MTS] [PRIVATE] Contains management information [PRIVATE] [JVC] files of event and/or disc creation [AVCHD] [AVCHD] information for the files taken with [BDMV] [BDMV] the camcorder. [STREAM] [STREAM] Video file in AVCHD format [XXXXX.MTS]...
-
Page 34: Using With A Portable Media Player
Using with a Portable Media Player Turning on the Export Mode To cancel the export setting Select the file and select [ ] again. You can easily transfer videos recorded in To quit the screen export mode to iTunes . -
Page 35: Uploading Files To Websites
Use of this software is authorized according to the terms of the software license. When contacting the nearest JVC office or agency in your country (refer to the JVC Worldwide Service Network at http://www.jvc-victor.co.jp/english/worldmap/index-e.html) about this software, please have the following information ready. -
Page 36: Further Information
Before requesting service, consult the following chart. If the solutions indicated in the chart do not solve the problem, consult your nearest JVC dealer or JVC service center for instructions. Refer also to the FAQ of new products on JVC’s website. - Page 37 If a malfunction occurs in the built-in memory ! P erform [FORMAT BUILT-IN MEM.]. (All data is deleted.) # If this does not solve the problem, contact the JVC customer service for repairs. To reset the camcorder when it does not operate normally ...
-
Page 38: Warning Indications
Set the clock. If the message still appears after setting the SET DATE/TIME! clock, the battery for the clock has been depleted. Consult your nearest JVC dealer. • Be sure to use JVC battery packs. COMMUNICATING ERROR • Set [REC MEDIA FOR VIDEO] to [BUILT-IN MEMORY]. CANNOT USE IN •... -
Page 39: Specifications
Specifications General AC Adapter Power supply Power requirement DC 11 V (Using AC adapter) AC 110 V to 240 V , 50 Hz/60 Hz DC 7.2 V (Using battery pack) Output § Power consumption DC 11 V , 1 A Approx. - Page 40 Specifications (Continued) h: hour/m: minute Approximate recordable time (for video) Recording medium Built-in Memory SDHC Card 32 GB 4 GB 8 GB 16 GB 32 GB Quality 2 h 56 m 20 m 40 m 1 h 20 m 2 h 40 m 4 h 9 m 30 m 1 h 00 m...
- Page 41 h: hour/m: minute Required charging/recording time (approx.) Battery pack Charging time Recording time BN-VF808U 1 h 50 m 1 h 10 m* BN-VF815U 2 h 40 m 2 h 25 m* (Provided) BN-VF823U 3 h 40 m 3 h 40 m* * When the monitor backlight is set to [STANDARD] mode.
-
Page 42: Cautions
Cautions Battery Pack Recording Medium • Be sure to follow the guidelines below The supplied battery pack is a Terminals to prevent corruption or damage to your lithium-ion battery. Before using recorded data. the supplied battery pack or an • Do not bend or drop the recording medium, optional battery pack, be sure or subject it to strong pressure, jolts or... - Page 43 Avoid using the unit of Japan, Limited is: ... in places subject to excessive humidity or dust. JVC Technical Services Europe GmbH ... in places subject to soot or steam such as near Postfach 10 05 04 a cooking stove.
-
Page 44: Terms
Terms AC Adapter ............16 On-screen Recording Control ......19 AV Connection ..........25, 28 On-screen Zoom Control ........21 Battery Pack ..........16, 41, 42 Playback Zoom ..........22, 23 BD/DVD Backup ..........26 Portable Media Player ........34 BD/DVD Burner ..........26 Quick Review ..........19, 20 CD-ROM ............10, 29 Clock Adjust ............16 Recordable Time ..........40 Component Connection ........24...
Need help?
Do you have a question about the GZ-HM400EK and is the answer not in the manual?
Questions and answers