Table of Contents
Advertisement
Available languages
Available languages
Advertisement
Table of Contents

Subscribe to Our Youtube Channel
Related Manuals for Sears Kenmore 85130


Summary of Contents for Sears Kenmore 85130
- Page 1 INSTALLATION INSTRUCTIONS INSTALLATION INSTRUCTION MANUAL MODEL No. 85130 85138 85139 85140 Read and save these installation instructions. MICROWAVE OVEN *Sold by Sears Canada Inc. Printed in Korea SEARS. CANADA INC., TORONTO. M5B 2B8 Part No. 3828W5U0134...
-
Page 2: Your Safety First
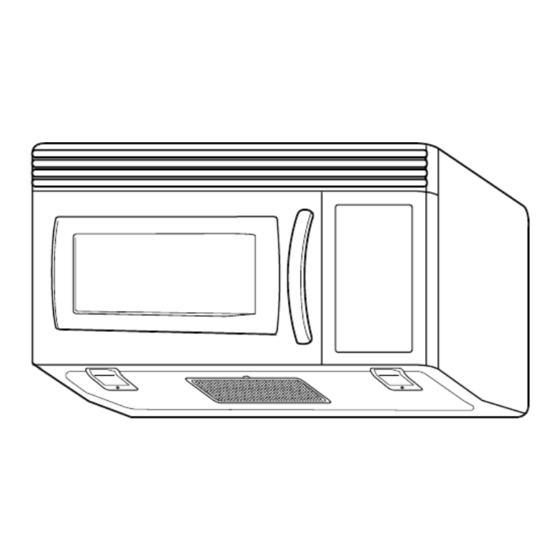
YOUR SAFETY FIRST BEFORE YOU START • Proper installation is the installer's responsibility! – Read the entire manual before you begin. The Model number label is located on the oven front. See Figure 1. Mounting plate is located on back side of microwave oven. See Figure 2. BE SURE TO READ THE FOLLOWING SAFETY INSTRUCTIONS: Model Number Label Mounting... - Page 3 YOUR SAFETY FIRST • THIS APPLIANCE MUST BE GROUNDED! – If there is an electrical short circuit, grounding reduces the risk of electrical shock by providing an escape wire for the electric current. This appliance is equipped with a cord having a grounding wire with a grounding plug.
- Page 4 YOUR SAFETY FIRST • MAKE SURE YOU HAVE ENOUGH SPACE AND SUPPORT. – Mount the oven against a flat, vertical wall, so it is supported by the wall. The wall should be constructed of minimum 2" x 4" wood studding and 3/8" thick drywall or plaster/lath. –...
-
Page 5: Parts, Tools, Materials
PARTS, TOOLS, MATERIALS THE FOLLOWING PARTS ARE SUPPLIED WITH THE OVEN: NOTE: Depending on your ventilation requirements, you may not use all of these parts. One power cord clamp and Damper/duct connector One dark-colored mounting screw (for roof-venting or wall-venting installation) (to hold the power cord) Not Actual Size Actual Size... - Page 6 PARTS, TOOLS, MATERIALS YOU WILL NEED THE FOLLOWING TOOLS AND MATERIALS FOR THE INSTALLATION: Carton or other heavy material for covering the counter top. Clear tape Stud finder or thin nail. (for taping the templates to the wall) Keyhole saw (for the power cord hole) Saber saw (for cutting vent holes for roof or wall venting) Electric drill...
-
Page 7: Step 1: Electrical Connections
STEP 1: PREPARE THE ELECTRICAL CONNECTIONS W A R N I N G AVOID ELECTRICAL SHOCK! THIS APPLIANCE MUST BE GROUNDED! 1. Locate the grounded electric outlet for this oven in the cabinet above the oven, as shown in Figure 4. Upper NOTE: The outlet should be on a circuit dedicated to the Cabinet... -
Page 8: Step 2: Prepare The Venting System
STEP 2: PREPARE THE VENTING SYSTEM NOTE: The ductwork you need for outside ventilation is not included with your oven. The standard ductwork fittings and length are shown in Figure 9, page 9. W A R N I N G -F I R E H A Z A R D THIS OVEN MUST BE PROPERLY VENTED! You may vent your oven in one of three ways: Roof-venting If your oven is located on an outside wall near the roof, as in Figures 6 (3... -
Page 9: Standard Fittings
STEP 2: PREPARE THE VENTING SYSYTEM STANDARD FITTINGS NOTE: If the existing duct is round, you must use a rectangular-to-round adapter, with a rectangular 3" extension duct installed between the damper assembly and the adapter to prevent the exhaust damper’s sticking. DUCT LENGTH The total length of the duct system, including straight duct, elbows, transitions, wall or roof caps must not exceed the equivalent of 140 feet. -
Page 10: Step 3: Prepare The Venting Blower
STEP 3: PREPARE THE VENTING BLOWER Your microwave oven is shipped with the blower assembled for roof venting. You need to adjust the blower if you want wall-venting or room-vented (recirculating) installation. W A R N I N G ELECTRICAL SHOCK HAZARD! UNPLUG UNIT BEFORE WORKING ON IT. •... -
Page 11: Wall-Vented Installation
STEP 3: PREPARE THE VENTING BLOWER WALL-VENTED INSTALLATION: back plate blower unit 1. Remove one blower unit mounting screw and one blower plate screw. Remove the blower plate from blower plate cabinet. See Figure 13. mounting screws 2. Carefully lift the blower unit out of the microwave oven. 3. - Page 12 STEP 3: PREPARE THE VENTING BLOWER blower plate mounting screws exhaust ports blower unit exhaust ports Figure 17 blower unit mounting screws Figure 18 ROOM-VENTED (Recirculating) INSTALLATION: 1. Remove one blower unit mounting screw and one blower plate screw. Remove the blower plate from blower unit cabinet.
-
Page 13: Step 4: Prepare The Wall And Upper Cabinet For Installation
STEP 4: PREPARE THE WALL AND UPPER CABINET FOR INSTALLATION MEASURE AND TACK / TAPE UP THE TEMPLATES 1. Using a plumb line and (metal) measuring tape, find and mark the vertical center line on the back wall, as in Figure 22. 2. -
Page 14: Drill The Holes In The Wall And Upper Cabinet
STEP 4: PREPARE THE WALL AND UPPER CABINET FOR INSTALLATION DRILL THE HOLES IN THE WALL AND UPPER CABINET. W A R N I N G BE VERY CAREFUL WHEN DRILLING HOLES INTO THE WALL. Electrical wires could be concealed behind the wall covering and if the drill hits them you could get an electric shock. - Page 15 STEP 5: INSTALL THE MOUNTING PLATE TO THE WALL THE OVEN MUST BE CONNECTED TO 3/16" Hole on Studs AT LEAST ONE WALL STUD. 5/8" Hole on Drywall Only " Minimum 66 1. Draw a vertical line on the wall at the center of the From the Floor 30″...
- Page 16 STEP 5: INSTALL THE MOUNTING PLATE TO THE WALL TO PREPARE THE REAR WALL CUTOUT OPENING AND EXHAUST ADAPTOR/MOUNTING PLATE FOR WALL-VENTED: 1. Place the mounting plate against the rear wall as described in step 5 item 1 (page 15). 2.
-
Page 17: Step 6: Attach The Oven To The Wall
STEP 6: ATTACH THE OVEN TO THE WALL W A R N I N G power cord You will need two people to lift this microwave. Failure to use more than one person could result in personal power cord injury. hole 1. - Page 18 STEP 6: ATTACH THE OVEN TO THE WALL 6. Roof vented installation:See Figure 33 Install ductwork through the vent opening in the upper cabinet. Complete the venting system through damper the roof according to the method needed. See “PREPARE THE VENTING SYSTEM,” STEP 2 on the page 8.
-
Page 19: Instructions Pour L'installation
L’INSTALLATION NO. DE MODÈLES 85130 85138 85139 85140 Lisez toutes ces instructions et conservez-les pour toute référence utltérieure FOUR À MICRO-ONDES *Vendu par Sears du Canada Imprimé en Corée SEARS DU CANADA INC., TORONTO M5B 2B8 No. de Pièce 3828W5U0134... -
Page 20: Votre Sécurité Avant Tout
VOTRE SÉCURITÉ AVANT TOUT AVANT DE DÉBUTER • Une installation adéquate est la responsabilité de l’installateur! – Veuillez lire tout le manuel avant de débuter. L’étiquette du numéro de modèle est située à l’avant du four à micro-ondes. Référez-vous au schéma 1. La plaque de montage est située à l’arrière du four. Référez-vous au schéma 2. ASSUREZ-VOUS DE LIRE LES MESURES DE PRÉVENTION SUIVANTES : Étiquette du numéro de modèle Plaque de... - Page 21 VOTRE SÉCURITÉ AVANT TOUT • VOUS DEVEZ EFFECTUER LA MISE À LA TERRE DE CET APPAREIL! – S’il se produit un court-circuit, la mise à la terre réduit les risques de choc électrique en procurant une voie de sortie à l’alimentation électrique.
- Page 22 VOTRE SÉCURITÉ AVANT TOUT • ASSUREZ-VOUS D’AVOIR SUFFISAMMENT D’ESPACE ET DE SOUTIEN. – Montez le four sur un mur vertical et plat afin qu’il puisse être soutenu par le mur. Le mur devrait être monté sur des madriers d’au moins 2 po. x 4 po. et fait de plâtre, lattes ou de feuilles de gypse d’une épaisseur minimale de 3/8 po. –...
-
Page 23: Pièces, Outils, Matériaux
PIÈCES, OUTILS, MATÉRIAUX VOICI LA LISTE DES PIÈCES INCLUSES : REMARQUE : il se peut que vous n’ayez pas à utiliser toutes ces pièces, selon vos besoins de ventilation. Une attache pour cordon d’alimentation et une vis de montage de couleur foncée Connecteur de conduit/registre (pour retenir le cordon d’alimentation) (pour la ventilation du toit ou du mur) - Page 24 PIÈCES, OUTILS, MATÉRIAUX VOICI LA LISTE DU MATÉRIEL QUE VOUS AVEZ BESOIN POUR FAIRE L’INSTALLATION : Un morceau de carton ou tout autre matériel épais pour recouvrir le comptoir. Un détecteur de madriers ou un long clou mince. Du ruban adhésif transparent (pour coller les gabarits au mur) Une scie passe-partout (pour le trou du fil d’alimentation) Scie sauteuse (pour couper les...
- Page 25 ÉTAPE 1 : PRÉPARA RACCORDEMENTS ÉLECTRIQUES A V E R T I S S E M E N T ÉVITEZ LES RISQUES DE CHOC ÉLECTRIQUE! CET APPAREIL DOIT ÊTRE MIS À LA TERRE! 1. Placez la prise de courant avec mise à la terre de ce four dans l’armoire au-dessus du four, tel qu’illustré...
- Page 26 ÉTAPE 2 : PRÉPAREZ LE SYSTÈME DE VENTILATION REMARQUE : les conduits dont vous avez besoin pour évacuer l’air ne sont pas inclus avec votre four. Vous trouverez au schéma 9 de la page 9 les types de raccords et les longueurs de conduits. AVERTISSEMENT-DANGER D INCENDIE LA VENTILATION DE CE FOUR DOIT ÊTRE ADÉQUATE! Il y a trois façons d’aérer adéquatement votre four :...
- Page 27 ÉTAPE 2 : PRÉPAREZ LE SYSTÈME DE VENTILATION RACCORDS STANDARDS REMARQUE : si le conduit présent est rond, vous devez utiliser un adaptateur de forme “rectangulaire à rond”, en posant un conduit d’extension rectangulaire de 3 po. entre l’ensemble du registre et l’adaptateur afin d’empêcher le registre d’évacuation de coller.
- Page 28 ÉTAPE 3 : PRÉPARER LA SOUFFLERIE DU VENTILATEUR Votre four à micro-ondes vous est expédié avec un ventilateur pour toiture. Vous devez ajuster la soufflerie si vous désirez la ventilation murale ou dans la pièce (recirculation d’air). A V E R T I S S E M E N T RISQUE DE CHOC ÉLECTRIQUE! •...
- Page 29 ÉTAPE 3 : PRÉPARER LA SOUFFLERIE DU VENTILATEUR INSTALLATION DE LA VENTILATION PAR LE MUR : Plaque de Unité de soufflerie la arrière 1. Retirez une vis de montage et une vis de la plaque de la soufflerie. Retirez la plaque de la soufflerie du boîtier. Vis de montage Référez-vous au schéma 13.
- Page 30 ÉTAPE 3 : PRÉPARER LA SOUFFLERIE DU VENTILATEUR Vis de montage de la plaque de la soufflerie Évents d´évacuation de la soufflerie Évents Vis de la plaque d´évacuation montage de la soufflerie Schéma 17 Schéma 18 VENTILATION DANS LA PIÈCE(recirculation d’air) INSTALLATION: Unité...
- Page 31 ÉTAPE 4 : PRÉPARATION DU MUR ET DE L’ARMOIRE SUPÉRIEURE AVANT L’INSTALLATION MESUREZ ET BROCHEZ/COLLEZ LES GABARITS AVEC DU RUBAN ADHÉSIF 1. À l’aide de la ligne à plomb et du ruban à mesurer (en métal), trouvez et marquez la ligne verticale du centre sur le mur arrière, tel que démontré...
- Page 32 ÉTAPE 4 : PRÉPARATION DU MUR ET DE L’ARMOIRE SUPÉRIEURE AVANT L’INSTALLATION PERCEZ LES TROUS DANS LE MUR ET DANS L’ARMOIRE SUPÉRIEURE A V E R T I S S E M E N T SOYEZ TRÈS PRUDENT LORSQUE VOUS PERCEZ DES TROUS DANS LE MUR.
-
Page 33: Étape 5 : Installation De La Plaque De Montage
ÉTAPE 5 : INSTALLATION DE LA PLAQUE DE MONTAGE LE FOUR À MICRO-ONDES DOIT ÊTRE Trou de 3/16 po dans les montants Trou de 5/8 po dans un mur FIXÉ À AU MOINS UN MONTANT DU MUR. en placoplâtre seulement 1. - Page 34 ÉTAPE 5 : INSTALLATION DE LA PLAQUE DE MONTAGE Préparation du découpage dans le mur arrière pour l'installation du ventilation murale : 1. Placez la plaque de montage contre le mur arrière, comme expliqué à l'étape 5, point 1. 2. À l'aide d'un crayon, faites des marques dans les trous F, G, H et I.
- Page 35 ÉTAPE 6 : INSTALLER LE FOUR AU MUR A V E R T I S S E M E N T Deux personnes sont requises pour soulever ce Fil d'alimentation four à micro-ondes. Vous risquez de vous blesser gravement si vous tentez de soulever seul l’appareil.
- Page 36 ÉTAPE 6 : INSTALLER LE FOUR AU MUR 6. Installation avec ventilation sur le toît(Référez-vous au schéma 33) : installez le système de conduit à travers damper l’ouverture de l’armoire. Passez le système de ventilation par le plafond selon la méthode de votre choix. Voir le schéma 34.
Need help?
Do you have a question about the Kenmore 85130 and is the answer not in the manual?
Questions and answers