Table of Contents
Advertisement
Advertisement
Table of Contents

Related Manuals for Telia F1

Summary of Contents for Telia F1
- Page 1 Trådløst bredbånd Telia F1 Router User Guide...
- Page 2 Telia F1 Router User Guide Dear customer, Thank you for choosing the fast and high-quality Telia Trådløst Bredbånd. We wish you a pleasant experience and productive work! This guide will help you to connect to the Internet and to the router for self-administration via web...
- Page 3 Service Set Identifier - the name of the wireless network Transmission Control Protocol Unshielded Twisted Pair - unshielded twisted pair (Ethernet network cable) Wide Area Network - in this case the TELIA Internet Network WiFi Wireless fidelity –wireless technology WLAN...
-
Page 4: Table Of Contents
Contents 1 ROUTER..............................4 2 EQUIPMENT PORTS AND LAMPS ......................5 2.1 Router ports ..........................5 2.2 Router LEDs and buttons ......................6 3 WIRELESS COMMUNICATION ........................7 3.1 Connect to WiFi with QR code ....................8 4 CONFIGURE THE ROUTER USING A BROWSER ..................8 5 RESTORE FACTORY SETTINGS ......................11 6 CHANGE WIRELESS SETTINGS ...................... -
Page 5: Router
1 ROUTER The Telia F1 Router (hereinafter referred to as the Router) is a device designed to provide Internet services. Telia F1 Features Description For Fixed wireless access 3x 1GE and 1x 2.5GE Not in use for Trådløst Bredbånd IP telephony (SIP) -
Page 6: Equipment Ports And Lamps
2 EQUIPMENT PORTS AND LAMPS 2.1 Router ports Description Not in use for Trådløst Bredbånd 1-4 (four) yellow LAN ports for PC, etc. Physical speed of ports 1-3 of 1Gb/s, 4 port physical speed up to 2.5Gb/s WAN for Fixed wireless access el. -
Page 7: Router Leds And Buttons
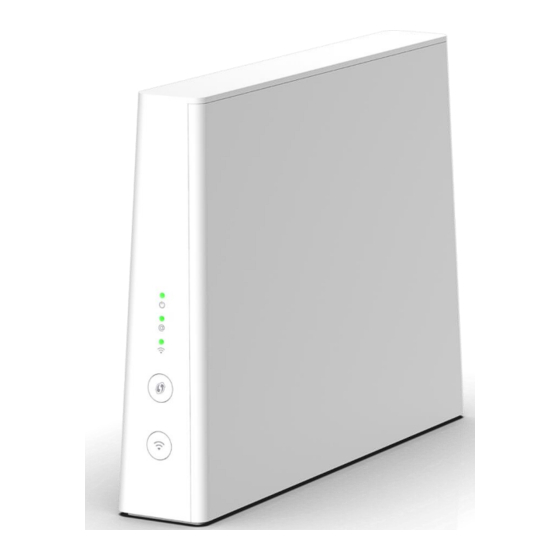
2.2 Router LEDs and buttons Description Status LED ( Internet LED (@) WiFi LED ( WPS pairing button ( WiFi .button ( ) Status LED ( ): Color Condition Meaning Green Solid Power is on and there is a physical connection to the Ethernet WAN port Solid The router system is loading... -
Page 8: Wireless Communication
Internet LED (@): Color Condition Meaning Solid Internet is working, no data is being sent/received. Green Blinking The Internet is working and data is being sent/received. Solid No internet connection Router is off or Internet is provided in Bridge mode WiFi LED ( ): Color Condition... -
Page 9: Connect To Wifi With Qr Code
The router has two wireless access points: The 5 GHz access point provides extremely high transmission speeds, is less sensitive to interference, and allows IEEE 802.11a/n/ac/ax wireless devices to be connected. The 2.4 GHz access point allows you to connect IEEE 802.11b/g/n/ax wireless devices. Use this access point for wireless devices that do not support 5 GHz. - Page 10 ❸ You can now change the settings to suit your needs. • When connected, the initial WEB page of the router will open. Selecting the Advanced interface gives you more control. When connecting for the first time, the following options will be offered: •...
- Page 11 Note: The factory password (Web admin password) is unique to each device and is not displayed elsewhere on the router sticker, so the password cannot be changed. In the initial window we see the following cards: • System Info- provides information about the router (Global Information), system date / time (Time Management), router administration tools - Restart / Reset / Semi-Reset (Configuration) •...
-
Page 12: Restore Factory Settings
• Local Network- Possibility to change lan and guest configuration: IP address / subnet and shared IP address ranges. If necessary, disable the DHCP server. Static IP-MAC address associations (Add new static lease) can also be described • Devices - provides a list of all devices connected to the local network •... - Page 13 In the radio section you can view a number of parameters, some of which you can change: • disable / enable 2.4 GHz or 5 GHz radio module (Enable: ON / OFF) • Choose what standards the radio module will work with (Standard) 2.4GHz has two choices of 802.11b/g/n or 802.11b/g/n/ax 5Ghz also has 2 options for 802.11a/n/ac...
-
Page 14: Lan Ip / Subnet Change, Dhcp Server Management, Ip Reservation
In the WPS section you can: initiate WPS pairing by pressing the button • If you want to entertain your guests via Wi-Fi but do not want their WiFi devices to access your LAN, activate the Guest access point: a. in the AP section, select Guest under Home b. -
Page 15: Static Ip Address Binding On A Lan Dhcp Server
Note. If you change the IP address of the Router (to eg 192.168.0.1), you will lose control of the WEB. To continue managing / configuring the Router, you must log in with a new IP address (e.g. http://192.168.0.1), and update the connection to the Router so that the computer obtains an IP address from the subnet again. -
Page 16: Computers Connected To The Internal Network
9 PORT FORWARD CONFIGURATION This function is not supported on Trådløst Bredbånd! 10 UPNP CONFIGURATION This function is not supported on Trådløst Bredbånd? Note. Telia F1 in factory configuration UPnP and NAT-PMP settings are off... -
Page 17: Router And Network Diagnostics
11 ROUTER AND NETWORK DIAGNOSTICS • In the main window, click on the name Diagnostics • In the additional window that appears, you will find three sections: o Ping & Traceroute- you will be able to take Ping and Traceroute tests o Connection- automatic communication check is performed o Network- statistics for each slot are displayed o Igmpproxy- IP multicast information is displayed... - Page 18 a. Time of Day Access Control In the area, click the Add New Rule button b. Configure the limited days and hours of the week for the selected LAN device (MAC address), select Block in Mode c. Save with the Save button.
Need help?
Do you have a question about the F1 and is the answer not in the manual?
Questions and answers