Advertisement
- 1 INTRODUCTION
- 2 Included
- 3 ABOUT THE BUSHNELL RXS-100 RED DOT REFLEX SIGHT
- 4 MOUNTING YOUR RXS-100 SIGHT
- 5 PARTS GUIDE
- 6 INSTALLING THE BATTERY
- 7 REPLACING THE BATTERY
- 8 SWITCHING POWER ON/OFF
- 9 ADJUSTING DOT BRIGHTNESS
- 10 SIGHTING IN/ZEROING YOUR RXS-100 SIGHT
- 11 OPERATION UNDER EXTREME CONDITIONS
- 12 TROUBLE SHOOTING
- 13 Technical Specifications
- 14 Documents / Resources
INTRODUCTION
Thank you for purchasing your new Bushnell® RXS-100 Red Dot Reflex Sight (illuminated optical sight).
This manual will help you optimize your viewing experience by explaining how to utilize the sight's features and how to care for it. Read the instructions carefully before using your sight.

DO NOT LOOK AT THE SUN THROUGH THE OPTICS, AS PERMANENT EYE DAMAGE OR EVEN BLINDNESS MAY RESULT.
Included

- Battery Door Tool
- W/E Adjustment Tool
- 3mm Hex Wrench for Mounting Screws
- CR2032 Lithium Battery
- Weaver Style Low-profi le Mounting Base
- Microfi ber Cleaning Cloth
- Protective Shroud Cover
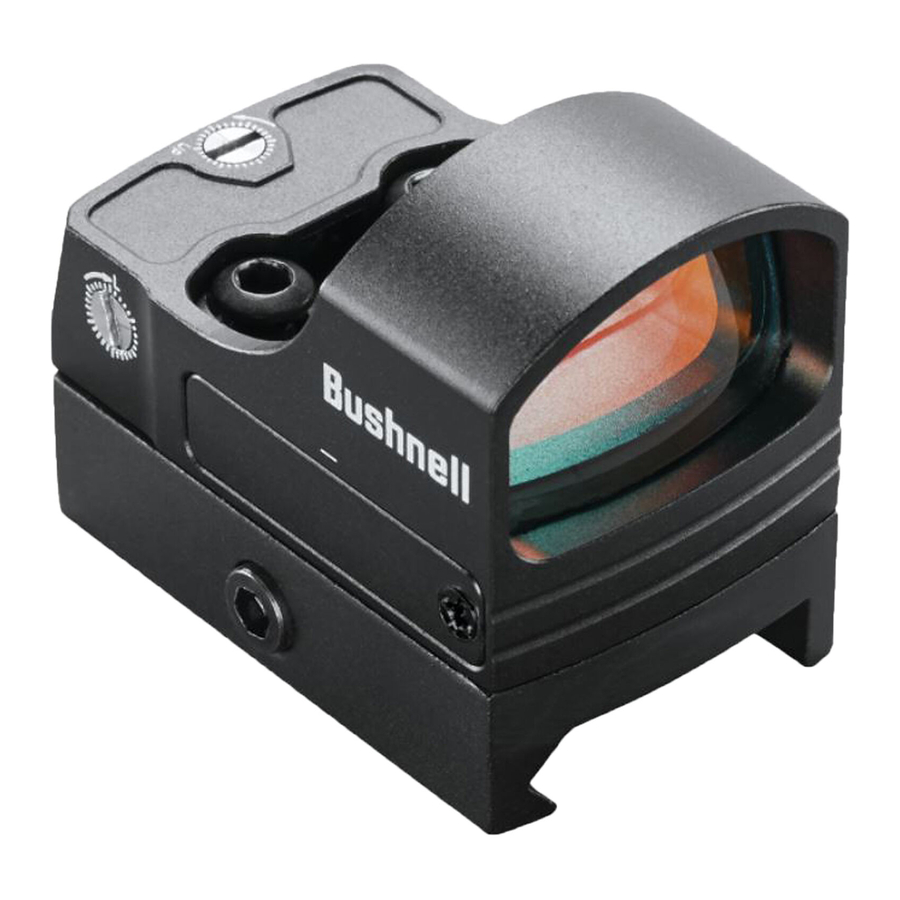
ABOUT THE BUSHNELL® RXS-100 RED DOT REFLEX SIGHT
The RXS-100 is a state-of-the-art reflex sight, designed for hunting, plinking and target shooting with pistols, rifles, and shotguns. It may be directly mounted to compatible pistol slides (or accessory mounts) with the Leupold DeltaPoint® footprint or it may be mounted to accessory rails using the included low-profile Weaver style mount. It features a battery life of more than 5,000 hours (at a typical brightness level of "3")*, a 1-hour auto-timeout feature to prolong battery life (timer countdown resets if any button is pressed), battery access without unmounting, and a 4 MOA dot with 8 brightness settings.
 * Note: battery life in use will vary depending on the brightness settings used, freshness and quality of the battery, ambient temperature, and other factors.
Your sight's illuminated reticle has been pre-focused so the aiming point always appears in focus on the target. By comparison, open sights force you to choose to focus your eye on only the rear sight, front sight or target-or settle for a blurry compromise.
Your sight can be easily used with both eyes open (eye relief is unlimited), increasing the shooter's awareness of the surrounding environment and providing faster target acquisition due to the limited parallax design, as the dot follows the movement of the user's eye while remaining fixed on the target. Engineered for greater speed and accuracy, the sight allows you to focus on the target rather than a reticle, thus increasing accuracy. The Bushnell RXS-100 sight's electronic illuminated dot has been pre-focused to be parallax free at 50 yards. Parallax error is minimized, from close range up to 100 yds.
MOUNTING YOUR RXS-100™ SIGHT
BEFORE MOUNTING YOUR SIGHT, REPLACING ITS BATTERY, OR REMOVING OR PERFORMING MAINTENANCE ON THE SIGHT, BE SURE ACTION IS OPEN, CLIP OR MAGAZINE IS REMOVED AND A ROUND IS NOT IN THE CHAMBER. DO NOT ATTEMPT ANY WORK UNTIL THE FIREARM HAS BEEN CLEARED AND DETERMINED TO BE SAFE.
IF THE SIGHT IS NOT MOUNTED FAR ENOUGH FORWARD, ITS REARWARD MOTION MAY INJURE THE SHOOTER WHEN THE FIREARM RECOILS.
Your new sight, even with its technologically advanced design and features, will not perform at its best if not properly mounted. One of the most important contributing factors to the accuracy of your firearm and sight combination is the quality of the mount and care taken during its installation. The RXS-100 will fit all bases compatible with Leupold® DeltaPoint® Pro sights*. It also includes a low-profile base for mounting on Weaver or Picatinny style accessory rails. Make sure the base you use is manufactured specifically for your pistol, rifle or shotgun. Be sure the base is properly installed and securely fastened according to the manufacturer's instructions for your safety.
The base should create a uniform horizontal and vertical mounting platform. Be sure it is properly installed and securely fastened according to the manufacturer's instructions for your safety. There is no set eye relief for your RXS-100 sight; therefore, you should provide at least three inches of clearance between the viewing lens and your eye when in the shooting position. While 1X power/magnification sights have unlimited eye-relief, always ensure there is an adequate amount of space between your face and the optic to account for firearm recoil.
If mounting directly to an adapter plate (common for optics ready pistols), follow the manufacturer's instructions for attaching the adapter plate. Unless otherwise specified by the 3rd party manufacturer, be sure to remove any clearance by gently forward loading the plate during fastening. When attaching the red dot sight to the adapter plate, gently forward load the sight body while fastening. This both removes clearances that may otherwise shift under recoil and improves the chances of repeatable mounting should the red dot sight need to be removed for any reason such as maintenance.
If using the included mount, loosen the socket head hex screw on the mount of the sight using the provided tool, so that the locking bar can clamp around the rail. Position the mount on your base rail so that the cross-bolt engages a slot. Forward load the mount, so that the crossbolt engages the forward face of the slot and clearance is removed. Tighten the hex bolt.

Do not overtighten. Torque should be set to 15 lbf*in (pound-force inch) for the two sight-to-base screws and 20 lbf*in for the base cross-bolt.
*Leupold® and DeltaPoint® are registered trademarks of Leupold & Stevens, Inc.
PARTS GUIDE

- Battery Compartment Cover
- Mount
- Lens
- Elevation Adjustment
- Windage Adjustment
- Sight-to-Base Screws
- Brightness Up/Down Buttons
Remember, not all sights or scopes are compatible with all mounts on all firearms. If there is any doubt in your mind, you should seek the advice of your local retailer or gunsmith.
INSTALLING THE BATTERY

Negative (-) side facing up,
Positive (+) facing down
Before powering on your sight for the fi rst time, you will need to activate the installed CR2032 lithium battery by removing the protective plastic disc covering the battery. Loosen the screw on the right side of the battery cover (see photo, right). The screw is retained by an O-ring to help keep it in place. Note: Screw and mating door hole has a machined countersink to hold screw fl ush to the cover. When reinstalling cover after activating or changing battery, ensure the cover's tab end (opposite of screw end) is seated into the sight's mating pocket before attempting to engage the screw. Remove plastic disc. Replace battery cover, replace and tighten screw. Verify that red dot is on and functional by switching the power on and increasing the brightness if necessary (see "Switching Power On/Off", and "Adjusting Dot Brightness" below).
REPLACING THE BATTERY
Should your reticle grow dim or not light at all, replace the battery, following the installation procedure described above.
SWITCHING POWER ON/OFF
To turn the sight's power on, press either the Brightness "Up" or "Down" button (7, Parts Guide) for 1 second, then release. To switch off the sight, hold the Brightness "Down" button for 3 seconds.
ADJUSTING DOT BRIGHTNESS
To adjust the intensity level of the dot reticle, press the Brightness "Up" button to increase brightness, or the Brightness "Down" to decrease brightness. The RXS-100 provides 8 levels of brightness from the dimmest to the brightest setting. Each single press of the Up or Down button will increase or decrease brightness by one level. The highest two settings are visible even in bright daylight conditions. Please note that the highest settings are often too bright for indoor or dark ambient conditions and will produce some stray refl ections from the LED package. This is normal and if experienced, the brightness should be reduced to compensate.
SIGHTING IN/ZEROING YOUR RXS-100™ SIGHT
SINCE THIS PROCEDURE INVOLVES LIVE FIRE, IT SHOULD BE DONE AT AN APPROVED RANGE OR OTHER SAFE AREA. CHECK BORE FOR OBSTRUCTIONS. AN OBSTRUCTED BORE MAY CAUSE INJURY TO YOU AND OTHERS NEAR BY. ENSURE THE CONDITION OF THE FIREARM AND CONFIRM IT IS UNLOADED BEFORE MAKING ADJUSTMENTS OR INSPECTING THE BORE. EYE & EAR PROTECTION IS RECOMMENDED.
Initial sighting in of the RXS-100 can be done using a bore sighter per the manufacturer's directions, or by visual bore sighting through a rifle's barrel with the bolt removed as follows, referencing a target at a 25 to 50 yard distance (7-15 yards for handgun. An alternative for pistol mounted applications is to use the iron sights as reference for initial/rough dot alignment). Boresighting should be done at your local shooting range rather than at home due to safety concerns, as well as the convenience of being able to confirm final sight-in with live fire while you are there.
Provided care is taken to ensure all mounting adapters and red dot sight are forward mounted, and fastened according to instruction, undesired point-of-aim shift from mounting will be negligible.
- With the sight mounted, rest the firearm on a suitable support. Switch on the sight's power and adjust brightness as needed until dot is easily visible.
- Start by sighting along the barrel and aim at a target 25 to 50 yards away (7-15 yards for handgun). View through your RXS-100 sight, and gently rotate the windage and/or elevation adjustments, using the supplied tool to align the red dot with the target as seen along the barrel. The adjustments are detented, with 1 MOA per click and 30 MOA per full revolution.
- You should then fire a test shot to determine the point of impact of your weapon. If you are not hitting your aiming point (the center of the target) make an adjustment by turning the windage and/or elevation screw(s) in the direction you want the impact to move.
Final sighting in can then be done, once the RXS-100 has been bore sighted as described above. Make sure you load the same ammo you plan to use most often with the sight. - Repeat step 3, making adjustments as needed, to bring the point-of-impact into alignment with the point-of-aim.
- Once satisfied with basic alignment, it is recommended to repeat step #3 again except with using the center of 3 or 5 shot groups as the overall estimate for alignment confirmation.
OPERATION UNDER EXTREME CONDITIONS
- Extreme heat (humid or dry): no special procedures required. Avoid prolonged exposure if possible.
- Extreme cold: extreme low temperature may shorten battery life.
- Salt air: similar to a firearm, ensure a light film of oil is maintained on all exposed steel components (e.g. fasteners).
- Dust storms and sand storms: keep the sight covered when it is not being used.
- Ensure that battery cover is securely fastened in place-hand tighten only. Clean lens with lens paper/cloth (see caution note below) and wipe the sight dry as soon as possible after exposure to any form of moisture. The sight is not waterproof or sprayproof.
![]()
The lenses shall never be cleaned with fingers but with lens paper/cloth, to avoid scratching the glass. - Use a soft brush or "canned air" to remove any loose debris (sand, grass, etc.) prior to using the lens paper or soft clean cloth.
TROUBLE SHOOTING
Problem: Red Dot Does Not Appear
Possible Causes/Solutions:
- Discharged battery: Replace battery with a new CR2032 lithium cell.
- Battery installed incorrectly: Remove and reinstall battery with correct polarity orientation, referring to the "negative up/ positive down" marks above and below the battery compartment cover (see Parts Guide photo).
- Battery not making good contact: Clean contact surfaces and reinstall battery.
- Defective Brightness Buttons: Contact Bushnell customer service (1-800-423-3537).
Problem: Impossible To Zero
Possible Causes/Solutions:
- Adjustment screw is at its limit: Inspect alignment of mount to barrel. Note that some aftermarket (bolt-on / no gunsmithing) rails position the sight too high relative to the bore and can sometimes cause issues. This has been observed on some revolver applications.
- Impact point is moving: Inspect all sight and accessory mating connections. Ensure the firearm and ammunition is otherwise performing as expected.
Technical Specifications
SKU: RXS100
Magnification: 1x
Reticle: 4 MOA Dot
Adjustment Range: 100 MOA
MOA perRev: 30
Parallax Free Distance (Yds): 50
# of Brightness Settings: 8
Eye Relief & Field or View: Unlimited
Length (inches): 1.8
Weight (oz): 1.3*
*Note: Weight listed is with battery, but not the included base. The low-profile base weighs about 0.8 oz.

Documents / ResourcesDownload manual
Here you can download full pdf version of manual, it may contain additional safety instructions, warranty information, FCC rules, etc.
Advertisement


Need help?
Do you have a question about the RXS100 and is the answer not in the manual?
Questions and answers