Advertisement
Quick Links
Advertisement

Related Manuals for TURBO RACING P32-S

Summary of Contents for TURBO RACING P32-S
- Page 1 P32-S 2.4GHz 4CH LCD RADIO SYSTEM www.turboracinghobby.com...
- Page 2 Introduction Thank you for choosing our company's products! If this is your rst time using this remote controller, please read this manual carefully before using it and operate it follow the instructions strictly. You can also check the manual if you encounter problems during the operation.
-
Page 3: Radio Specifications
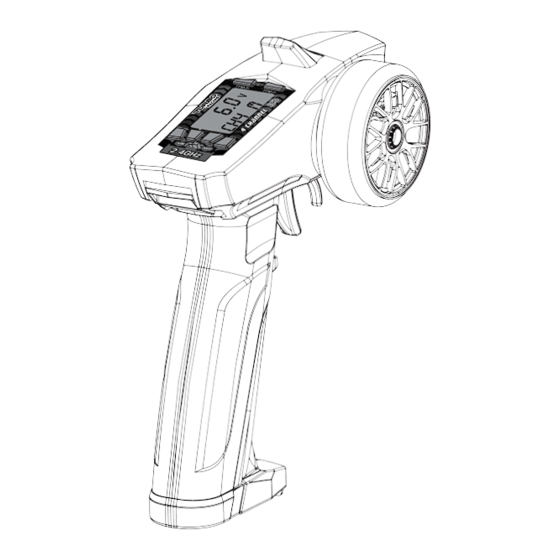
RADIO SPECIFICATIONS P32-S AAA x4 L (mm) 137.00 H (mm) 164.60 W (mm) 68.70 RECEIVER SPECIFICATIONS Receiver Gyro RX RX41 RX49 4.8 - 10.0V L x H x W (mm) Receiver RX47 4.8 - 10.0V 36x26x14 www.turboracinghobby.com... - Page 4 Functions LCD Antenna Steering wheel ST trim+ LCD Display ST trim- + button - button SEL/CH Throttle trigger Power Disassemble key Bat box 1. The LCD interface automatically turns o the light guide lamp after 10 seconds without any operation. 2.
- Page 5 CH3 key setting function: CH3 key can automatically switch between positive and negative output self-locking or non self-locking. Long press CH3 key buzzer to give a sound, indicating successful switching. (Factory default self-locking) Restore factory settings: In the startup state, long press and hold the "SEL/CH" button, the buzzer will beep once, the LCD screen will go out, and then restart.
- Page 6 Battery Installation Receiver Installation & Connection Connection(RX41) Electric powered model Steering Servo Receiver Pairing The Transmitter & Receiver(RX41)
- Page 7 (RX47) Connection User group mode A/N/B, factory default N mode. We have added three user group modes with switch adjustment, but now this feature is only available for remote control with user group mode. 伺服 (CH6) User group mode Antenna Switch 伺服...
- Page 8 Connection(RX49) Steering Servo Gyro Receiver Pairing The Transmitter & Receiver (Rx49) 1. After connecting the receiver to a power source (receiver battery or ESC) and turning it on. 2. Switch on the transmitter. 3.Connect the Bind connector to the“Pair”pins on the receiver. The LED on the receiver will flash rapidly,and then remove the Bind connector from the receiver.
- Page 9 CH4 M: M stands for middle CH4 L: L stands for base CH4 H: H stands for height...
- Page 10 Operation Fail safe function setting Please turn on the TX, then pull the TH trigger anywhere you want to and hold it, press the SW button of the receiver about 2sec,the LED should start ashing for 5sec,then release SW button and TH trigger, turn o the TX.
- Page 11 Packanging content Pemrks Model 4 channel 2.4GHz transmitter (P32-S) 4 channel2.4GHz receiver (RX41) Manual 4 channel 2.4GHz Gyro receiver Optional (RX49) 6 channel 2.4GHz receiver Optional (RX47) www.turboracinghobby.com...
Need help?
Do you have a question about the P32-S and is the answer not in the manual?
Questions and answers