Table of Contents
Advertisement
Quick Links
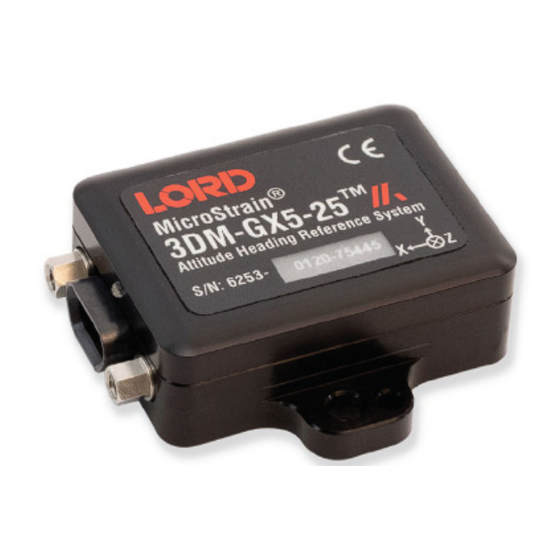
MicroStrain Quick Start Guide: 3DM-GX5-25 AHRS
The 3DM-GX5-25 Attitude and Heading
Reference System (AHRS)
lightest industrial AHRS with an Adaptive Extended Kalman
Filter available. Congratulations on your purchase.
Let's get started:
The 3DM-GX5-25 communicates through a serial
connection and is monitored by a host computer. Sensor
measurements and computed outputs can be viewed and
recorded with SensorConnect software, available as a free
download from the LORD Sensing website. Alternatively,
users can write custom software with the open source data
communication protocol, also available on the site. Data is
time-aligned and available by either polling or continuous
stream.
The sensor and connectivity kit are purchased separately.
There are two variations of the kit, USB cable (p/n 6212-
3004) and RS232 communications and global power
(p/n 6212-3001). This guide assumes that you have a
connectivity kit and will download the latest version of
SensorConnect™ software.
Step 1:
Download and install the latest SensorConnect™ software:
http://updates.microstrain.com/SensorConnect_12.3.0_x64.msi
is the smallest and
Step 2:
Unpack the sensor and connectivity kit.
Step 3:
Attach the interface cable to the sensor. If you are using the
RS232 version, you must also plug the power supply into the
power jack on the RS232 DB9 connector, and then plug it into
AC power.
Step 4:
Plug the interface cable into the appropriate computer input.
The green LED on the sensor should first blink, then pulse
slowly to indicate it is in the idle mode. Sensors are factory-
set to idle mode.
Step 5:
Start SensorConnect. The first thing you must do is create
a repository file to which you will store settings and data.
Click 'home' to bring up this screen:
Step 6:
If you are using a USB interface, the sensor will initiate
communications with SensorConnect automatically. This is
indicated by a green dot just right of the sensor name. You
will also notice that the green LED on the sensor is blinking
rapidly, indicating active communications.
Click on 'devices' to see this on screen:
Advertisement
Table of Contents

Summary of Contents for MicroStrain 3DM-GX5-25
- Page 1 MicroStrain Quick Start Guide: 3DM-GX5-25 AHRS The 3DM-GX5-25 Attitude and Heading Step 2: Reference System (AHRS) is the smallest and Unpack the sensor and connectivity kit. lightest industrial AHRS with an Adaptive Extended Kalman Filter available. Congratulations on your purchase.
- Page 2 MicroStrain Quick Start Guide: 3DM-GX5-25 AHRS Step 7: Step 9: Click on sampling, + add channel field, and Attitude If you are using RS232, click on Devices, and ‘+ Add Device’. (Euler RPY). Set data rate to 10Hz or higher.
- Page 3 MicroStrain Quick Start Guide: 3DM-GX5-25 AHRS Step 12: Your screen will look like this: Step 14: Test the linkage to the widget aircraft...pick up the sensor, and move it in 3 axes. The plane should respond. Now you know that your sensor is working, and you’re in command.
- Page 4 Now, you’re ready to put your sensor to work in your application. For sensor pinout and other details, refer to the user manual, which is found on the MicroStrain website: https://www.microstrain.com/inertial/3dm-cx5-45 Additional information about MicroStrain data communications software and related information will be found by scrolling down to DOCUMENTATION.
Need help?
Do you have a question about the 3DM-GX5-25 and is the answer not in the manual?
Questions and answers