Table of Contents
Advertisement
Quick Links
INSTALLATION & OPERATION MANUAL
CDS2000
Complete Delivery System Totalizer
DOC#: MN-CDS2000 (R1)
112 Lumber Lane
Seneca, SC 29672
(864) 882-4544
FAX: (864) 882-4457
www.turbinesincorporated.com
Manual part number 901782
Copyright 2021-2024 Turbines Inc. All rights reserved.
Information contained herein is subject to change at any time without prior notice.
Revision C – January 2023
Advertisement
Table of Contents

Summary of Contents for Turbines CDS2000
- Page 1 112 Lumber Lane Seneca, SC 29672 (864) 882-4544 FAX: (864) 882-4457 www.turbinesincorporated.com Manual part number 901782 Copyright 2021-2024 Turbines Inc. All rights reserved. Information contained herein is subject to change at any time without prior notice. Revision C – January 2023...
- Page 2 All protection features for external delivery components are intended to be used with the operator present at delivery controls without exception. Technical Improvements Turbines Incorporated may modify the technical data herein without notice. CDS2000 P a g e...
-
Page 3: Table Of Contents
Details Display ............................ 12 Prove Display ............................ 13 Modes of Operation ............................ 14 Operating Mode ............................ 14 Programming Mode .......................... 14 Prove Mode ............................. 14 Installation .............................. 15 Installation Precautions .......................... 15 Totalizer Installation Location ......................... 15 Interconnecting Cable Installation ...................... 15 CDS2000 Models ............................ 17 Operation .............................. 18 Programming .............................. 19 Setup Menu .............................. 19 Language Setup ............................ 19 Date/Time Setup (User Password Protected) .................. 19 Hardware Configuration (User Password Protected) ................ 19 Metrology Configuration (User Password Protected) ................ 20 Metrology Configuration – Metrology Selections ................ 20 Configuration – Metrology UOM ...................... 21 ... - Page 4 Loaner Mode ............................ 27 Activation Required .......................... 27 Software Updates .......................... 27 Calibration Settings .......................... 27 Diagnostics Report .......................... 28 Initialization............................ 28 Device Setup ............................ 28 Import/Export Data .......................... 28 Prove Mode (User Password Protected)..................... 28 Specifications: Hardware & Software ...................... 29 Troubleshooting ............................ 31 Illustrations .............................. 36 CDS2000 Wiring Schematic ......................... 38 CDS2000 Compatible Wiring ........................ 39 CDS2000 LPA Logic ............................ 40 CDS2000 Delivery Alarm Matrix ........................ 41 Field Calibration ............................ 42 System Block Diagram .......................... 43 Return Policy ............................... 45 CDS2000 P a g e...
-
Page 5: Warranty
Warranty Turbines Inc. of Altus, Oklahoma provides the following statement of warranty and is subject to the following terms and conditions. No other warranty or guaranty, express or implied, shall be operative or binding upon the company at any time, or under any circumstances, by Turbines Inc. -
Page 6: Description
The CDS2000 configuration settings can be reprogrammed in the field with relative ease. Programming the CDS2000 is simply a matter of selecting the desired operating criteria from an all-inclusive menu thus eliminating the need to scroll through an entire flow chart to enter or change select data. -
Page 7: Overview
When introduced to flow the turbine flowmeter generates an AC sinewave signal within the pickup coil located directly above the turbine’s rotor. The signal of the pickup coil is amplified, divided, corrected, and displayed by the CDS2000. The displayed total is corrected for temperature by sensing the... -
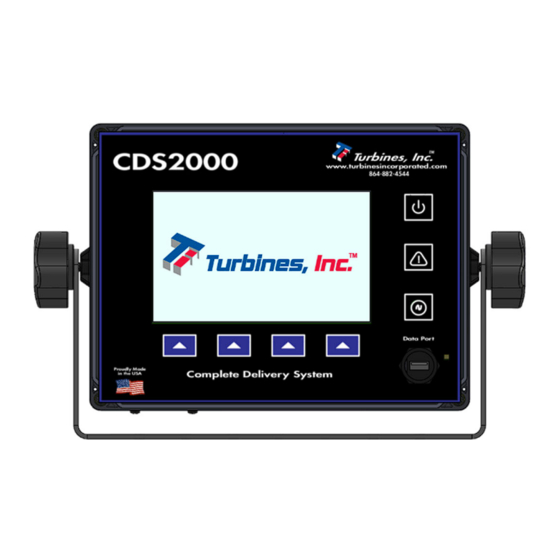
Page 8: Control Panel Indicators
Once the CDS2000 is on it can be turned off via the Power Symbol pushbutton, but two conditions must first be met. The CDS2000 will not allow itself to be turned off if it affects metrology. If there is a delivery underway, the system will not allow itself to turn off. -
Page 9: Softkeys
Revision C – January 2023 Softkeys The CDS2000 unit utilizes both soft keys and touchscreen capabilities. Softkeys are intended for daily use while the touchscreen is only necessary during configuration and setup. Please Note: touchscreen capabilities are NOT enabled during the operating mode. -
Page 10: Display Information
Revision C – January 2023 Display Information The CDS2000 has five primary displays. For example, under the Details screen there are five informative screens that can be selected using PREVIOUS and NEXT. Pressing and holding the HOLD button will keep the currently displayed screen from timing out. Please Note: when sub-menus are displayed, the PREVIOUS and NEXT softkeys are used to scroll between screens. -
Page 11: Alarms Display (Alarm Icons)
K-factor based on flow rate is available on the Detail Display. Delivery Total: The delivery total, located in the bottom left corner of the CDS2000 display, represents the cumulated total since the last Reset action. (Refer to RESET softkey Page 9) The delivery total is the total pulses generated divided by the K-factor and corrected for temperature if compensation is activated. -
Page 12: Details Display
Sensors Product Printer About The Details Display shows additional information regarding the operating conditions of the system. Details are broken into five different sections: Delivery, Sensors, Products, Printer, and About. CDS2000 P a g e | 12... -
Page 13: Prove Display
Prove Display The Prove Display must be accessed via the following steps: 1) Please Note: When the Program Enable Module (PEM) is secured to the CDS2000, the Setup Menu is disabled and access to the Prove Mode is denied. 2) While in the Operating Display, hold down both the Details and Alarms softkeys for approximately 3 seconds. -
Page 14: Modes Of Operation
The CDS2000 program offers 3 modes: Operating, Programming, and Prove. Any mode that can affect the calibration of the CDS2000 is password protected. The CDS2000 has a 2- tiered password level of security, Privileged and User/Weights and Measures (Please Note: Default User Password is “2000”). -
Page 15: Installation
16.. Sufficient slack should be maintained in the cables to permit the CDS2000 Totalizer to be rotated forward for easy access to the rear panel connections. Additionally, a thin application of a non-conductive Oxygen compatible lubricant to the male threads of the nickel-plated connectors will provide an additional moisture barrier. - Page 16 Revision C – January 2023 Example of Incorrect and Correct Cable Securement Example of Proper Cable Stress Relief CDS2000 P a g e | 16...
-
Page 17: Cds2000 Models
Route cables and tie wrap excess so that no rubbing of the cables will occur. b. Allow slack in the cables to allow the CDS2000 to rotate for easy access to the rear panel. 5. Connect the power cable to the vehicle battery or other constant power source. Please Note: It is NOT recommended to connect the power to the lighting system of the truck/trailer. -
Page 18: Operation
Used as a “PREVIOUS,” scroll down navigation printing is enabled) as “Current Alarms” or button as well as a “RESET” option various alarms are well as “NEXT” option “Cancel” detected SIGNAL: Connect to turbine TEMP (Temperature): Connect PRESS (Pressure): Connect to 4‐20mA output flowmeter to temperature probe P/N: 900063 P/N: 900038 P/N: 900039 PCO (Pump Control): Connect to Pump Control P/N: 900062 OUTPUT: Connect to RS‐232 POWER: Connect to power printer supply P/N: 900064 P/N: 900037 Mounting Bracket Knob P/N: 900040 P/N: 901169 CDS2000 P a g e | 18... -
Page 19: Programming
Revision C – January 2023 Programming The Model CDS2000 is factory-set. (Default settings can be found on pages 32-34.) One should only use the programming guide to change parameters or turn on additional features. To enter the Setup Menu, turn the power on by holding down the Power button. -
Page 20: Metrology Configuration (User Password Protected)
The Printer Checking function enables handshaking between the printer and the CDS2000. Depending upon the printer, the CDS2000 detects if the printer is online, out of paper and enabled for delivery. Metrology Configuration (User Password Protected) The Metrology Configuration menu provides the end user with the option to adjust the “Metrology Selections &... -
Page 21: Configuration - Metrology Uom
The number of linearizer points can range from 2 – 10. As a convenience, the CDS2000 offers a “sort” feature which will place the data in the required order once the frequency and corresponding KF have been entered into the linearizer table. -
Page 22: Metrology Configuration - Sensors
Nanny Mode red screen is also configurable. Please Note: the PCO cable is a required component for Nanny Mode to function properly. Pump Settings The Pump Settings menu allows configuring various delivery options surrounding the pump: Temperature, Pressure and Leak Detect. CDS2000 P a g e | 22... - Page 23 Pump Cooldown Timer will decrement toward zero. If no further temperature error(s) occur, the Pump Cooldown Timer will reach zero, the pump icon will disappear, and the delivery pump will be enabled. CDS2000 P a g e | 23...
-
Page 24: Printers
Print Titles: When enabled, prints a corresponding title next to the printed data on the ticket. For example, instead of printing just the date 5/5/2020 the system will print the title DATE: 5/5/20. CDS2000 P a g e | 24... - Page 25 1200, 2400, 4800, 9600, 19200, 38400, 57600, 115200, 230400 baud. Use Bluetooth activates or deactivates Bluetooth communications. If Use Bluetooth is disabled, printer communication is via the built-in RS-232 port. If using RS-232, the communication parameters (above) must be CDS2000 P a g e | 25...
-
Page 26: Passwords
Bluetooth Mode allows selection between Bluetooth Master or Bluetooth Slave modes. In many cases, the CDS2000 is connected as a master when interfacing to a Bluetooth printer. When the CDS2000 is connecting to a cellphone running a Bluetooth App, Bluetooth Slave mode is typical. -
Page 27: System Activity
Factory Setup include the following: Loaner Mode Configurations are used to determine if the CDS2000 is to disable itself after a certain period of time. A password entered in the field is available to extend the loaner period. -
Page 28: Diagnostics Report
Reset Grand Totalizer resets the grand total. Reset System Hours resets the total number of hours the CDS2000 has been powered on. Clear Alarm Log clears the log of alarms. Clear Audit Trail clears the audit trail of changes that affect metrology. - Page 29 The pump cool down timer is disabled (pump always enabled). The printer is disabled. The Totalizer can be reset regardless of flow rate. NOT A LEGAL DELIVERY is displayed above the delivery totalizer. CALL TURBINES, INC. TODAY AT (864) 882‐4544 TO SCHEDULE A CUSTOM ON‐SITE TRAINING EXPERIENCE CDS2000 P a g e | 29...
-
Page 30: Specifications: Hardware & Software
Sensor Resolution RTD - 0.04 Ohms (approx.) Loop- 0.006mA (approx.) Math Processing: Internal floating point (FP), 15 digits of precision. Overall Error: 0.001% max (excludes uncertainty of temperature & pressure probe). CDS2000 P a g e | 30... -
Page 31: Troubleshooting
With a screwdriver, rapidly scratch the coil below the threads on the bottom surface. 3. Observe CDS2000 counts or "signal" light slightly illuminates or flashes. If yes, there is most likely a problem with the turbine meter. c. RTD Short or RTD Open i. - Page 32 Revision C – January 2023 CDS2000 Setup Menu *Programmable Default Settings are highlighted in *Blue Hardware Metrology Date & Time Configuration Configuration Metrology Metrology UOM Time Zone Options: Selections US Pacific US Mountain Intermittent Temp US Central Tolerance: *US Eastern *10 seconds Product Options: Totalizer UOM: Caracas *gal (Gallon) Sao Paulo L (Liter) *LIN London lb (Pound) Paris LCO2 Lb X 10 (Pounds x 10) Eastern Europe LN20 kg (Kilogram) Power Always On: Dubai ...
- Page 33 Revision C – January 2023 CDS2000 Setup Menu *Programmable Default Settings are highlighted in *Blue Metrology System Configuration Settings (continued) Flowmeter Timer Pump Calibration Size Settings Settings Size Options: Enable Linearizer Max Time Between ½” *Disabled 5/8" Deliveries: Enabled ¾” *15000 seconds 1" 1 ¼” 1 ½” *2" Average K‐Factor: 3" *150.00 4" Temperature Pressure Leak Pump Relay ...
- Page 34 Revision C – January 2023 CDS2000 Setup Menu *Programmable Default Settings are highlighted in *Blue System Settings (continued) Printers Page 2 Page 1 Page 5 Page 3 Page 4 Print Titles Printer Type EOL Format = Coordinates – TCF = Coordinates – Copy Coordinates – Product = Row 6, Column 1 Num = Row 3, Column 1 Row 16, Column 1 *Disabled *CR + LF Coordinates – Start = Epson Coordinates – Row 7, Column 1 Coordinates – Meter Zebra Temperature = Printer Baud = Num = PeopleNet Row 4, Column 1 1200 Coordinates – Stop =...
- Page 35 Revision C – January 2023 Steps to Connect the CDS2000 to a Printer through a Bluetooth Connection: Step Step Step Step Step Setup Setup Setup Setup Setup Menu Menu Menu Menu Menu System System System System Hardware Settings Settings Settings Settings Configuration Printer Printers Printers Printers Printers Checking Page Page Page ...
-
Page 36: Illustrations
Revision C – January 2023 Illustrations CDS2000 P a g e | 36... - Page 37 Revision C – January 2023 CDS2000 P a g e | 37...
-
Page 38: Cds2000 Wiring Schematic
Revision C – January 2023 CDS2000 Wiring Schematic CDS2000 P a g e | 38... -
Page 39: Cds2000 Compatible Wiring
Revision C – January 2023 CDS2000 Compatible Wiring PLEASE NOTE: The CDS2000 wiring is compatible with a CDS1000. Cables already wired for a CDS1000 can simply be utilized with the CDS2000 and functionality will remain consistent. The CDS2000 enhanced cable set uses a few extra connector pins not available to the CDS1000 for additional sensor inputs. PLEASE NOTE: the enhanced CDS2000 cable sets (Temperature and PCO Connectors) ARE NOT wire color compatible. CDS2000 Wiring Connections Power Signal Temperature Function Color Function Color Function Color 1 Power1 Brown 1 Coil1+ Brown 1 RTD 2‐ White 2 N/C N/C 2 Coil1‐ White RTD 1‐ Brown 3 Power2 Blue 3 Coil 2+ Blue RTD 1+ Green ... -
Page 40: Cds2000 Lpa Logic
Revision C – January 2023 CDS2000 LPA Logic CDS2000 P a g e | 40... -
Page 41: Cds2000 Delivery Alarm Matrix
Revision C – January 2023 CDS2000 Delivery Alarm Matrix CDS2000 P a g e | 41... -
Page 42: Field Calibration
(intervals). The best practice when using a scale is to place the receiving vessel on the scale. For any procedure the CDS2000 should be in the Prove Mode. To enter the Prove Mode, with the CDS2000 powered up normally, depress the Details and Alarms Softkeys for approximately 3 seconds until the Setup Menu appears. -
Page 43: System Block Diagram
Start/Stop/Reset SuperCap Backup Power Switches Touchscreen Interface SuperCap RLC454 Connector Board RS-232 RELAYS PRESSURE TEMPERATURE COIL POWER RLC453-2 (CDS2000) System Block Diagram 7/16/2014 - Randy Mauger Analog Front-End (AFE) 1 Measurements Temperature Diode Channel 1 Primary Temperature RTD1 Leak Detect... - Page 44 Revision C – January 2023 CDS2000 P a g e | 44...
-
Page 45: Return Policy
Product or refund or credit of the purchase price of the defective Product, as the case may be, is typically made within 30 days after receipt of the Product by Turbines R&D LLC. If the warranty claim is not approved, the return will be treated as a Non-Warranty Repair as provided below. ... - Page 46 Revision C – January 2023 Revision History Revision Description Date Temperature Mode Reconfigured 4/1/2021 Nanny Mode ‐ CDS2000 LS Hookup 5/16/2022 Pg39, changed connector name to Pressure 1/18/2023 CDS2000 P a g e | 46...
Need help?
Do you have a question about the CDS2000 and is the answer not in the manual?
Questions and answers