Cuisinart PRC-12 Series - Classic 12-Cup Stainless Percolator Manual
- Instruction booklet (9 pages) ,
- Instruction booklet (17 pages)
Advertisement
IMPORTANT SAFEGUARDS
For your safety and continued enjoyment of this product, always read the instruction book carefully before using.


When using electrical appliances, basic safety precautions should always be followed to reduce the risk of fire, electric shock and/or injury to persons, including the following:
- READ ALL INSTRUCTIONS.
- Always unplug from outlet when not in use and before cleaning. Allow to cool before putting on or taking off parts and before cleaning the appliance.
- Do not touch hot surfaces. Use handles and knobs.
![shock hazard]() To protect against electric shock, do not place cord, plug, or base unit in water or other liquids.
To protect against electric shock, do not place cord, plug, or base unit in water or other liquids.- This appliance should not be used by children or individuals with certain disabilities.
- Do not operate any appliance with a damaged cord or plug or after the appliance malfunctions or has been dropped or damaged in any manner. Return appliance to the nearest Cuisinart Repair Center for examination, repair, or electrical or mechanical adjustment.
- The use of accessory attachments not recommended by Cuisinart may cause injuries.
- Do not use outdoors.
- Do not let cord hang over edge of table or counter, or touch hot surfaces.
- Do not place on or near a hot gas or electric burner, or in a heated oven.
- Always fill percolator with water first, then plug cord into the wall outlet. To disconnect, turn controls to Off, then remove plug from wall outlet.
- Do not use appliance for other than intended use.
![]()
TO REDUCE THE RISK OF FIRE OR ELECTRIC SHOCK, DO NOT REMOVE THE BASE PANEL. NO USER- SERVICEABLE PARTS ARE INSIDE. REPAIR SHOULD BE DONE ONLY BY AUTHORIZED PERSONNEL.- Scalding may occur if the lid is removed during the brewing cycle.
![burn hazard]() Do not operate your appliance in an appliance garage or under a wall cabinet. When storing in an appliance garage, always unplug the unit from the electrical outlet. Not doing so could create a risk of fire, especially if the appliance touches the walls of the garage or the door touches the unit as it closes.
Do not operate your appliance in an appliance garage or under a wall cabinet. When storing in an appliance garage, always unplug the unit from the electrical outlet. Not doing so could create a risk of fire, especially if the appliance touches the walls of the garage or the door touches the unit as it closes.
SAVE THESE INSTRUCTIONS
FOR HOUSEHOLD USE ONLY

RISK OF FIRE OR ELECTRIC SHOCK
The lightning flash with arrowhead symbol within an equilateral triangle is intended to alert the user to the presence of uninsulated dangerous voltage within the product's enclosure that may be of sufficient magnitude to constitute a risk of fire or electric shock to persons.
 The exclamation point within an equilateral triangle is intended to alert the user to the presence of important operating and maintenance (servicing) instructions in the literature accompanying the appliance.
SPECIAL CORD SET INSTRUCTIONS
A short power-supply cord is provided to reduce the risks resulting from becoming entangled in or tripping over a longer cord. Extension cords may be used if care is exercised in their use.
If an extension cord is used, the marked electrical rating of the extension cord must be at least as great as the electrical rating of the appliance, and the longer cord should be arranged so that it will not drape over the countertop or tabletop where it can be pulled on by children or tripped over.
OPERATING NOTICE
Clogging and backing up of water and/or coffee in the coffee basket can occur under any or a combination of any of the following conditions: The use of too finely ground coffee or not properly cleaning coffee grounds from the gold-tone filter, or allowing coffee grounds to spill over the coffee basket.

Never open the top cover during the brewing cycle, even if no water is draining from the coffee basket, since extremely hot water/coffee can spill out from the coffee basket and cause injury. If water/coffee is not draining from the coffee basket during the brewing cycle, unplug the unit and wait 10 minutes before opening the top cover and checking the coffee basket.
IMPORTANT UNPACKING INSTRUCTIONS
- Place the box on a large, sturdy, flat surface.
- Remove the instruction book and any other literature.
- Turn the box so that the back side of the percolator is down and slide the percolator from the box.
- After the percolator has been removed, place the box out of the way and take the pulp inserts away.
- Remove the polybag covering the percolator.
We suggest you save all packing materials in the event that future shipping of the machine is needed. Keep all plastic bags away from children.
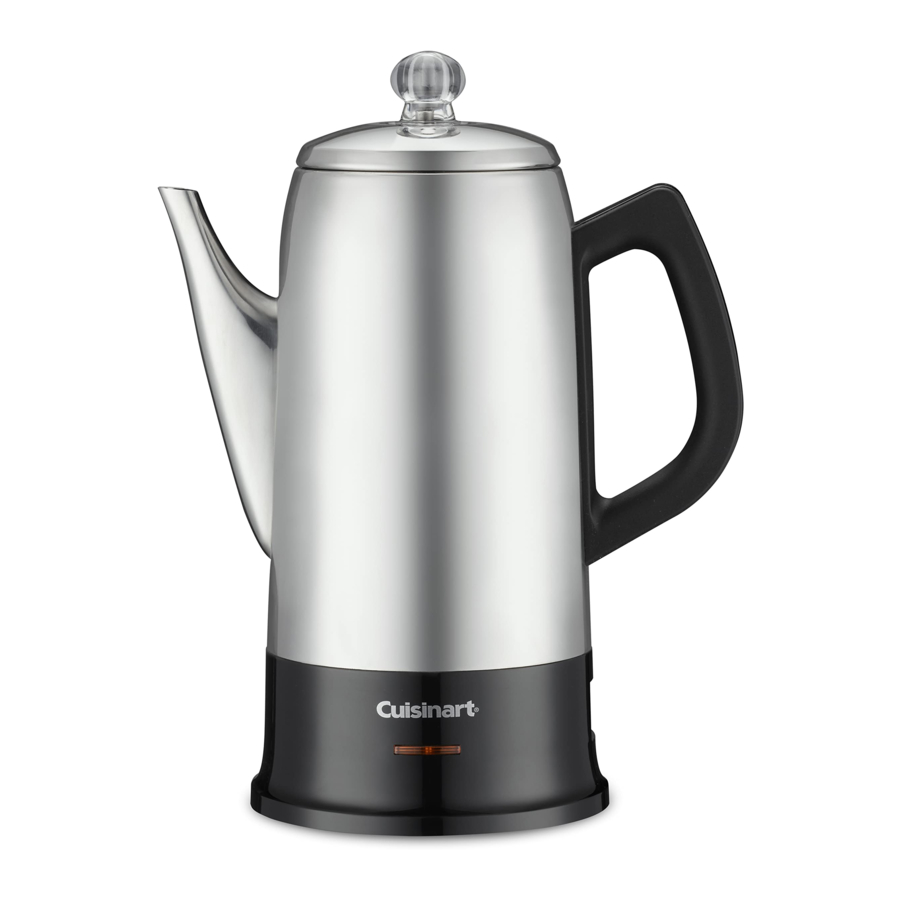
FEATURES AND BENEFITS
The Cuisinart Classic 12-Cup Percolator has been designed to increase the pleasure of enjoying a perfectly percolated cup of coffee.

- Transparent Percolator Knob
Allows you to see the percolating process. - Stainless Steel Cover
Lock-down cover ensures safe pouring. - Coffee Basket Lid
- Coffee Basket
Holds ground coffee for up to 12 cups of coffee. Convenient measurement markings take away the guesswork. - Spring
- Pump Tube Delivers water automatically from the carafe to the basket.
- Stainless Steel Body
Holds from 4 to 12 cups of coffee. - Tapered Spout
For no-mess, dripless pouring. - Comfort-Grip Handle
Ergonomically designed for easy pouring. - Stay-Cool Base
Prevents heat damage to tables and counters. Eliminates the need for a trivet or other surface protector. - Removable Power Cord
For convenient pouring and serving, the power cord is removable from unit. - Indicator Light
Illuminates to indicate that the brewing cycle is complete. - Water Level Markings
- 4-Cup Water Level Mark
- Well
USING THE DEVICE
- Before using for the first time, thoroughly wash all parts of the percolator. (See the Cleaning and Maintenance section of this booklet.)
- Remove cover, basket, lid and pump tube with spring. Using the measurement markings (located inside the body) fill the percolator with the desired amount of water. For best results, be sure to use cold water when filling the percolator. When preparing 4 cups, use the small circular marking as the 4-cup level mark.

- Run cold water over the coffee basket. Place basket on top of pump tube. Add desired amount of coffee according to level markings on basket. To help keep small coffee grounds from sifting through the holes in the basket, be certain to use a grind designed for percolator coffee, or use a coarse grind. Finer grinds may sift through the holes.
- Place basket and pump tube assembly into percolator so bottom of tube fits into well. Place basket cover on top of basket and push cover onto top of percolator.
- Plug base into standard household 120 volt AC wall outlet. Brewing begins within seconds, and continues at a rate of approximately one cup per minute.

The following chart serves as a guide for preparing various brew strengths. Amounts can be varied to suit personal taste and particular coffees.
| Brew Strength of Coffee/ Number of Coffee Measures* | |||
| #Cups | Mild | Medium | Strong |
| 12 | 12 | 16 | 20 |
| 10 | 10 | 14 | 18 |
| 8 | 8 | 12 | 16 |
| 6 | 6 | 8 | 12 |
| 4 | 4 | 6 | 8 |
*1 coffee measure = 1 level tablespoon
- Once brewing cycle is complete, indicator light will illuminate to signal your coffee is ready.

Be certain the percolating process has stopped completely before removing cover.
- Once brewing has completed, remove the cover carefully and using a mitt or potholder, remove the basket and pump tube.
do not touch the stainless steel parts of the percolator, as they will be hot. Replace cover so it snaps into place. You are now ready to enjoy a flavorful cup of coffee.
- Remove plug from percolator for easy serving.
Replace plug to keep coffee hot.
CLEANING AND MAINTENANCE
A lways remove the plug from the electrical outlet before attempting to clean the percolator.
The percolator cover, basket, lid, and pump tube (with spring) can all be placed in the upper rack of a dishwasher or washed in warm soapy water and rinsed thoroughly.
Never wash percolator body or power cord in dishwasher.
Never immerse the percolator body in water or other liquids. To clean, simply wipe with a clean, damp cloth and dry before storing.
Do not use scouring agents or harsh cleaners on any part of the percolator.
Note: Washer at bottom of pump tube must move freely. Should coffee grounds become trapped near the washer, loosen with a toothpick, then run under tap water to clean.
Storage:
Percolator should be stored with cover off.
Maintenance:
Any other servicing should be performed by an authorized service representative.
DECALCIFICATION
Decalcification refers to removing the calcium deposits that form on the metal parts of the percolator over time.
For best performance from your percolator, decalcify the unit from time to time. The frequency depends upon the hardness of your tap water and how often you use the percolator. Decalcification will clean the interior of the unit.
To Decalcify, fill percolator with vinegar to the 3 cup level then add water to the 12 cup level. Combined mixture should not exceed 12 cups. Be sure that all parts are in place, and make sure that the lid is securely on. Plug the power cord connector into the cord insert and plug the unit into an electrical outlet. Let the unit run through its normal cycle. Once complete, discard the vinegar and water mixture.
Run one cycle of fresh, cold water (without vinegar) through the unit at the completion of decalcification before using the unit to brew coffee.

Documents / ResourcesDownload manual
Here you can download full pdf version of manual, it may contain additional safety instructions, warranty information, FCC rules, etc.
Download Cuisinart PRC-12 Series - Classic 12-Cup Stainless Percolator Manual
Advertisement


Need help?
Do you have a question about the PRC-12 Series and is the answer not in the manual?
Questions and answers