SwagTron EB7 Elite Plus - eBike Manual
- User manual (26 pages) ,
- Quick start manual (2 pages)
Advertisement
PRODUCT SAFETY NOTICE
The SWAGTRON EB7 Elite Plus eBike has been designed with plenty of safeguards in place for its riders. Extra precautions have been taken to protect the user from hardware malfunctions through our meticulous design and engineering.
Like any mode of transportation, however, the SWAGTRON EB7 Elite Plus has inherent hazards associated with its use (e.g., losing control, falling off, or riding into hazardous situations). Be sure to read and follow all instructions and safety recommendations in this user manual prior to and when riding your eBike.
Before each ride, especially before and after traveling long distances, inspect your bike. Check the tires for proper inflation and cracks on the tire walls. Keeping the tires properly inflated and maintained will help prevent flats and maximize performance.
Second, check all cables and cable housings for fraying, breaks, rust, or corrosion and replace if necessary. Lastly, inspect the brakes to make sure they are working properly. Additionally, check the brake pads for any damage as they will wear over time and eventually need replacement.
If a replacement of the brake pads or any other part is needed, please contact customer support for replacement service. In general, it is recommended to make sure all nuts and bolts are taut and properly fastened to prevent injury and unnecessary wear and tear on your eBike.
| Max. Rider Capacity | 264 lb. / 120 kg |
| Max. Speed (Throttle-Only) | 18.6 mph / 29.9 km/h |
| Range per Charge (throttle-only) | Up to 19 mi / 30.6 km (mode 1) |
| Max. Incline (Throttle-Only) | 25° (throttle only) |
This device requires coordination, agility and balance. Use your best judgment to determine if an individual can use the SWAGTRON EB7 Elite Plus eBike safely.
| SAFETY GEAR, CLOTHING, AND FOOTWEAR | Please wear appropriate clothing and safety gear including shoes, kneepads, elbow pads and an ASTM F1492 approved helmet. Avoid wearing anything that can drape over or get caught into/under the wheels. Wear closed-toe, flat shoes to maintain flexibility and stability. |
| MODIFICATIONS AND REPAIRS | The SWAGTRON EB7 Elite Plus is a highly sophisticated electronics product that includes complex, technical circuitry. Attempting to repair or modify your can void all warranties. Only authorized repair centers may service the EB7 Elite Plus. |
| OBEY LOCAL LAWS AND REGULATIONS | Always check and adhere to local laws regarding personal transportation devices, including pedestrian laws. The eBike is considered a motor vehicle and should not be ridden after consuming alcohol or drugs. |
By riding the SWAGTRON EB7 Elite Plus eBike, the user acknowledges and accepts personal responsibility of all risks associated with the use of the SWAGTRON EB7 Elite Plus eBike, which may include, but are not limited to, muscle injuries, broken bones, lacerations, or serious injury that may be sustained while using the SWAGTRON EB7 Elite Plus eBike.
General Information
Before operating your eBike, please read all instructions. This manual will guide you through the functions, usage, and proper care of your EB7 Elite Plus. If you have any questions or cannot find the information you need in the manual, please contact your place of purchase or our customer service at 1-844-299-0625. Before contacting customer service, please have your purchase information ready as this may be needed during the call.
When reading this manual, note these icons:
 Notes with this icon MUST be read, understood, and obeyed to prevent injury or damage.
 Notes with this icon include relevant information.

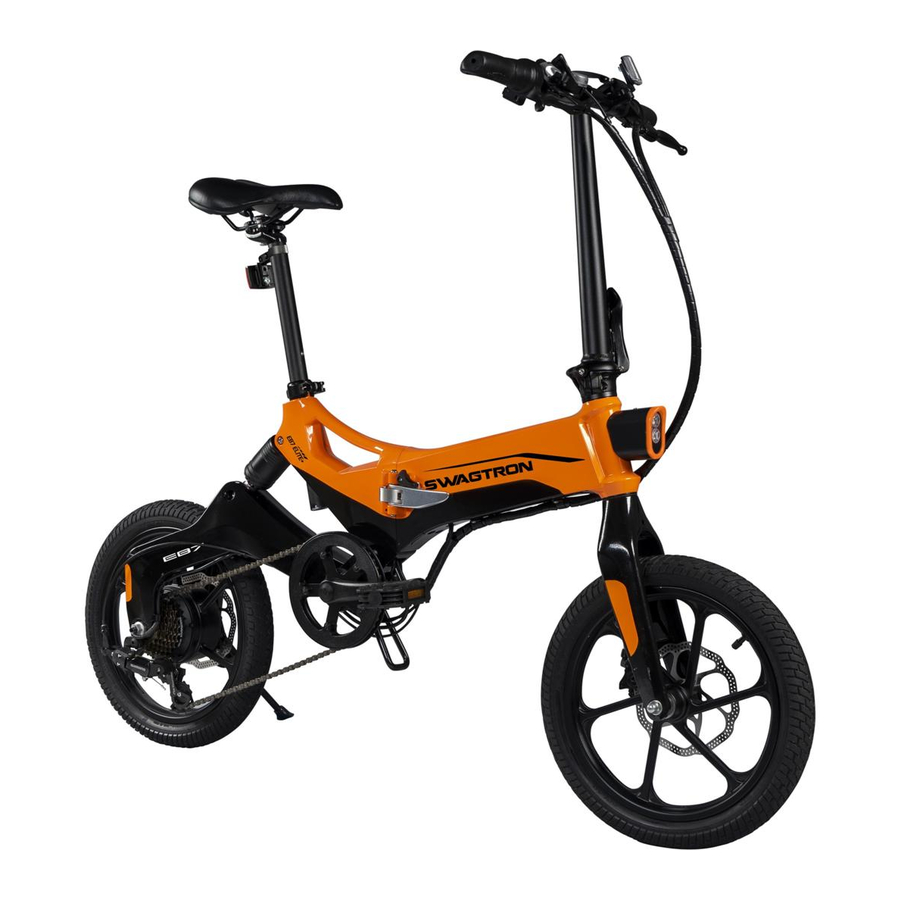
About the SWAGTRON EB7 Elite Plus
The EB7 Elite Plus is a compact, zero-emissions, personal transportation device that feels like a bike but rides like a moped! It's environmentally-friendly and built with premium- grade components using industry-leading manufacturing processes.
- Eco-friendly with zero emissions
- Folds at the frame, stem and pedals
- Offers powered speeds up to 18.6 mph
- Rechargeable, portable and durable
What's In the Box?

- 1 x SWAGTRON EB7 Elite Plus eBike
- 1 x Charging Cable & Adapter
- 2 x Keys
- 1 x User Manual
Product Overview

Assembling the Handlebar

Step 1. Pull the stem upright (  ).
).
Step 2. Fold the latch up to close it. It will snap into place.
Step 3. Unmount the clamp on top of the stem (  ), and put the handlebar onto the top of stem, then re-install the clamp to fix the handlebar onto the stem (
  ).
).
Handling Your eBike
Folding & Unfolding the Head
Be careful not to position your fingers between the latch and the stem. Doing so may result in injury.

To Unfold (  ):
):
Step 4. Pull the handlebar stem upright.
Step 5. Fold the latch up to close it. It will snap into place.
To Fold (  ):
):
Step 1. Locate the silver bolt in the side of the latch and pull it up.
Step 2. While holding the bolt up, use your other hand to unfold the latch by pulling it down away from the stem. There is a notch on the other side of the latch to make this easier.
Step 3. With the latch undone, fold the stem down.
Folding & Unfolding the Frame
To Unfold the Frame

Unfold the rear wheel / section and keep your eBike upright with the kickstand. While holding the latch lock up, push the latch closed. Make sure the hook end of the latch is secure and let the latch lock turn down into the latch to lock everything in place. (  ).
).
To Fold the Frame
While holding the latch lock up, use your other hand to open the latch by pulling it away from the frame ( ). Fold the rear wheel / section towards the other wheel and use the stand under the frame as needed.
Adjusting the Handlebars

Unfold the clamp, then rotate and adjust the direction of the handlebars to a comfortable position ( ). Secure the handlebars by flipping the clamp closed (
 ).
).
Adjusting the Seat Height
Positioning the seat at the right height is key for better pedaling, safety and overall comfort. The rider's leg length is used to determine the seat's position. When pedaling, your hips should remain level and your legs shouldn't over-extend. To determine the right seat height, sit on the eBike with one pedal at its lowest point and place the ball of your foot on the pedal. If your knee bends slightly at this position, the seat is at the right height. Additionally, when placing your heel on the pedal, your leg should be nearly straight.
Open the clamp under the seat post. Pull the seat up or push it down to adjust height. Check to make sure the seat post is fully inserted into the frame and the head of the seat is parallel with the frame. Lastly, close the clamp to secure the seat in place (  ).
).

Unfolding & Folding the Pedals
Holding the crank arm vertical, fold or unfold the pedal. Repeat with the other pedal as needed ( ).
).

Charging the Battery
Charging Instructions
Charge the eBike before using it.
Step 1. Make sure the bike is turned off and connect the charger's cables and adapter if needed.
Step 2. Plug the charger into a wall outlet (100V-240V) then plug the other end into the charging port. Remove the cap as needed.
Step 3. Allow ~5 hours' time for charging. The charging adapter's light will turn red during charging and then turn green once charging is complete. Disconnect all cables once charging is finished.
For your convenience, the battery can also be charged while detached from the EB7 Elite Plus. (See 4.2 for detaching instructions.)

- Fully charge the battery before your first use, this may take up to 5 hours.
- Perform periodic visual inspection of the battery ports and charging cables.
- Keep your charging environment clean and dry at all times.
- If the charging port is damp or has any liquid on it, do not charge your eBike.
- In order for the battery to operate at maximum efficiency, avoid charging your eBike in extremely hot or extremely cold environments.
- DO NOT, under any circumstances, use the bike while it is charging or connected to the charger.
- The charging time is ~5 hours. Charging longer than that may affect battery life and/or performance. If the charging adapter's light doesn't turn on, it may not be fully connected. Check that it is securely connected to the wall and to the bike.
- Use only the charger provided with your EB7 Plus. If you have lost or misplaced your charger, contact customer support to obtain a replacement.
Battery Lock/Removal
For your convenience, the EB7 Elite Plus's battery can be removed and locked as needed. Fold the bike first before unlocking and/ or removing the battery.
Step 1. Use the included keys to unlock the battery via the keyhole inside the folded frame ( ). To unlock the battery, insert the key, and turn it to the unlock ![]() position.
position.
Step 2. With the key inserted into the keyhole, lift the handle and use it to pull the battery out ( ).
Step 3. To reinstall the battery, reinsert it into the frame. Turn the key to the locked ![]() position.
position.
Remember to lock the battery and remove the key before unfolding and/or riding the bike.

Riding Your eBike
How to Ride

- Start your eBike by pressing and holding the power button ~2s, or ride it with your feet directly. Power-assisted mode will be on whenever power is on.
- Move forward by twisting the throttle.
- Switch between 7 gears by pressing the gear button or pushing the gear.
![information]() Gear Button only shifts up in gear.
Gear Button only shifts up in gear. - To stop, release the throttle, then squeeze the front and rear brakes to slow the front and rear wheels down.
- Use the horn and headlight to alert pedestrians and other riders of your presence.
Buttons Information

The EB7 Elite Plus eBike's display features several different elements.
![]() : Press and hold for ~2 seconds to turn the eBike on/off. Quick-press to cycle between TRIP, VOL, TI, and ODO on display.
: Press and hold for ~2 seconds to turn the eBike on/off. Quick-press to cycle between TRIP, VOL, TI, and ODO on display.
![]() : Quick-press to switch between speed modes (1-3). Press and hold for ~2 seconds to turn the headlight on/off.
: Quick-press to switch between speed modes (1-3). Press and hold for ~2 seconds to turn the headlight on/off.
![]() : Quick-press to switch modes 1, 2, and 3.
: Quick-press to switch modes 1, 2, and 3.
Display Information

![]() : This icon indicates cruise control's status (on/off). Maintain speed for ~7 seconds to use this feature. Brake to turn it off.
: This icon indicates cruise control's status (on/off). Maintain speed for ~7 seconds to use this feature. Brake to turn it off.
![]() : This icon indicates the headlight's status (on/off).
: This icon indicates the headlight's status (on/off).
![]() : Current speed, as measured in mph or km/h.
: Current speed, as measured in mph or km/h.
TRIP: These numbers show distance data for a single trip. Data is automatically cleared when the bike is powered off.
ODO: These numbers show odometer data, i.e., cumulative distance from 0 to 6213 mi. Data accumulates in increments of 0.63 mi. If a single trip is less than 0.63 mi, it is not included in the total mileage. When data exceeds the maximum (6213 mi), the odometer will automatically reset to zero.
TI: These numbers show time data for a single trip.
VOL: These numbers show current voltage information.
Battery Level: This icon indicates how much battery life you have left.
MODE: Displays the current speed mode (1, 2 or 3). Each mode has a different maximum speed (throttle-only):
Mode 1 max. speed is 11.3 mph. Mode
2 max. speed is 13.7 mph.
Mode 3 max. speed is 18.6 mph

Display Settings
Press and hold  and
and  buttons for ~2s to enter the display setting screen.
Adjust display brightness: Press the ![]() button to enter P01 screen, then use and buttons to adjust the brightness of the display's backlight.
button to enter P01 screen, then use and buttons to adjust the brightness of the display's backlight.
Switch measurement system: Press the ![]() button to enter P02 screen, then use and buttons to set the display to the desired measurement type between imperial (miles, mph) and metric (km, km/h).
button to enter P02 screen, then use and buttons to set the display to the desired measurement type between imperial (miles, mph) and metric (km, km/h).
Safe Riding Techniques & Tips
Consider the following techniques and info to help ensure you have a safe, fun riding experience. Before riding, always check to make sure your brakes are working properly.
- Make sure your feet are always on the pedals. Taking your feet off the pedals while riding is dangerous.
- Remember to remain seated when using the eBike's cruise control function.
- Make sure the battery is fully charged, especially if you plan to travel long distances.
- For your own safety and the safety of others, ride only at speeds you are comfortable with and be ready to stop at any time.
- Keep a safe distance from fellow riders to avoid collisions.
- Pay attention to your surroundings. Your eyes are your best tools for safely avoiding obstacles and unsafe surfaces.
- Ride in open spaces and flat areas. Avoid slopes or high traffic areas until you're familiar with riding.
- Do not ride at high speeds, on uneven terrain, in inclement weather, or otherwise unsafe conditions.
- Never use the eBike to do anything that may cause personal injury or property damage.
- Do not attempt to carry passengers or heavy items. The bike can only support the weight of one person at a time. Do notexceed the weight limit.
- Only ride the eBike where permitted. You MUST comply with local laws and give way to pedestrians.
DO NOT USE THE EBIKE TO PERFORM DANGEROUS MANEUVERS. FAILURE TO EXERCISE GOOD JUDGMENT AND HEED THE ABOVE WARNINGS INCREASES THE RISK OF SERIOUS INJURY OR, IN VERY RARE CASES, DEATH. USE WITH APPROPRIATE CAUTION AND SERIOUS ATTENTION TO SAFE OPERATION.
Before Your First Ride
Inspect gears, examine brakes and check tire pressure. Proper tire inflation can reduce flats and improve performance, including travel distance per charge. See Section 7.1 for more.
Daily Bike Inspections
Routine inspections before and after every ride will help you maintain optimal bike performance and catch potential problems before they turn into safety concerns. Regularly check brakes, lights, seat and tire pressure.
Semi-Annual Bike Mechanic Inspections
Bikes require regular maintenance. Take your bike in to your local bike shop for a tune-up twice yearly. Complex components should always be inspected, serviced and adjusted by experienced mechanics.
Maintenance
- Do not perform any kind of maintenance while the eBike is powered on or charging.
- Attempting to repair or modify your eBike can void all warranties. Only authorized repair centers may service the eBike. If you need assistance, please contact customer service.
Tire Inflation
You will need a pressure gauge, a standard bicycle pump to inflate the EB7 Elite Plus eBike's tires.
Step 1. Ensure the eBike is powered off and stable.
Step 2. Visually inspect the tires for damage, or puncture marks. If the tire is damaged, DO NOT INFLATE IT. Contact customer service immediately.
Step 3. Find the valve located on the inside of the wheel and remove the cap.
Step 4. Use a standard bicycle pump to pump air to the tires slowly.
Step 5. Use the pressure gauge periodically to check PSI.
Step 6. When the tire reaches 40-65 PSI/2.8-4.5BAR, stop inflating and replace the valve cap.
Step 7. Repeat with other tire.
- Any PSI markings on the tires indicates a maximum. DO NOT inflate the front tire to this value. Only inflate to a maximum of 65 PSI as directed above.
- Underinflation is strongly recommended if you intend to ride outdoors in temperatures above 90°F degrees. Bring the EB7 Elite Plus eBike indoors and deflate the tires to 58.5 PSI. If the PSI is too high and the tire are exposed to excessively high temperatures, riding outdoors may cause serious damage to the tire including but not limited to stretching and/or rupturing.
Cleaning
Proper cleaning of your eBike can guarantee a longer lifespan and a smooth riding experience.
- Wipe the outer body of your eBike with a soft, dry microfiber cloth.
- Check around the wheels and ensure there is no blockage. The eBike's design allows for easy wheel maintenance.
- The eBike meets IPX4 water-resistance, meaning it can withstand splashes; however, do not submerge the eBike in water.
- Do not let water and liquids get into the eBike's electric parts or battery.
Storage
Below are some tips to consider when storing your EB7 Elite Plus eBike.
- Before storing, fully charge the eBike to prevent battery over-discharge due to non-use.
- If storing the eBike for more than one month, discharge and recharge the battery at least once a month.
- Cover the eBike to keep dust out. Do not store in a dusty environment as this may cause damage over time.
Transportation
Before moving, lifting, or otherwise transporting the eBike, turn it off. The eBike weighs approximately 42.3 lb. If you are unsure of your ability to lift this much weight, ask someone for help.
Lithium-ion batteries are considered hazardous materials; therefore, transportation is governed by federal, state and local laws.
International law prohibits the shipping of bare lithium-ion batteries. If you are shipping your EB7 Elite Plus eBike, you must ship it with the battery installed.
Disposal at End-of-Life
This product must not be disposed of by incineration, landfilling, or mixing with household trash. Improper disposal of the battery contained within this product may result in the battery heating up, rupturing, or igniting which may cause serious injury. The substances contained inside the battery present chemical risks to the environment. The recommended disposal for any SWAGTRON product at its end-of-life is to dispose of the entire unit at or through an e-waste recycling center, program, or facility.
Local regulations and laws pertaining to the recycling and disposal of lithium-ion batteries and/or products containing them will vary according to country, state, and local governments. You must check laws and regulations corresponding to where you live in order to properly dispose of the battery and/or unit. It is the user's responsibility to dispose of their waste equipment properly with accordance with local regulations and laws.
For additional information about where you should drop off your batteries and electrical or electronic waste, please contact your local or regional waste-management office, your household waste disposal service, or your point-of-sale.
Specifications
| Item | Parameters |
| Model Name | EB7 Elite Plus |
| Net Weight | 42.3 lb. / 19.2 kg |
| Unfolded Dimensions | 52.8 x 22 x 42.1 in. / 1340 x 560 x 1070 mm |
| Folded Dimensions | 29.5 x 16.5 x 26 in. / 750 x 420 x 660 mm |
| Max. Incline (Throttle-Only) | 25˚ |
| Max. Capacity | 264.5 lb. / 120 kg |
| Max. Speed (Throttle-Only) | 18.6 mph / 30 km/h |
| Range Per Charge (Throttle-Only) | Up to 18.6 miles (mode 1); 16.2 miles (mode 2); 14.3 miles (mode 3) |
| Battery Voltage | 36V 6.4 Ah |
| Charging Voltage | 100V - 240V / 50 - 60Hz /42V 1.5A  |
| Voltage | 36V 0.5W |
| Wheel Size | 16" Front / Rear |
| Wheel Inflation | 40-65 PSI / 2.8-4.5 BAR |
| Charging Time | 5 Hours |
| Water Resistance | IPX4 |
| Warranty | 1 Year Limited |

Documents / ResourcesDownload manual
Here you can download full pdf version of manual, it may contain additional safety instructions, warranty information, FCC rules, etc.
Advertisement


Need help?
Do you have a question about the EB7 Elite Plus and is the answer not in the manual?
Questions and answers