Table of Contents
Advertisement
Quick Links
Advertisement
Table of Contents

Summary of Contents for Mira HM-2000 EVO
- Page 1 Instruction Manual English (EN) Headmaster Workstation...
-
Page 2: Table Of Contents
Example for the clamping of a cylinder head ..............26 Operation ............................27 14.1 Vario Drive handling ......................27 14.2 Multivac handling ......................28 Troubleshooting ..........................29 15.1 Start-up ........................... 29 20.7.2023/ v1.6 HM-2000 EVO | Serial-No.: 0518 © (subject to change without notice) - Page 3 Maintenance ............................. 40 Special accessories ........................42 20.1 Working lamp 230VAC ....................42 20.2 Additional carrying profiles ....................42 20.3 Tool holder ........................42 Technical data..........................43 20.7.2023/ v1.6 HM-2000 EVO | Serial-No.: 0518 © (subject to change without notice)
-
Page 4: Safety Regulations
Power must be disconnected prior to any electrical work or repair operations! Repair operations may only be performed by the local Mira representative or by the manufacturer! Use only genuine MIRA spare parts that are listed in the respective operating instructions! Avoid all contact with the electrical circuits of the machine! =>... -
Page 5: Elementary Safety-Advices
Breakdowns must be corrected immediately! Designated utilisation The MIRA HM-2000 EVO machines are exclusively designed for clamping and machining cylinder- heads from combustion engines (Diesel and Gasoline). Another- or beyond going utilisation is not intended and permitted. The Minelli Corporation will not be rendered liable for damages which evolve from improper machine-use. - Page 6 Warranty and liability Warranty matters are described in MIRA‘s terms of sales and return policy conditions and are a integral part of any sales contract between MIRA an the customer. Warranty- and liability by people and material assets are void, if they had one or more of the following causations: ➢...
- Page 7 They can irritate and injure the lungs and the eyes. Wear suitable safety equipment (e.g. protection goggles, mask etc.). Ensure enough ventilation on the workstation. Special safety precaution, for example: eyeflushing device. 20.7.2023/ v1.6 HM-2000 EVO | Serial-No.: 0518 © (subject to change without notice)
- Page 8 • Further cleaning per grade of using and grade of pollution of the machine. • The packaging material of the HM-2000 EVO, after delivering, must be disposed correctly in the respective waste containers and/or according to the local waste- and environmental legislations! Noise emission of the machine •...
-
Page 9: Copyright
Copyright © The exclusive copyright of this instruction manual remains in the hands of the MINELLI Corporation (MIRA). This instruction manual is appointed to the operator and the corresponding employees. Minelli Corporation MIRA Division Mattenstrasse 3 8330 Pfäffikon ZH Switzerland For the provided technical documentation see the authorised person in chapter „Declaration of conformity“... -
Page 10: Non-Liability
Non-liability The HM-2000 EVO workstation may only be operated according to the instruction manual. The manufacturer refuses to accept any liability for accidents and damages caused by incorrect operation and non-designated use. He also refuses any liability for alienated use of the machine. -
Page 11: Declaration Of Conformity
Declaration of conformity 20.7.2023/ v1.6 HM-2000 EVO | Serial-No.: 0518 © (subject to change without notice) -
Page 12: Positioning
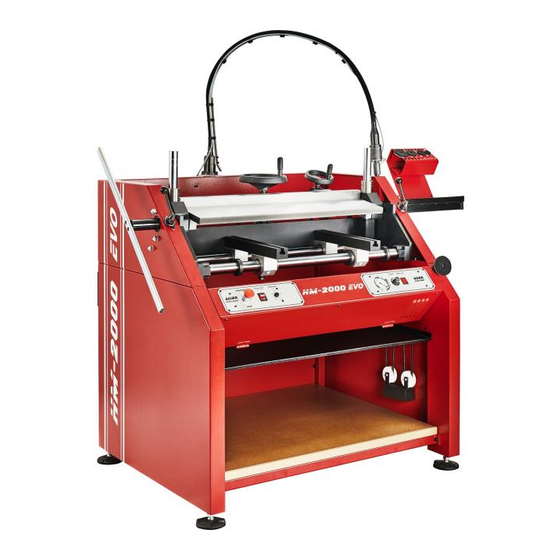
HM-2000 EVO The HM-2000 EVO contains the newly constructed clamping system AV-2000 EVO and represents the all new generation of MIRA headmaster workstations. The state of the art developed Vario Drive and Multivac units are modularly integrated in the headmaster workstation and can be easily retrofitted into the system afterwards. -
Page 13: Connections And Type Plate
Up to 8 devices can be connected to the multiple socket. The type plate is located on the rear side of the HM-2000 EVO on the right corner. => Manipulation and removing of the type plate are not allowed. -
Page 14: Machine Parts
Multivac unit Clamping lever AV-2000 EVO Board sheet with service Mounting foot access with levelling Drawer Front-panel (retractable) EMERGENCY Vario Drive Shelf STOP controls Vario Drive 20.7.2023/ v1.6 HM-2000 EVO | Serial-No.: 0518 © (subject to change without notice) -
Page 15: Rear View
11.2 Rear view Vario Drive Mounting angle assembly for Vario Drive assembly Including rubber stops (4x) Cable bushing Type plate for Vario Drive HM-2000 EVO and Multivac Multiple socket 20.7.2023/ v1.6 HM-2000 EVO | Serial-No.: 0518 © (subject to change without notice) -
Page 16: Av-2000 Evo
Main spindle for elevation of the clamping plate Linear roll bearing Ball bearing trapezoidal spindle Trapezspindel Adjustable stop Clamping plate Carrying profiles, moveable Supporting guides Adjusting collar 20.7.2023/ v1.6 HM-2000 EVO | Serial-No.: 0518 © (subject to change without notice) -
Page 17: Controls Multivac And Vario Drive
Driving pin to Vacuum setting VGX-21 device Fig. 4 - Vario Drive hand grip with switch-key button Vacuum ON-OFF indication Vacuum pump Fig. 3 - Multivac controls 20.7.2023/ v1.6 HM-2000 EVO | Serial-No.: 0518 © (subject to change without notice) -
Page 18: Installation Of The Equipment
The installation of the equipment can be divided into mounting of the Vario Drive and Multivac. The VGX- 21 unit is not fixly integrated in the HM-2000 EVO and therefore must be connected as an external device to the multiple socket of the workstation. -
Page 19: Connecting The Vario Drive And Multivac
The earthing can be mounted corresponding to the figure beside. It can be attached on the rear sheet panel of the HM-2000 EVO with the provided mounting material. Secure the earthing from the inside of the rear sheet panel with a hex nut and a lock washer. -
Page 20: Control Box Vario Drive
12.4 Control Box Vario Drive The associated control box for operating the Vario Drive unit is firmly mounted inside the front panel of the HM-2000 EVO and ready for use. The power supply for the Vario Drive will be provided through the pre-installed multiple socket of the HM-2000 EVO workstation. -
Page 21: Multivac
12.6 Multivac The Multivac vacuumtesting unit is firmly mounted inside the front panel (on the right) of the HM-2000 EVO and ready for use. The power supply for the Multivac will be provided through the pre-installed multiple socket of the HM-2000 EVO workstation. -
Page 22: Multivac Adaptor
The M5 hex nuts and M5 inhex screws should be tightened with a torque wrench => 6,5Nm tightening torque. Fig. 18 - Fixation of the tool holder 20.7.2023/ v1.6 HM-2000 EVO | Serial-No.: 0518 © (subject to change without notice) -
Page 23: Voltage Transformer 100Vac 230Vac
230VAC, 50Hz max. 1,0m max. 1,5m • Operating the HM-2000 EVO workstation (incl. Vario Drive and Multivac) without voltage transformer is allowed ONLY in a 230VAC, 50-60Hz power network! • The voltage transformer has to be connected in a de-energised mode! •... -
Page 24: Cylinder Head Clamping Device
Tighten both clamping levers again (left side first, Fig. 21 - Revolving of the AV-2000 EVO then right side) to secure the clamping device. 20.7.2023/ v1.6 HM-2000 EVO | Serial-No.: 0518 © (subject to change without notice) - Page 25 10mm Fig. 25 - Elevating the clamping plate with the main spindle Fig. 26 - Distance of the clamping plate 20.7.2023/ v1.6 HM-2000 EVO | Serial-No.: 0518 © (subject to change without notice)
- Page 26 Risk of injury if these indications will be ignored. Furthermore, the adjusting stops are simplifying the clamping process on similar cylinder heads, because the clamping position is given and adjusted from the first cylinder head. 20.7.2023/ v1.6 HM-2000 EVO | Serial-No.: 0518 © (subject to change without notice)
-
Page 27: Example For The Clamping Of A Cylinder Head
Fig. 30 -Regular and even clamping of cylinder head Fig. 31 - Irregular and uneven clamping of cylinder head 20.7.2023/ v1.6 HM-2000 EVO | Serial-No.: 0518 © (subject to change without notice) -
Page 28: Operation
The Vario Drive hand grip is, by default, inserted on the tooling plug of the right side wall of the HM-2000 EVO workstation. The hand grip can be lifted up from the tooling plug and, for operation, inserted on Lifting up the adaptor of the VGX-21. -
Page 29: Multivac Handling
1. Select the required diameter-size for the adaptor (corresponding to cylinder head) and apply the adaptor on to the vacuum hose of the hose retraction of the HM-2000 EVO workstation. 2. Switch the ON/OFF switch of the Multivac unit to position 1. => vacuum pump ON! 3. -
Page 30: Troubleshooting
Is the vacuum adjusting defective? Has the clearance from the valve to the valve stem guide been checked, according to the engine manufacturer’s recommendation? Is the valve seat clean? 20.7.2023/ v1.6 HM-2000 EVO | Serial-No.: 0518 © (subject to change without notice) -
Page 31: Spare Parts
AV-2000 EVO Page 33 16.3 Pressure- and pivot spindle / Main spindle Page 34 16.4 Hose retraction Page 35 16.5 Vario Drive Page 36 16.6 Multivac Page 37 20.7.2023/ v1.6 HM-2000 EVO | Serial-No.: 0518 © (subject to change without notice) -
Page 32: Hm-2000 Evo
(1x) Revolving handle 13242.4.2773 (1x) Front panel Multivac 13441.2.6475 (1x) Front panel Vario Drive 13441.2.6502 (4x) Mounting foot 1MMS102 (1x) Vario Drive control box (1x) Boardsheet 12042.2.6511 13441.2.6571 20.7.2023/ v1.6 HM-2000 EVO | Serial-No.: 0518 © (subject to change without notice) - Page 33 (1x) Swiss type, plate 230VAC 12041.1.6557 1KST00397 Multiple socket (1x) Schuko, 230VAC 1KST00398 Multiple socket (1x) USA 110VAC 1KST00399 (1x) Vario Drive 12011.2.6409 (1x) Cable bushing 1KIC00395 20.7.2023/ v1.6 HM-2000 EVO | Serial-No.: 0518 © (subject to change without notice)
-
Page 34: Av-2000 Evo
13342.1.4988 (2x) Supporting (2x) Supporting guide guides 13342.2.5006 1NPSPJ40 (1x) Main spindle 13342.2.6618 (1x) Pressure- and pivot spindle 13342.3.3868 (1x) Star grip 1HSGD10KI (1x) Star grip 1HSGD10KI 20.7.2023/ v1.6 HM-2000 EVO | Serial-No.: 0518 © (subject to change without notice) -
Page 35: Pressure- And Pivot Spindle / Main Spindle
(1x) Threaded spindle 13341.3.3852 (1x) Mounting 13342.1.6626 (2x) Gripper clamp 1KKA00197 (1x) Trapezoidal spindle 13342.3.6681 (1x) Mounting angle 13342.1.4999 (1x) Spindle nut 1KTR00418 (1x) Rubber bellow 1KFA00415 20.7.2023/ v1.6 HM-2000 EVO | Serial-No.: 0518 © (subject to change without notice) -
Page 36: Hose Retraction
(1x) Hose clamp upper part 13551.1.6499 (1x) Vacuum hose retaining ring 13551.4.3526 (7x) Guiding disc (1x) Vacuum hose 13551.4.3524 lead-in (5x) Plastic 13551.4.4067 ball caster 1KKR44 (1x) Counterweight 13551.3.3525 20.7.2023/ v1.6 HM-2000 EVO | Serial-No.: 0518 © (subject to change without notice) -
Page 37: Vario Drive
(1x) Planetary gear assembly 12041.4.2836 12042.3.6437 (1x) Earthing (1x) Driving pin 1KMB00407 12041.4.2370 (1x) Emergency (1x) ON/OFF switch button 1KWS00147 1EAK04 (1x) Relay unit (1x) Potentiometer 1EAK01 1KPO00391 20.7.2023/ v1.6 HM-2000 EVO | Serial-No.: 0518 © (subject to change without notice) -
Page 38: Multivac
1HGK21Ka 1IMA01 (1x) Air-filter element (1x) Valve body 1FBF30 16042.4.3117 (1x) Valve shaft 16042.2.6312 (1x) Plug-in socket 16042.4.6606 (1x) Vacuum lead- (1x) Fuse 0,63A through 1ESI0630 16042.4.2691 20.7.2023/ v1.6 HM-2000 EVO | Serial-No.: 0518 © (subject to change without notice) -
Page 39: Schematic Diagramm 230Vac
Schematic diagramm 230VAC 20.7.2023/ v1.6 HM-2000 EVO | Serial-No.: 0518 © (subject to change without notice) -
Page 40: Schematic Diagramm 110Vac
Schematic diagramm 110VAC 20.7.2023/ v1.6 HM-2000 EVO | Serial-No.: 0518 © (subject to change without notice) -
Page 41: Maintenance
Maintenance Servicing and maintenance can be held at a minimum if the HM-2000 EVO will be operated properly and without any modifications. The use of warm water and a cleaning cloth are recommended for cleaning the anodised and powder-coated surfaces. Do not use any abrasive cleanser (acid, base, wire wool etc.) for surface cleaning. - Page 42 Contacting manufacturer if Checking of the vacuum soft cloth. Do not use control elements are adjustment in operation by abrasive cleanser! defective or damaged using the turning knob. 20.7.2023/ v1.6 HM-2000 EVO | Serial-No.: 0518 © (subject to change without notice)
-
Page 43: Special Accessories
Webshop. 20.1 Working lamp 230VAC The working lamp can be installed as an additional illumination for the HM-2000 EVO workstation. Thanks to the flexible headlamp and magnetic base, it is possible to place the working lamp on the desired position in the workstation. With integrated ON-OFF switch. -
Page 44: Technical Data
Technical data The following specifications are in context with the HM-2000 EVO and its subsystems AV-2000 EVO, Vario Drive and Multivac vacuumtesting unit. Specifications for other devices (VGX-21) and equipment can be reviewed in the respective instruction manuals. HM-2000 EVO workstation... - Page 45 Notes 20.7.2023/ v1.6 HM-2000 EVO | Serial-No.: 0518 © (subject to change without notice)
- Page 46 Notes 20.7.2023/ v1.6 HM-2000 EVO | Serial-No.: 0518 © (subject to change without notice)
- Page 47 Notes 20.7.2023/ v1.6 HM-2000 EVO | Serial-No.: 0518 © (subject to change without notice)
- Page 48 Manufacturer and wordwide distributor: Your local distributor: MINELLI CORPORATION Mattenstrasse 3 8330 Pfäffikon ZH Switzerland www.miratool.ch 20.7.2023/ v1.6 HM-2000 EVO | Serial-No.: 0518 © (subject to change without notice)
Need help?
Do you have a question about the HM-2000 EVO and is the answer not in the manual?
Questions and answers