Table of Contents
Advertisement
Quick Links
Advertisement
Table of Contents

Related Manuals for Kyocera S1360


Summary of Contents for Kyocera S1360
- Page 1 S1360 User Guide...
-
Page 2: Table Of Contents
Table of Contents Volume......21 Get Started....4 Phone Accessories . - Page 3 Notepad......45 Voice Services ....46 10 Call History .
-
Page 4: Get Started
Pressing cancels the activation process. To shop for accessories for your phone, visit Note: If you are having any difficulty kyocera.superiorcommunications.com. with activation, contact Customer Care at 1-888-321-5880 for Program Your Phone assistance. Before you start using your phone, you will... -
Page 5: Phone Battery
Phone Battery Charge the Battery You must have at least a partial charge in Install the Battery the battery to make or receive calls. To charge the battery: To install the battery: 1. Connect the AC 1. Hold the phone face adapter to the down. -
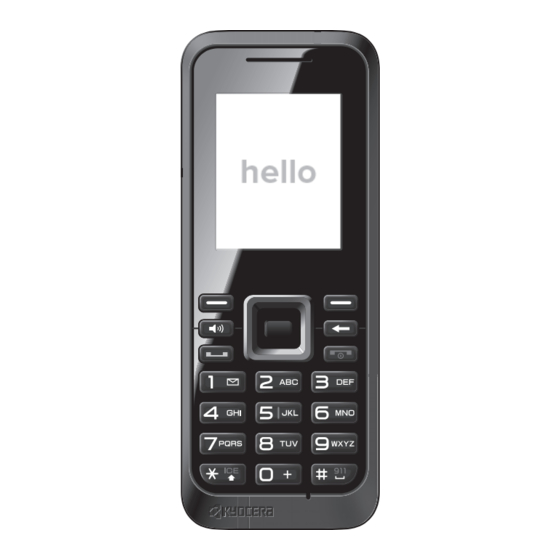
Page 6: Phone Overview
Phone Overview Get to Know Your Phone ① Earpiece. ② Home screen. ③ Volume key raises or lowers ringtone or call volume. ④ Left softkey selects items that appear on the lower left of the display. At the home screen, you can select MENU. - Page 7 Screen Icons These icons may appear on your phone’s screen. Your phone’s current signal strength. Your phone is connected to or (More bars = stronger signal.) communicating with a Bluetooth device via Hands-free Profile (HFP). Your phone cannot find a usable signal.
-
Page 8: Main Menu
Main Menu At the home screen, press (OK key) to access the main menu. Home Screen > Level 1 > Level 2 OK key Access these options: Ringtones, Graphics, and My Stuff Ringback Tones. Access account information and Top-Up your My Account account. -
Page 9: Guide Conventions
Guide Conventions Back Up Within a Menu Press to go to the previous menu. In this guide, the following conventions are Press to return to standby mode. used when describing phone features. Navigate Through the Menus Select means to press the Left softkey, Right softkey or OK key to select an item seen on the display. -
Page 10: Call Features
2 Call Features This section describes the basic features Call Using a Contact related to calls. 1. From standby mode, select CONTACTS. Power Phone Up 2. Highlight a contact and press To turn your phone on, press Call Using Voice Recognition wait until the phone display lights up. -
Page 11: Answer Phone Calls
Voice Memo to record the other party’s Answer Phone Calls voice. Phone Info to display information about When a call comes in, the phone rings, vibrates, or lights up. The phone number of your phone. the caller also appears if it is not restricted. If the number is stored in your contacts list, Volume Control the contact’s name appears. -
Page 12: Use Speed Dialing
Use Speed Dialing To display a Missed Alerts entry from the home screen: Speed dialing allows you to assign a one- 1. Select Missed Alerts from the main or two-digit shortcut to a contact. Before menu. you can use speed dialing you must save a 2. -
Page 13: Text Entry
3 Text Entry Text Entry Modes Enter Numbers with Number Keypad You can enter letters, numbers, and From the text entry field, select OPTIONS symbols whenever you are prompted to > 123 to enter a number when you press a enter text. - Page 14 Rapid Entry (T9) with Number Keypad From the text entry field, select OPTIONS > T9Word to check words you are trying to spell against a dictionary of common words. You can enter text in the following ways: To enter words, press a key once. For example, to enter the word “any”...
-
Page 15: Text Entry Quick Reference
Text Entry Quick Reference This table gives instructions for entering text. To.. Do this.. Use Abc or T9Word mode and press a key Enter a letter until you see the letter your want. Enter a number Use 123 mode and press a key. Use Symbols mode and highlight a smiley you Enter a symbol want and press... -
Page 16: My Stuff
4 My Stuff This section describes how your phone can retrieve and playback media files and other downloads. My Stuff Menu Select My Stuff from the main menu to access the following functions: Level 1 > Level 2 > Level 3 My Stuff Ringtones Displays your ringtones and the Get New option. -
Page 17: My Account
5 My Account Top-Up your Account You can manage your account directly from your phone. The basic tasks are summarized in this chapter. For more Top-Up is how you add money to yours information about your account, go to. account. You can Top-Up your account right from your phone. -
Page 18: For More Information
For More Information 6. Scroll down to select Top-Up Now and press 7. You are now Topped-Up. Press For more information about your account. exit. Top-Up with a Debit Card, Credit Card, or PayPal Account 1. From the main menu, select My Account. -
Page 19: Settings
6 Settings Settings Menu Select Settings from the main menu to access the following functions: Level 1 > Level 2 > Level 3 Settings Access these options: Graphic, Brightness, Backlight, Notification, Picture ID, Display Power Save Mode, Keypad Light, Clock/Calendar, and Greeting. -
Page 20: Display
Display Backlight You can adjust Backlight to maximize Adjusting your phone’s display settings not brightness or maximize battery life. only helps you see what you want, they can also help increase battery life. Set Backlight Dim Duration 1. From Backlight, select Backlight Dim. Set Graphics 2. -
Page 21: Volume
Set Power Save Mode Volume This feature helps conserve your battery Adjust your phone‘s volume settings to suit power by automatically adjusting the your needs and your environment. backlight and keypad setting of your phone. Adjust Volume 1. From Power Save Mode, select On. 1. -
Page 22: Keyguard
Text Entry – If you select Contacts, select All Contacts, or select One Contact to select an entry.) You can configure settings for text entry. 3. Scroll up or down to select a ringtone From Text Entry, select one of the option and select a ringtone. -
Page 23: Phone Info
Phone Info Lock Phone View Phone Number The Lock Phone settings menus let you set phone security, lock code, and more. Select My Phone# to view your phone’s phone number, MSID, and other Set Lock Phone information. When your phone is locked, you can only Check your Phone Memory make calls to 911 or ICE Contact. -
Page 24: Reset/Delete
Reset/Delete 1. From Reset/Delete, enter your four- digit lock code. 2. Select one of the following: Delete Phone Content – Reset Settings to restore all the You can quickly and easily delete all the factory defaults, including ringtone content that you have created or stored in types and display settings. - Page 25 Voice Recognition Settings – Prompt Mode to prompt for required information. You can control the settings associated – Readout Mode to prompt for with voice recognition. See “Voice required information and to read the Recognition” on page 46 for more text displayed on the main screen.
- Page 26 Vibrate Type – On to activate Airplane Mode. Airplane Mode will be deactivated You can select vibration patterns for when you turn the phone off. incoming calls, messages, alarms, and – Off to deactivate Airplane Mode. scheduled events. – On Power-up to activate Airplane 1.
- Page 27 Persistent Alerts Call Answer Mode You can set the type of Alert you would like You can select how to answer incoming to receive. calls on your phone. 1. From Alerts, select Persistent Alerts. 1. From Call Setup, select Call Answer. 2.
- Page 28 Net Guard Location The Net Guard helps you avoid accidental Before using any of the location-based connections when you connect to the Web. services, you must turn on your phone‘s To enable or disable Net Guard: location feature. 1. From Data Settings, select Net Guard. To enable your phone‘s location feature: 2.
- Page 29 Navigation Key Shortcut You can use the navigation keys as shortcuts to access specific menu items directly from standby mode. You can reassign the default shortcuts to the menu items you choose. 1. From Navigation Keys, select the navigation key you wish to reassign. 2.
-
Page 30: Contacts
7 Contacts Use Contacts to store information about a person or company. Access Contacts Add Contacts Access Contacts List Add Contacts from Home Screen 1. From the home screen, select CONTACTS. 1. From the home screen, enter a phone -or- number to save. -
Page 31: Use Contacts
Add Contacts from Contacts Use Contacts Menu Call Contacts 1. From the Contacts list, select Add New... > New Contact. 1. From the Contacts list, highlight a 2. Enter a name for the contact. Scroll contact. down to the next field when done. 2. -
Page 32: Customize Contacts
Customize Contacts Assign Pictures to Contacts 1. From the Contacts list, select a contact. Edit Contact Details 2. At the contact details screen, scroll up to select 1. From the Contacts list, highlight a 3. Select Choose Photo. contact. 4. Select a picture from the list. (Scroll to 2. -
Page 33: Contact Groups
Delete Contacts 5. When finished, select SAVE. 1. From the Contacts list, select a contact. Delete a Group 2. Select OPTIONS > Delete Contact > 1. From the Contacts list, highlight a DELETE. group. Note: You cannot recover deleted 2. Select OPTIONS > Delete Group > information. -
Page 34: Ice Contacts
ICE Contacts Emergency Message To send an emergency message: Your phone is equipped with a key that 1. From the Contacts list, select OPTIONS displays the ICE (In Case of Emergency) > Settings > ICE. contacts, which could be very helpful in 2. -
Page 35: Messaging
8 Messaging Use Messaging to send, receive, and erase messages from your phone. Messaging Menu Select Messaging from the main menu to access the following functions: Level 1 > Level 2 > Level 3 Messaging Access these options: Call Voicemail and Voicemail Voicemail Details.
Need help?
Do you have a question about the S1360 and is the answer not in the manual?
Questions and answers
Where is the SIM card slot located?