Toro Power Max 1028LXE Operator's Manual
Hide thumbs
Also See for Power Max 1028LXE:
- Operator's manual (29 pages) ,
- Operator's manual (29 pages) ,
- Operator's manual (25 pages)
Table of Contents
Advertisement
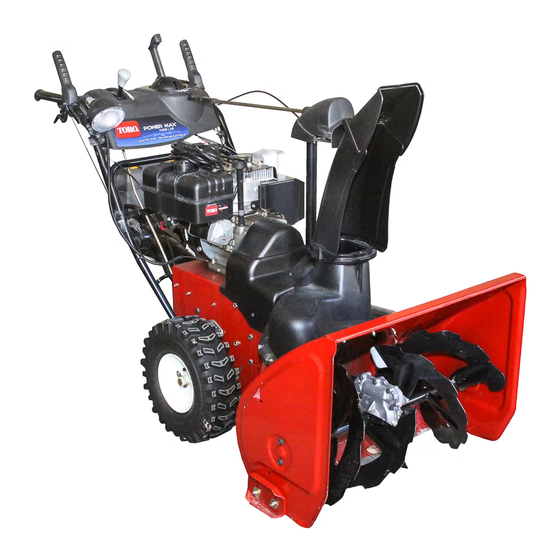
1028LXE Power Max
Model No. 38641—Serial No. 250000001 and Up
Introduction
Read this manual carefully to learn how to operate
and maintain your product properly and to avoid injury
and product damage. You are responsible for
operating the product properly and safely.
You may contact Toro directly at www.Toro.com for
product and accessory information, help finding a
dealer, or to register your product.
Whenever you need service, genuine Toro parts, or
additional information, contact an Authorized Service
Dealer or Toro Customer Service and have the model
and serial numbers of your product ready. The
illustration below identifies the location of the model
and serial numbers on the product. Write the numbers
in the space provided below:
Model #:
Serial #:
This manual uses 2 words to highlight information.
Important calls attention to special mechanical
information and Note: emphasizes general
information worthy of special attention.
Keep this engine Owner's Manual with your unit.
Should this engine Owner's Manual become
damaged or illegible, replace immediately.
Replacements may be ordered through the
engine manufacturer.
Safety
This snowthrower meets or exceeds the ISO
standard 8437 in effect at the time of production.
Read and understand the contents of this manual
before the engine is ever started.
This is the safety alert symbol. It is used to
alert you to potential personal injury hazards.
Obey all safety messages that follow this symbol
to avoid possible injury or death.
2004—The Toro Company
8111 Lyndale Ave., Bloomington, MN 55420, USA
m-4038
Printed in the USA
All Rights Reserved
Form No. 3351-206 Rev A
Snowthrower
Improperly using or maintaining this
snowthrower could result in injury or death. To
reduce this potential, comply with the following
safety instructions.
The following instructions have been adapted from
the ANSI/OPEI standard B71.3–1995 and the ISO
8437:1989 standard.
Training
Read the operator's manual carefully. Be
thoroughly familiar with the controls and the
proper use of the equipment. Know how to stop
the unit and disengage the controls quickly.
Never allow children to operate the snowthrower.
Never allow adults to operate the snowthrower
without proper instruction.
Keep the area of operation clear of all persons
(particularly small children) and pets.
Exercise caution to avoid slipping or falling,
especially when operating the snowthrower in
reverse.
Preparation
Thoroughly inspect the area where you will use
the snowthrower. Remove all doormats, sleds,
boards, wires, and other foreign objects.
Before starting the engine, disengage all clutches.
Shift the snowthrower into neutral as well, if
applicable.
Do not operate the snowthrower without wearing
adequate winter garments. Wear footwear that
will improve your footing on slippery surfaces.
Handle fuel with care; it is highly flammable.
– Use an approved fuel container.
– Never add fuel to a running or hot engine.
– Fill the fuel tank outdoors with extreme care.
Never fill the fuel tank indoors.
– Replace the fuel tank cap securely and wipe up
any spilled fuel.
Use only the power cord supplied with the
snowthrower and a receptacle appropriate for use
with the power cord for electric-start motors.
Original Instructions (GB)
Register your product at www.Toro.com
Operator's Manual
Advertisement
Table of Contents

Related Manuals for Toro Power Max 1028LXE


Summary of Contents for Toro Power Max 1028LXE
- Page 1 Read the operator’s manual carefully. Be additional information, contact an Authorized Service thoroughly familiar with the controls and the Dealer or Toro Customer Service and have the model proper use of the equipment. Know how to stop and serial numbers of your product ready. The the unit and disengage the controls quickly.
-
Page 2: Maintenance And Storage
The following list contains safety information specific parts have stopped. Disconnect the spark plug wire and keep the wire away from the spark plug to Toro products or other safety information that you must know. to prevent someone from accidentally starting the engine. -
Page 3: Sound Pressure
Purchase only genuine Toro replacement parts snowthrower a few inches (centimeters) off the and accessories. pavement. Then lift the handles quickly to bump the front of the snowthrower on the pavement. - Page 4 m-6936 3351-206 Rev A...
-
Page 5: Safety/Instruction Decals
Safety/Instruction Decals Important: Safety and instruction decals are located near areas of potential danger. Replace damaged decals. 106-7309 1. Cutting/dismemberment hazard, impeller—stop the engine before leaving the operator’s position and do not place your hand in the chute. 107-3826 1. Fast 3. -
Page 6: Product Overview
Product Overview Tecumseh Part No. 36501 1. Primer Tecumseh Part No. 35077 1. Key ignition 4. Fast 2. Engage to start the engine 5. Increasing scale 3. Disengage to stop the 6. Slow engine 7. Stop the engine m-7018 1. Auger/impeller lever 8. -
Page 7: Installing The Wheel Clutch Cable Ends
Installing the Wheel Clutch Setup Cable Ends Installing the Upper Handle 1. Unwrap the Assembly cable ends from the lower handle. 1. Lift and rotate the upper handle assembly and position it over the lower handle. Note: Ensure that the 2 cables attached to the Quick Stick (A) 2. -
Page 8: Installing The Traction Control Linkage
Installing the Traction 7. Secure the trunnion and upper end of the speed control rod with the outer washer and a hairpin cotter Control Linkage you previously removed. Note: To make the installation easier, you can look 1. Remove the hairpin cotter and washer from the down through the opening in the speed the lower end of the speed control rod (A) and insert selector (A). -
Page 9: Installing The Chute Control Rod
Installing the Chute Control 8. Insert the cable clip (A) that supports the deflector cable (B) 1. Remove the packaging materials from the Quick onto the forward Stick. carriage bolt, and secure the carriage 2. From the operating position, rotate the Quick bolts with locknuts Stick so that it is upright and in the center. -
Page 10: Filling The Engine With Oil
Filling the Engine with Oil Filling the Fuel Tank Your snowthrower comes with only a few ounces of oil in the engine. Before starting the engine, add oil. Note: The bottle that comes with the snowthrower Gasoline is extremely flammable and explosive. A contains 25 oz. -
Page 11: Operation
Operation 6. Firmly push in the primer 3 times with your thumb, Note: Determine the left and right sides of the holding the primer machine from the normal operating position. in for a second before releasing it each time. Starting the Engine 1. -
Page 12: Stopping The Engine
Stopping the Engine Operating the Traction Drive 1. Move the throttle to the Stop Note: To operate the traction drive, you must operate position. the snowthrower with both wheel clutch levers in the released position. Refer to Using the Wheel Clutch Levers on page 13. -
Page 13: Using The Wheel Clutch Levers
Using the Wheel Clutch Operating the Speed Levers Selector The wheel clutch levers allow you to momentarily The speed selector has disengage the drive to one or both wheels with the 6 forward and 2 reverse traction drive lever still engaged. This enables you to gears. -
Page 14: Operating The Quick Stick
Operating the Quick Stick Moving the Chute Deflector Push and hold the blue trigger cap down and move Push and hold the blue trigger cap down to use the the Quick Stick forward to lower the chute deflector; Quick Stick to move the discharge chute and the move it rearward to raise the chute deflector. -
Page 15: Operating Tips
Operating Tips Always set the throttle to the Fast position when throwing snow. If the engine slows down under a load or the wheels slip, shift the snowthrower into a lower gear. If the front of the snowthrower rides up, shift the snowthrower into a lower gear. -
Page 16: Recommended Maintenance Schedule
Have an Authorized Service Dealer inspect and replace the traction drive belt and/or the auger/impeller drive belt if necessary. Important: You can find more information about maintaining and servicing your snowthrower at www.Toro.com. Important: Refer to your engine operator’s manual for additional maintenance procedures. For engine adjustments, repairs, or warranty service not covered in this manual, contact an Authorized Tecumseh Servicing Dealer. -
Page 17: Checking The Engine Oil Level
Checking the Engine Oil 6. Firmly tighten the nuts that secure both skids to the auger sides. Level Note: To quickly adjust the skids if they loosen, support the scraper 1/8 inch (3 mm) off the pavement, Each time before using the snowthrower, check the then adjust the skids down to the pavement. -
Page 18: Checking And Adjusting The Auger/Impeller Cable
Checking and Adjusting the Checking the Auger Auger/Impeller Cable Gearbox Oil Level Check and adjust the auger/impeller cable after the Check the auger gearbox oil annually, and add oil if first 2 operating hours, then annually thereafter. necessary. 1. Move the snowthrower to a level surface. 1. -
Page 19: Changing The Engine Oil
Changing the Engine Oil Lubricating the Hex Shaft Change the engine oil after the first 2 operating hours, Lightly lubricate the hex shaft (A) annually with then annually thereafter. If possible, run the engine automotive engine oil. just before changing the oil because warm oil flows better and carries more contaminants. -
Page 20: Inspecting And Replacing The Spark Plug
Inspecting and Replacing Adjusting the Discharge the Spark Plug Chute Latch Use a Champion RJ-19LM or equivalent spark plug. If the discharge chute does not lock into the desired Check and gap the spark annually, and replace the position or does not unlock so that you can move it to plug if necessary. -
Page 21: Replacing The Headlight Bulb
Use a GE 892 16W halogen light bulb. Do not damaged, go to www.Toro.com for additional service touch the bulb with your hands or allow dirt or information or have an Authorized Service Dealer moisture to come into contact with the bulb. -
Page 22: Preparing The Snowthrower For Storage
Removing the Snowthrower Storage from Storage 1. Remove the spark plug and spin the engine rapidly using the starter to blow the excess oil from the cylinder. Gasoline vapors can explode. 2. Install the spark plug by hand and then torque it Do not store gasoline more than 30 days. -
Page 23: Troubleshooting
Troubleshooting Toro designed and built your snowthrower for trouble-free operation. Check the following components and items carefully, and refer to Maintenance on page 16 for more information. If a problem continues, see an Authorized Service Dealer. Problem Possible Causes Corrective Action Electric starter does not turn 1. - Page 24 6. The auger/impeller drive belt is 6. Install and/or adjust the loose or is off the pulley. auger/impeller drive belt; refer to www.Toro.com for servicing information or take the snowthrower to an Authorized Service Dealer. 7. The auger/impeller drive belt is 7.
Need help?
Do you have a question about the Power Max 1028LXE and is the answer not in the manual?
Questions and answers