
Subscribe to Our Youtube Channel
Summary of Contents for AOSEED X-KIT V4.0
- Page 2 Hey, Welcome to your own toy robot factory, X-KIT! With this suite, you can create unlimited toy robots by 3D design, model making, 3D printing, and coding. Get ready to dive into the world of robotics. Let's see how you can tackle it .
- Page 4 X-KIT is a collaborative suite of an app and hardware. Please visit the website:https://en.ime3d.com X-KIT Box X-KIT APP Hub / Servo / Sensor / Connector Modular Design / Graphical Coding / Remote Control...
- Page 5 Design 3D Print Assemble Code Pick preset design Send the file to a 3D Put the printed pieces Make and transfer a Let the robot run or from the list in the app. printer and start to together on the Hub desirable program for control it by the Customize the design...
- Page 6 Servomotor Buzzer Wheel Tire Rubber Track Ultrasound Sensor Ball Pin Axle Long Pin Axle Pin Ball Axle The Hub Quick Guide Plier...
- Page 7 Overview 2 motors 8 input/output ports Universal wheel Micro-USB power port 3 indicator lights Power button 28 pin sockets Start button Micro-USB data port Pause button 2 IR sensors 2 RGB LED lights...
-
Page 8: Power Signal
Power Signal If the green Power signal is on , it means that the Hub is running. Bluetooth Signal If the Bluetooth signal is on , it means that the Hub is successfully connected with the app. Data Signal If the yellow Data signal is on , it means that data transmission is enabled or programs are ready to run. - Page 9 Plugins Diagram Please refer to the diagram when plugging in electronic modules as servos, sensors. Wrong installation might cause the malfunction of program. Motor M1 M2 They can rotate forward and backward to move. ULTRA RGB Lights Colorful lights can be turned on by manipulating the numbers of RGB values.
- Page 10 Micro-USB The cord is for both charging It is used for both charging and transferring data and code transfer. Make sure the Hub is ON when transferring data State of Charge Not Charing Charing Fully Charged...
- Page 11 90° 180° 0° Servomotor Ultrasound Sensor Buzzer Servomotor is a rotary actuator that An ultrasonic sensor is an electronic A buzzer is an audio signaling device. allows for precise control. It consists of device that measures the distance of a Typical uses of buzzers include alarm a suitable motor coupled to a sensor for target object by emitting ultrasonic sound...
- Page 12 Applications of Servos X-KIT provides 4 servos. With servos, there can be a lot of gameplay to be discovered. Different combinations between servos and components will produce various effects. Using with linkages and sliding blocks, we can realize our creativity and even explore much more.
- Page 13 Ball Pin Axle Long Pin Double pins at both ends With a ball head at one end Double cross-shape ends One longer end pin It can be used for connections It can be used on part or link It can be used for connections It can be used for connections between part and part, part that rotates in nearly 360°.
- Page 14 Windows PC Download Android Tablet / iPad Download https://www.aoseed.com/downloads/X-KIT Search "X-KIT or XKIT" in Google Play or App Store Note X-KIT APP is always free for trial and updates!
- Page 15 Setting Projects Set email / BGM / Sound Effect User-created design and coding works are saved here Robot templates Remote control Preview and pick the 60+ A wireless control panel provides robot designs full control over robots Robot categories Explore Animal Kingdom / Vehicle League Latest news, tutorial, gameplay Construction Group / Fantasy Show...
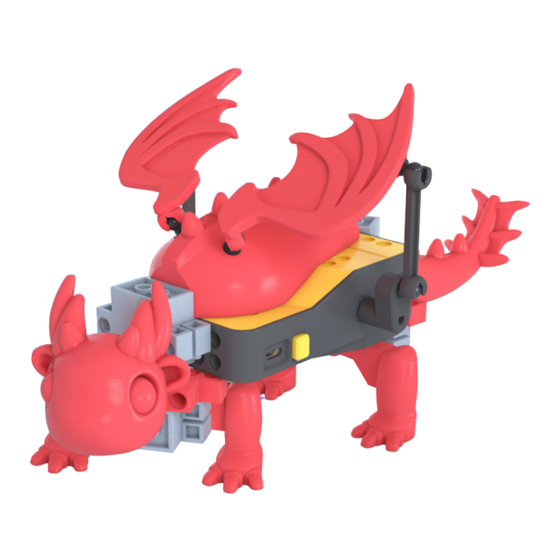
- Page 16 X-KIT contains robots from 4 categories for kids to pick from. Animal Kingdom Vehicle League Construction Group Fantasy Show...
- Page 17 Return to Homepage Parts list Lists of 3D printed parts and electronic modules Robot description Robot 3D preview A 3D model of the robot can be previewed here Building Instruction Step by step instruction of the assembling of selected robot Go to coding Forward to coding mode Print...
- Page 18 Print Create new design Upload design to cloud Save your work to "Projects" Go to Homepage Share design Go back Socket size setting Magnifier An visual aid for part installation Toolbox of modular parts when dragging part Hole Connectors Design area The models of 6 standard 3D work space connectors for installation...
- Page 19 Includes parts of 60+ robot templates. The modules can be used for brand new design Includes models of wheel and electronic modules as ultrasound sensor, servo or servo pack Includes various modular parts as links or LEGO parts Includes various fun stickers to stick on and merge into most parts without using connectors Includes hole tool to make standard sockets on model Includes Text tool to generate custom text stickers...
- Page 20 It is required to use connectors to install parts onto the Hub or When parts fail to be installed, they will drop on a work plane. You connect part to part. There are 6 types of connector model in the can edit and then reinstall them, or delete them.
- Page 21 There are two different coding modes after pressing code Block Coding More powerful but still very intuitive block coding allows users of all ages to freely control their robot through coding. Card Coding An easy-to-learn coding app which allows pre-school kids to taste the fun of coding.
- Page 22 premade codes are prepared in the Code Library for users to use in their robots directly.
- Page 23 Create new code Control Connect Hub Save to "Projects" Back to Homepage Go back Plugins Diagram of electronic module connection Coding block toolbox A foldable diagram guides you Includes X-KIT coding blocks, variables to connect electronic modules and other custom coding blocks Start/Stop code Transferred codes in the hub can be Case Library...
- Page 24 Start / Stop custom code Connect Hub Transferred codes in the hub can be The Bluetooth signal will be on when started or stopped by pressing this button the Hub is successfully connected. Go back Buzzer Preset motions Buzz your buzzer. The Buzzer module 6 preset motions of the Hub can need to be connected.
- Page 25 There are pre-programmed motions in the Remote-Control mode. Tracer Protector Avoider Follower Spinner Winner The Tracer auto-traces The Protector patrols The Avoider bypasses The Follower keeps a The Spinner spins in The Winner celebrates by the black line in the only in the territory an obstacle every time fixed distance to the...
- Page 26 New project Brand new design, card code or block code can be created here My designs My codes There are 2 code files due to 2 coding modes. Distinguish them by the icons. Card Code Block Code...
- Page 27 Geometry Painter Foraging Dinosaurs Latest updates of gameplay tutorial and news are here! Rover Drone Show Stand...
- Page 28 1: Can I still use X-KIT without a 3D printer? Without a 3D printer, our user can control the hub and the electric modules to perform basic motions. However, the point of X-KIT is to let more people get close with 3D design and 3D printing and enjoy the power from them. If you are not currently with a 3D printer, you might: 1.
- Page 29 For how-to videos and further supports: https://www.aoseed.com/products/X-KIT Follow us on: @aoseed2011 @aoseed2011 @aoseed2011 CHOCKING HAZARO_Small Parts not for children under 3 years old...
Need help?
Do you have a question about the X-KIT V4.0 and is the answer not in the manual?
Questions and answers