
Related Manuals for orford EB Series

Summary of Contents for orford EB Series
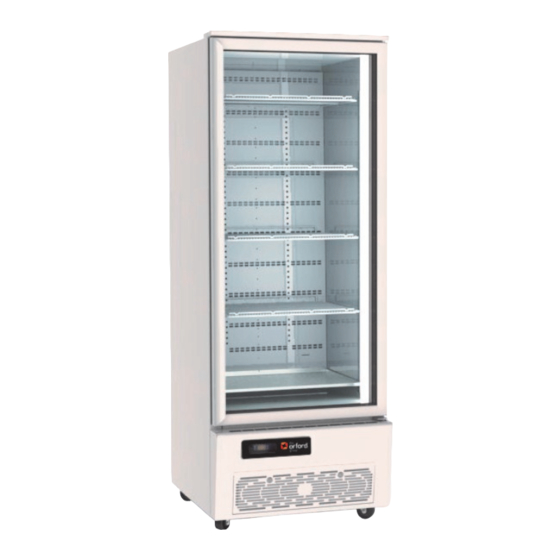
- Page 1 Vertical Display and Storage EB Vertical Refrigerators 1 , 2 and 3 Door Vertical Refrigerators ORIGINAL INSTRUCTION EB20R-B EB30R-B EB20R-Sn-B EB30R-Sn-B EB45R-Sn-B EB45R-B EB36R-Sn-B EB36R-B www.orford.com.au 1300 673 673...
- Page 2 Rev.1 Sept 2021 edition. Copyright © 2012. All rights reserved. ORFORD REFRIGERATION, it’s subsidiaries are registered trademarks of The Orford Group. The Orford Group reserves the right to alter specifications without notice. Contact Addresses Address: Orford Refrigeration 382 South St ...
- Page 3 Installation and Operating Manual Please keep this manual in a safe place and refer to it and your Warranty information should it be required. Please fill out for future reference This information will be required for Warranty Service work to be authorized.
-
Page 4: Table Of Contents
The information contained within is provided for the benefit of users of these products. Keep this information in a safe place for future reference. Product specifications enclosed are correct at time of publication. The Orford Group reserves the right to change specifications, in our endeavours for continuous product improvement. The Orford Group cannot be held responsible for errors or omissions in this document. -
Page 5: Shipping Damage & Uncrating
12 months (for non-corporate account customers as determined by The Orford Group). Orford Warranties do not cover service calls resulting from poor maintenance or replacement of consumable part (s). Please refer to additional Warranty Information, or copies of any contracts, supplied with this equipment for more details. - Page 6 Position the refrigerator in accordance with its Climate Class. Climate Class defines the climatic ambient conditions for which the cabinet is suited. Refer table below. The EB series are suited to the Climate Class as indicated on the cabinet identification label. Refer table below. Ambient Temperature ºC...
- Page 7 EB30R-B EB30R-Sn-B EB36R-B EB36R-Sn-B EB20R-B / EB20R-Sn-B / EB30R-B / EB30R-Sn-B / EB36R-B / EB36R-Sn-B / EB45R-B / EB45R-Sn-B...
- Page 8 EB45R-B EB45R-Sn-B EB20R-B / EB20R-Sn-B / EB30R-B / EB30R-Sn-B / EB36R-B / EB36R-Sn-B / EB45R-B / EB45R-Sn-B...
-
Page 9: Safety Information
when moving these appliances. Be careful not to touch moving parts and hot surfaces. Orford Refrigeration does not authorize the use of flammable refrigerants for servicing these refrigerators and freezers as Warning! injury, loss of life and/or property may result. - Page 10 Ventilation These refrigerators require proper ventilation of the refrigeration unit (Motor). The EB series refrigerators are ventilated at the front. The front ventilation grill must be kept free on any obstructions at all times. The EB series refrigerators will operate satisfactorily when ventilated only from the front but is recommend that the cabinet be kept 50mm or greater from a rear wall for maximum performance and energy saving.
- Page 11 Starting It is recommended that competent service people start up and check the equipment for correct installation and proper operation. All Self-Contained equipment is run tested in the Factory for proper temperature and operation, but it is possible that during transport or shipping damage, loosening of screws, shifting of control setting, etc, may have occurred.
- Page 12 Bottom shelf removal 1. Isolate power Refer “To Isolate Power” 2. Undo the screws and remove bottom shelf(shelves) from the slots in the vertical rear duct. 3. Lift bottom shelf up, twist it at an angle and take it out. 4.
-
Page 13: Energy Management System
After the 7 day learning period the control will automatically switch off the interior and sign light (if fitted) when your premises are closed. Note:- The EB Series has manual light switches to override the lighting operation if required. Refer Manual Light Switches. - Page 14 Energy Management Control Motion Sensor LED Indicators Motion: The motion LED flashes on detecting motion. If the motion detection LED is continually flashing when there is no activity in front of the refrigerator, you should contact your service provider. Door: Illuminated when door opens. Compressor: Illuminated when the compressor is running.
-
Page 15: Temperature Adjustment
Buttons Up: Scrolls up menus, Increases parameter values. Set: Accept/forward - selects menu options and parameters Defrost :Return/backward - De-selects menu options and parameters. Activates a manual defrost (only applicable if temp is below termination temp) Down:Scrolls down menus. Decreases parameter values. Note:- These buttons are used for cancelling alarms, for temperature adjustment and by technicians. - Page 16 Alarms Appliance sensor failure: Temperature sensor failure alarms are activated if the measured temperature is outside the normal measurement range. This may be caused by a wiring fault (loose connection, short or open circuit) or the sensor itself may be faulty. Whilst this alarm will cause the compressor to shut down when active High Temperature sensor failure: Temperature sensor failure alarms are activated if the measured temperature is...
- Page 17 Lighting The cabinet interior lighting and (optional) illuminated advertising sign are factory set to operate automatically by the Energy Management System for maximum energy saving. Manual Light Switches are also provided to change the lighting operation to suit special circumstances. There are two switches, one for interior lighting and another for the sign giving separate Switch Operation: I = Automatic (EMS Controlled) (Factory Setting)
- Page 18 Maintenance Warning! Isolate Power before removing any covers for Maintenance Note: The front unit cover can be removed to gain access to the Power Isolation Switch. Cleaning Check that all vents are clean and clear of dust, dirt, lint, paper, plastic etc. that may cause an obstruction to proper ventilation.
- Page 19 Cleaning To clean the condenser filter Pull grill forward using the finger holes provided. Lift filter out of the grill. Brush or vacuum dust and dirt off the filter. Wash the filter with clean water. Detergent and warm water may be required to clear grease build up from cooking oil etc.
- Page 20 Service Recessed LED Tube Replacement Isolate power Refer To Isolate Power To remove the plastic light diffuser, insert a screwdriver at the top and lift the diffuser. Slide it out. Rotate the LED tube 90º and slide out to remove. 4.
- Page 21 Mullion LED, Tube Replacement Isolate power. Refer To Isolate Power. Remove the plastic light diffuser, insert a screwdriver into the gap at the top and lift the diffuser. Plastic light diffuser Gap at the top Screw driver . Slide it out of the mullion 4.
-
Page 22: Problem Solving
Problem Solving Check before calling for machine service Note: Routine adjustments and maintenance procedures are not covered by warranty, refer to Warranty information supplied with your equipment, for conditions and responsibilities. If after following the checklist your equipment fails to operate correctly, please have the Series Model Number, Item Number and Cabinet Serial Number ready before calling for service. - Page 23 Disposal : *** Note:- These refrigerators use flammable blowing agents for their insulation and must be disposed of in accordance with Government regulations pertaining to your area. General Specifications Model EB20R-(Sn)-B EB30R-(Sn)-B EB36R-(Sn)-B EB45R-(Sn)-B 230 - 240V 230 - 240V 230 - 240V 230 - 240V 50Hz.
Need help?
Do you have a question about the EB Series and is the answer not in the manual?
Questions and answers