Advertisement
Table of Contents
Contents
Dragon Touch Smart 10 - Digital Photo Frame Manual
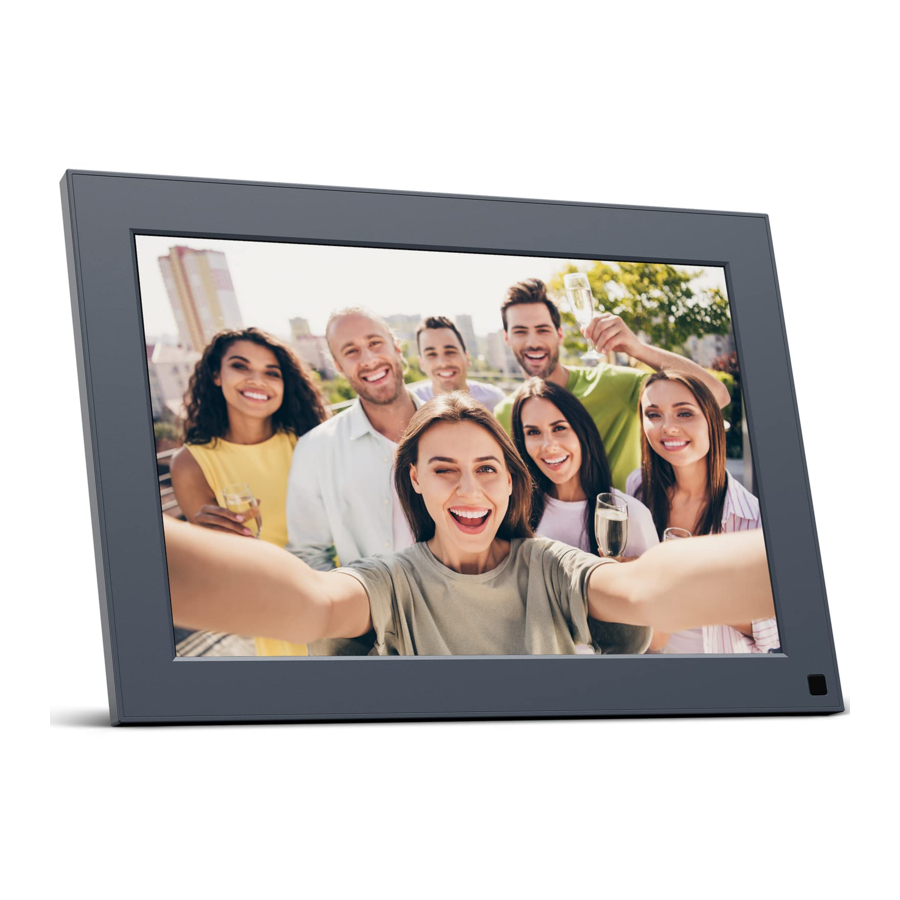
FRAME OVERVIEW

- 10" IPS Touch Screen
- PIR Motion Sensor
- Magnetic Suction

- Reset
- Micro USB Port
- USB Port
- DC Power Port
- Memory Card Slot
GETTING STARTED
- Installing the Frame Stand
Attach the frame stand to the back of the frame. The frame stand is magnetic so that you can easily install the frame in the correct position according to the magnet design. You can place the digital photo frame horizontally or vertically. It is highly recommended to place the photo frame horizontally during the first set up.

- Connecting to Power
Connect the power cable to your frame and plug the power adapter into a wall outlet.
The photo frame will automatically power up.

- Initial Settings
There are several initial settings (Wifi, Device Info, Sleep Schedule, etc.) when you enter the system for the first time. - Connecting to Wifi
You can connect to Wifi during the initial settings or under the Wifi setting. Select the Wifi network you would like to connect to and enter the correct password if required. If your Wifi network is not on the list, restart the router or move yourframe closer to your router, wait for seconds and check it again.
Note:- The photo frame supports 2.4GHz Wifi networks only.
- A private Wifi network is highly recommended.
- Frame ID
The photo frame will be activated when connecting it to Wifi for the first time. You can find the photo frame's unique Frame ID number on the photo frame: go to Settings → Device Info. The Frame ID number is required for binding your frame via the app or email.


USING THE OURPHOTO APP
- Downloading the OurPhoto App
Please download and install the OurPhoto app on your mobile device by searching OurPhoto on the App Store or Google Play.
![www.apple.com]()
![play.google.com]()
- Creating an OurPhoto Account and Log in
- Open the OurPhoto app, select Sign Up and fill in all the required information (if you already have an account, please log in directly).
- Click the right arrow icon to verify the email address you provided. A verification code will be sent to your email address.

- Collect and fill in the verification code, then click Submit to complete the account registration.
- Inviting Friends to Download the App and Log in
Your friends and family can also send pictures or videos to your photo frame via the app. They'll need to download and install the OurPhoto app, create an account, log in to their account, and bind your frame (Please refer to "Inviting Others to Bind Your Frame via the App" below).


BINDING YOUR FRAME
-
Binding Your Frame via the App
The following instructions are only applicable to the frame owner or the user who is the first to bind the frame.- Log in to the OurPhoto app.
- Select Devices.
- Click the "+" next to My Devices.
- Enter the Frame ID.
Note: Frame ID is a 6-digit series number which can be found on your frame.
Go to Settings → Device Info. - Create a device name for your frame.
Note: We recommend you to name your frame after the Frame ID for easy identification, for example, if the Frame ID is 123456, please name your frame Frame123456. - Create a unique email address for your frame.
Note: We recommend you to create the address with the Frame ID for easy identification, for example, if the Frame ID is 123456, please create an email address frame123456@ourphoto.cn. - Then click Bind.

- Confirm the binding request on your frame. Go to Settings → User Management → Pending User Requests, click Accept.
Note: Please make sure that you turn on the "Accept New Users" to receive the binding request. - If the binding succeeds, this account will appear under the Users, and it will be the main account of your frame.
Note: The above screenshot is for reference, please update to the latest firmware version.
![]()
- Inviting Others to Bind Your Frame via the App
The following instructions are only applicable to the non-frame owner to bind the frame. And binding requires the frame owner to operate and confirm on the frame.
Here is what your friends should do:- Download and install the OurPhoto app.
- Create a new OurPhoto account and log in. Go to Devices → Bound Devices, and then click "+".
- Enter the frame ID number of your frame.
Note: Frame ID is a 6-digit series number which can be found on your frame.
Go to Settings → Device Info. Please send this Frame ID to your friends. - Create a device name for the frame.
Note: We recommend your friends to name the frame after the Frame ID for easy identification, for example, if your Frame ID is 123456, please name the frame
Frame123456. - Then click Bind.

On your frame, you'll need to confirm your friend's binding request. Go to Settings → User Management → Pending User Requests, click Accept.
Then your friends and family will be able to share photos directly to the frame from anywhere in the world.
To check the list of your frame's bound users, go to Settings → User Management → Users.
Note: The above screenshot is for reference, please update to the latest firmware version.
![]()
- Binding Your Frame via Email
You and your friends can also bind your email accounts to the frame, so that you can share photos to the frame via email. Make sure the photo frame has already been activated and bound via the app before you bind it via email. Otherwise, it cannot bind the frame via email successfully.- Send an email with the subject "bd + Frame ID" to the frame's unique email address (the one you created when you bound your frame for the first time).
For example, if your Frame ID is 123456, send an email with the subject "bd123456" to the frame's unique email address. - Wait for seconds, you will receive a confirmation email from the OurPhoto team, and your email account is successfully bound to the frame. You can also find the bound email accounts in the User Management interface.
- Send an email with the subject "bd + Frame ID" to the frame's unique email address (the one you created when you bound your frame for the first time).


UPLOADING PHOTOS AND VIDEOS
- Uploading Photos and Videos via the App
- Open the OurPhoto app and log in to your account. Make sure you have bound your account to your frame before.

- Click Media to upload your photos or videos on your mobile device. Select the photos or videos you would like to upload and choose the frame you would like to send to. Click the right arrow icon to confirm.
- Click Photo or Video to take new photos or videos and choose the frame you would like to send to. Click the right arrow icon to confirm.
- The photo frame will receive the photos or videos in seconds, you can check the photo or video library on the frame.
Note:
- Open the OurPhoto app and log in to your account. Make sure you have bound your account to your frame before.

- If the frame didn't receive the photos or videos, please reboot the product or check the Wifi network.
- Each video clip is limited to 30 seconds or 100MB.
- The app supports sending Full Image to the frame. Please make sure your app version is 1.1.94 (iOS)/1.0.4 (Android) or above.
- Uploading Photos via Email
Send an email with photos attached to the email address of the frame. Your photos will be received in seconds, you can check the photo or video library on the frame.
Note:
- Videos cannot be uploaded via email.
- Make sure you have successfully bound the frame via email before uploading pictures.
- Uploading Photos and Videos via a Computer
- Make sure your frame and computer are on the same Wifi network.
- On your frame, enter the PC Control interface, go to Settings → PC Control. Click the Start button, you will find an FTP address on the screen.
- On your computer, open File Explorer. In the File Explorer, enter the FTP address in the address bar.
- Then you can drag and drop the photo and video files on the computer that you would like to transfer to the frame folder showed up.
- Click Stop on the frame to end PC connecting and uploading.
- Your photos or videos will be received in seconds, you can check the photo or video library on the frame.
![]()
Note: The above screenshot is for reference, please update to the latest firmware version.
![]()
- Uploading Photos and Videos via a USB Drive
- Insert a USB drive into the frame, and wait for seconds, the frame will let you know when the USB drive is successfully connected.
- Enter the Photo or Video library, click USB and you will see all the photos or videos stored in the USB drive.
- Click the More icon in the upper right corner and select the photos or videos you would like to import to the internal memory of the frame.
- Click the Share icon at the top then choose OK to import the photos or videos.
- Your photos or videos will be received in seconds, you can check the photo or video library on the frame.
Note:


- If you have too many files stored in the USB drive, it will take more time to read.
- The system will protect and lock the USB drive if there is no action after the USB drive has been plugged in for a while. To activate it, you need to take it out and plug it in again.
- Please remove all your external devices when you reset the photo frame.
![]()
Note: The above screen shot is for reference, please update to the latest firmware version.

- Uploading Photos and Videos via an memory Card
- Insert a memory card into the frame, and wait for seconds, the frame will let you know when the memory card is successfully connected.
- Enter the Photo or Video library, click the memory card and you will see all the photos or videos stored in the memory card.
- Click the More icon in the upper right corner and select the photos or videos you would like to import to the internal memory of the frame.
- Click the Share icon at the top then choose OK to import the photos or videos.
- Your photos or videos will be received in seconds, you can check the photo or video library on the frame.
Note:
- Max supports a 32GB memory card.
- If you have too many files stored on the memory card, it will take more time to read.
- The system will protect and lock the memory card if there is no action after the memory card has been inserted for a while. To activate it, you need to take it out and insert it again.
- Please remove all your external devices when you reset the photo frame.
DELETING PHOTOS AND VIDEOS
- Deleting Files in the Photo or Video Library
- Enter the Photo or Video library and choose Internal Storage, you will see all the photos or videos stored in the internal memory.
- Click the More icon at the upper right corner, and select the photos or videos you would like to delete from your frame.
- Click the Delete icon at the top then choose OK to delete the photos or videos.
- Deleting Files on a Slideshow
- When the photos or videos are displayed on the screen, click the photo or video you would like to delete.
- Click the Delete icon on the menu below, then choose OK to delete the photos or videos.
- Deleting Files in Album Settings
Delete all the photos from internal storage.
SETTINGS MENU
- Device Info
You can check the Frame ID and the app information. - User Management
Turn on/off the Accept New Users button to receive or reject new user requests. You can see and manage the bound users under the Users. Choose the account you want to manage, and a submenu will allow you to view the account's photos, remark name, delete user and delete user & photos.
Accept or refuse the New User Requests under the Pending User Requests. - PC Control
The PC Control feature helps to upload photos and videos from a computer. To upload files, please make sure your frame and your computer are on the same Wifi network. The Wifi status is shown on the screen.
Click Start and enter the FTP address on your computer to upload files (please refer to the UPLOADING PHOTOS AND VIDEOS section), and click Stop to end. - Wifi
You can choose the Wifi network you would like to connect to on the list. - Album Settings
- Full Screen
Turn on this setting to make the photo displayed in full screen. - Slideshow
You can set Slideshow time to make the frame automatically displays photos after a period time of inactivity. - Slideshow Mode
You can choose either Sequential or Random mode to display photos. - Slideshow Interval
You can set Slideshow Interval to adjust the duration of each photo displays. - Slideshow Transition Effect
You can choose the effect of slideshow transition. - Delete Photos
Delete all the photos from internal storage. - Restore default settings
It will remove all your user info, customized settings and files on your frame.
- System Settings
- Sound
You can adjust the media volume. - Display
- Brightness
You can adjust the brightness of the screen. - Suspended ball
Turn on this button, a suspended ball will appear on the screen. It is a quick navigation key to help you easily go to the Home page and adjust the volume. - Motion Sensor
Turn on the motion sensor, the screen of the photo frame will automatically turn off when motion is not detected in a certain period of time. The screen will wake when motion is detected or someone passes by it. - Auto-rotate screen
Turn on this button, the display will automatically adjust to either landscape or portrait position according to the frame placement.
- Date and Time
You can set the date and time according to your preference. - Language: English, Deutsch, Español, Français, Italiano, 日本語,简体中文
Choose the system language.
- Auto On & Off
You can set the Auto-On/Off time, as Sleep Schedule, to make the display automatically turn on and off at a specific time.
When your frame is in the sleep mode, press the power button on the back to awake the display. - Factory data reset
- Please disconnect your frame to Wifi first.
- Uncheck the "Delete all users and restore the device to inactive".
- Click OK to reset your frame.
Note: If the photo frame works abnormally or crashes, press and hold the power button for about 10 seconds to force it to shut down, and then turn it back on.
FAQ
- Does this frame have to be plugged in all the time?
Yes, this frame is required to be plugged into an AC outlet to function. It has no builtin battery. - Does this frame have to be Wifi connected to work or just in the setup process?
This frame needs to connect to a Wifi network for setup, receiving new photos/videos, receiving user requests and software updates. Other than that, the frame can play photos or video without a Wifi connection. - Why this frame cannot connect to Wifi?
It supports only 2.4GHz Wifi networks. Select the Wifi network you would like to connect to and enter the password correctly if required. If your Wifi network is not on the list, restart your router or move your frame closer to your router, wait for seconds and check it again. - Can this frame be hung on the wall?
No, this frame can't be hung on the wall. You can put it on a desk, nightstand, or shelf. - Can I place the frame in a portrait or landscape position?
You can place the frame horizontally or vertically. No matter what the frame orientation is, you will see photos displayed in landscape orientation. - Where can I find the Frame ID?
Frame ID is a 6-digit series number which can be found in your Frame. Go to Settings → Device Info. - Why I cannot bind my frame via the app?
Please note that there is a difference in the binding process.
If you are the frame owner or the first to bind the frame, please follow the instructions "Binding Your Frame via the App" to bind the frame.
If you are not the frame owner, please follow the instructions "Inviting Others to Bind Your Frame via the App" to bind the frame. After receiving a binding request, the frame owner will need to operate on the photo frame and click "Accept" under the User Management menu to confirm the binding. If the binding succeeds, the user account will appear under the Users. - Why I cannot bind my frame via Email?
Bind the frame via the app before binding the frame via email. If you cannot bind the frame via email, please make sure the frame has already been bound and activated via the app. - How do I unbind an account?
If you would like to unbind an Email or app account, please go to the User Management menu and click the bound user you want to delete, you will see there is an option for deleting a user. - Can I share photos and videos to the frame?
Yes, you can share photos and videos (max 30 seconds or 100MB) to the frame. - Can I transfer photos or videos from a computer?
Yes, you can transfer your files from a computer by using the PC Control feature, but this feature is only available to Windows system now. - Where do the photos and videos store?
All the received photos and videos will be stored in the built-in 16GB memory. It is estimated to keep over 40,000 photos of 300KB/pc. The server will only cache the data for 30 days, and all the photos will be encrypted and deleted after 30 days. It can enable your photo frame to receive the photos sent when the photo frame is offline. - How can I delete photos and videos?
Enter the Photo or Video Library, click "more" button on the top. Select the photos or videos you would like to delete and click "delete". - Is it possible to manage the photos and videos in the frame remotely?
You can only manage/export/delete photos and videos in the frame directly. - Can I change the image transitions and displaying speed?
You can choose your preferred slideshow mode, interval and transition effect in Album Settings. - Can this frame automatically turn on/off at a specific time?
You can go to the Auto On/Off setting and set the auto on/off time as you want. - Can I cycle pictures and videos together?
You could only play photos or videos separately.
If you cannot find the answer to your question, please contact our customer support team, thank you!
CONTACT US
For any inquiries about DragonTouch products, please feel free to contact us. We will respond within 24 hours.
Tel: (888)811-1140 (US)
Email: cs@dragontouch.com
Web: www.dragontouch.com

Documents / Resources
References
![www.apple.com]() App Store - Apple
App Store - Apple![play.google.com]() Google Play
Google Play![www.dragontouch.com]() Dragon Touch Android Tablet PC, 4k Action Camera & Sports DV Camera at Dragon Touch
Dragon Touch Android Tablet PC, 4k Action Camera & Sports DV Camera at Dragon Touch
Download manual
Here you can download full pdf version of manual, it may contain additional safety instructions, warranty information, FCC rules, etc.
Advertisement
Need help?
Do you have a question about the Smart 10 and is the answer not in the manual?
Questions and answers