Advertisement
- 1 What's in the box
- 2 What you'll need
- 3 Before you get started
- 4 Need some help?
- 5 STEP 1: Pair flow meter.
- 6 STEP 2: Turn water off.
- 7 STEP 3: Connect fittings
- 8 STEP 4: Find your measurements
- 9 STEP 5: Cut and clean pipe.
- 10 STEP 6: Install the flow meter
- 11 STEP 7: Turn water on
- 12 Congrats, you did it!
- 13 Documents / Resources
What's in the box

What you'll need
Installation instructions are intended only for use with recommended fittings. Visit rachio.com/flow for a list of required tools, helpful videos, FAQs and more.
- Recommended fittings
- Recommended manual pipe cutter
- Sandpaper or deburring tool
- Fine point permanent marker
- Stick ruler
- Phillips screwdriver
- Smartphone or tablet
Before you get started
Before any pipe is cut, make sure your system meets the installation requirements:
- Installation site must be within 300 feet of an installed Rachio 3 Smart Sprinkler Controller.
- Backflow preventer and installation area must be above ground (recommended).
Below ground installation requires additional steps not included in this manual. For more information, visit rachio.com/flow-underground. - The Flow Meter is not rated for potable water and must be installed after the backflow preventer.
- System must have ¾ inch or 1 inch pipe made of either copper, PVC, PEX, or SDR9 poly.
For 1 inch PVC pipe, 1 inch copper or poly pipe, and ¾ inch PVC pipe, you will need 14 inches of straight pipe between the backflow preventer and valve box.
For ¾ inch copper or poly pipe, you will need 16 inches of straight pipe between the backflow preventer and valve box. - If you have more than one Rachio 3 controller or more than one backflow preventer, visit rachio.com/flow-advanced.

Using installation methods other than those recommended in this manual could damage the Wireless Flow Meter or void the warranty.

Inserting your fingers into the Flow Meter or fittings can damage equipment or cause personal injury.
Once attached, fittings cannot be removed from the Flow Meter, but may be removed from the pipe using fitting removers.
Using glue of any kind could damage the Rachio Flow Meter.
Need some help?

Check out our Help Center.
support.rachio.com

Give us a call.
1 (855) 300 3569
If you're unable to complete any of the installation steps, we recommend a professional installation.
To find a Rachio Pro, go to rachio.com/flow-install
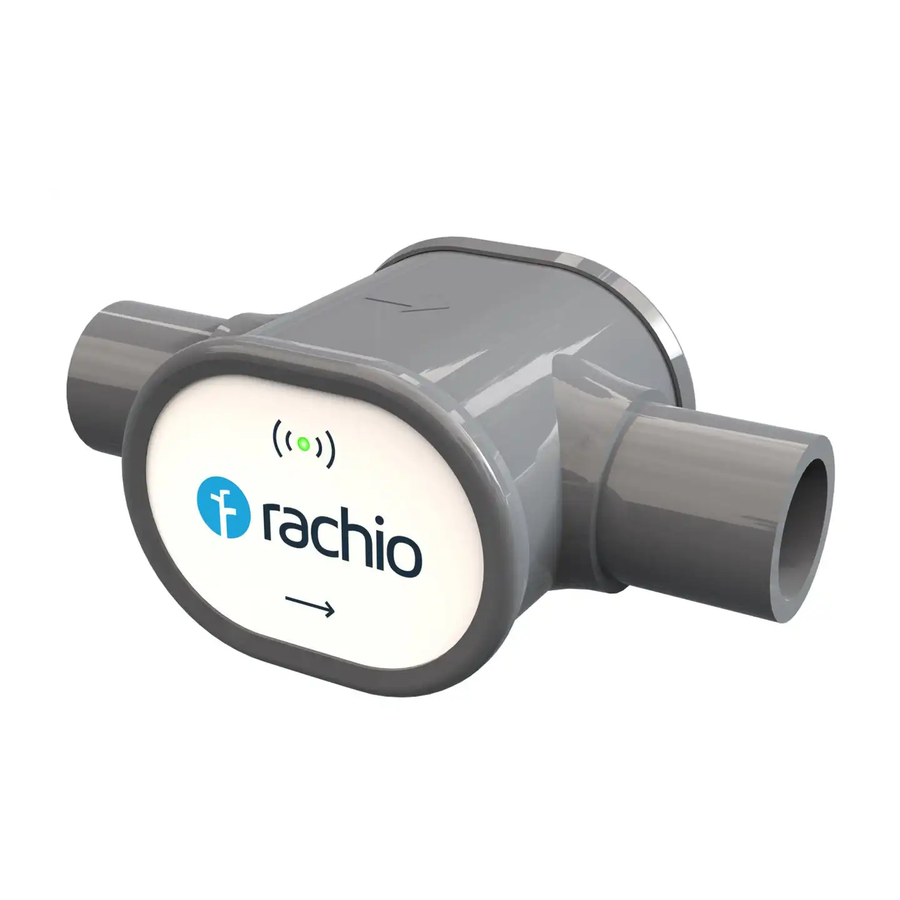
STEP 1: Pair flow meter.
- Take the Wireless Flow Meter to the backflow preventer where it will be installed.
- Do not put the batteries in the Flow Meter until prompted.
- Open the Rachio app. From the "More" tab, select "Accessories," then add the Rachio Wireless Flow Meter. You will be guided through the pairing process and then prompted to continue installation.
STEP 2: Turn water off.
- Turn off water to the irrigation system at the backflow or at the main shut-off.
- Drain the system by running any zone for one minute using the Quick Run feature in the Rachio App.
STEP 3: Connect fittings
Push the Flow Meter and fittings together firmly using a twisting action until the fittings are flush or nearly flush with the Flow Meter.

STEP 4: Find your measurements
Use the chart on the next page to find the size and material of your system. Reference the matching pipe cutting instructions in the following pages to mark pipes in preparation for cutting.
Accuracy is important here!
Measure twice, cut once.
If you are not using the Rachio-recommended fittings, please use your fittings' specs to complete installation.
For copper or poly pipe

Instructions for cutting 3/4 inch copper or poly pipe
- Identify 16 inches of straight pipe between the backflow preventer and the valve box.
- Mark 6 inches after the backflow; this will be the top cut (red line).
- Mark 8½ inches after the first mark; this will be the bottom cut (red line).
- Put a small X next to the first two marks.
- Mark 1⅛ inches above the top mark to indicate insertion depth (white line).
- Mark 1⅛ inches below the bottom mark to indicate insertion depth (white line).
Bottom fitting can be buried up to 2 inches if needed.

Instructions for cutting 1 inch copper or poly pipe
- Identify 14 inches of straight pipe between the backflow preventer and the valve box.
- Mark 6 inches after the backflow; this will be the top cut (red line).
- Mark 6¼ inches after the first mark; this will be the bottom cut (red line).
- Put a small X next to the first two marks.
- Mark 1 ⅛ inches above the top mark to indicate insertion depth (white line).
- Mark 1 ⅛ inches below the bottom mark to indicate insertion depth (white line).
Bottom fitting can be buried up to 1 inch if needed.

For PVC or PEX pipe

Instructions for cutting ¾ inch and 1 inch PVC or PEX pipe
- Identify 14 inches of straight pipe between the backflow preventer and the valve box.
- Mark 6 inches after the backflow; this will be the top cut (red line).
- Mark 6½ inches after the first mark; this will be the bottom cut (red line).
- Put a small X next to the first two marks.
- Mark 1 inches above the top mark to indicate insertion depth (white line).
- Mark 1 inches below the bottom mark to
Bottom fitting can be buried up to 1 inch if needed.

STEP 5: Cut and clean pipe.
- Make a clean, straight cut on the two innermost marks (denoted with X's).
First, cut the top innermost mark.
Next, cut the bottom innermost mark.
Do not cut the pipe on the outer insertion marks. - Use the deburring tool or sandpaper to remove rough edges and debris inside and outside the pipe.

STEP 6: Install the flow meter
- Install so the arrows on the side and face of the Flow Meter are oriented with the direction of water flow.
(Water flows towards the valve box.) - Push the Flow Meter, fittings, and pipe together firmly while twisting the fittings to the insertion marks (white lines).
- All Rachio recommended fittings swivel 360˚, allowing for easy directional adjustment of the Flow Meter after installation.

STEP 7: Turn water on
- Turn the water back on.
- rachio.com/flow-leakCheck installation site for leaks. If there is a leak, turn the water off and make sure the fittings are pushed up to the body of the flow meter and insertion marks. If the leak cannot be remedied, visit rachio.com/flow-leak.
Congrats, you did it!
Your Flow Meter is now reporting actual water usage.
To enable real-time leak detection, calibrate the Rachio Wireless Flow Meter. In the app's "More" tab, select "Accessories," then select the Rachio Wireless Flow Meter. Follow the app instructions to calibrate.
Check your email for tips on monitoring water flow and leak detection with your Rachio Wireless Flow Meter.

Documents / Resources
References
![rachio.com]() Rachio Wireless Flow Meter FAQ
Rachio Wireless Flow Meter FAQ![rachio.com]() Advanced installation for Rachio Wireless Flow Meter
Advanced installation for Rachio Wireless Flow Meter![support.rachio.com]() Rachio Support
Rachio Support![rachio.com]() Rachio Wireless Flow Meter Quick Start Guide
Rachio Wireless Flow Meter Quick Start Guide
Download manual
Here you can download full pdf version of manual, it may contain additional safety instructions, warranty information, FCC rules, etc.
Advertisement
Need help?
Do you have a question about the Wireless Flow Meter and is the answer not in the manual?
Questions and answers