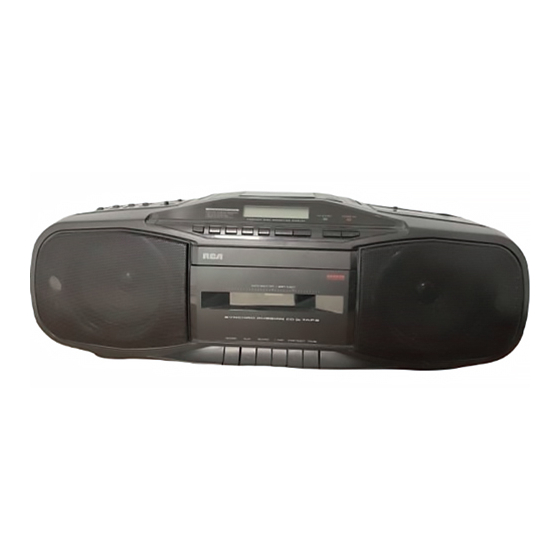
Summary of Contents for RCA SoundTrak RP-7946
- Page 1 RCA SoundPal? AUDIO MODEL RP-7946 USE AND CARE GUIDE Portable Disc Player/Radio/ Cassette Recorder...
- Page 2 lMPORTANT lNFORMATlON IMPORTANT INFORMATION CONCERNING This device generates and uses radio frequency interference to radio and television reception. This equipment has been type tested and found to comply with the limits for a Class B Computing the specifications in Subpart J of Part 15 of FCC Rules.
-
Page 3: Ac Power Operation
According to some State laws, and in the event service should be required, you may need both Model and Serial Numbers. Please record the Serial Number (located inside the Battery Com- partment) in the space below: SERIAL NO: This unit opertes on 120V AC household power or 8 “D”-size bat- teries. - Page 4 1. 3-Band Graphic Equalizer 2. Telescoping, Swivel Whip FM Antenna. 3. Volume Control 4. Bass Boost ON/OFF Switch 5. Function Switch Tape (Power Off) . CD . Radio 6. FM Stereo Indicator Light. 7. Power On Indicator Light. 8. Band Switch FM Stereo 9.
-
Page 5: Built-In Afc
1. Slide FUNCTION switch to RADIO. The POWER “ON” indicator will light. 2. Set BAND switch to desired broadcast band. . . AM or FM, or FM Stereo. 3. Use TUNING wheel to select a station. 4. Adjust VOLUME and GRAPHIC EQUALIZER controls to your listening preference. - Page 6 ‘,., 1. ‘, 3Band Graphic Equalizer 2. Volume Control 3. Bass Boost ON/OFF Switch 4. Function Switch 6 Tape (Power Off) Radio 5. Disc Operation Display. Track Number Remain Time Program Repeat - l/all Play/Pause Intro Shuffle Memory 6. Compact Disc Compartment 7.
-
Page 7: Inserting A Disc
INSERTING A DISC Slide FUNCTION switch to CD position. POWER Indicator Lights. CD DISPLAY lights. 2. Open the Disc Compartment by pressing the OPEN/CLOSE button. 3. Without touching the disc surface, place the disc in the com- partment with the label facing up. 4. - Page 8 ’ .,.- SKIP ,,I AND 144 During disc play, you can skip forward or backward to the begin- ning of any selection on the disc by using the SKIP buttons. SKIP Momentarily press the fibI SKIP button to instantly to the beginning of the next selection a selection further down the disc, repeatedly...
-
Page 9: Intro Button
Upon completion of the last Programmed selection, the player will automatically stop and the disc’s total tracks and playing time in- ” visible displayed. To stop play before the end of the last programmed selection, press the STCP button. Programmed play is automatically cleared when: The Disc Compartment is opened. - Page 10 1. 3-Band Graphic Equalizer 2. Volume Control 3.. Bass Boost ON/OFF Switch 4. Function Switch Tape (Power Off) Radio 5. Power “ON” Indicator Light. 6. Cassette Tape Compartment. 7. Tape Operation Buttons Record Play Rewind Fast Forward Stop/Eject Pause...
- Page 11 AUTOMATIC STOP When operating in the PLAY and RECORD modes and the end of the tape is reached, your unit will automatically return the buttons to their off position. REWIND While in OFF position (all buttons up), press REWIND button which remains depressed to run the tape back to the beginning point of your tape.
- Page 12 RECORDING FROM COMPACT DISCS 1. Place FUNCTION switch in CD position. 2. Insert a compact disc into the compact disc compartment. 3. Insert a blank cassette tape into the cassette tape compartment. 4. Press the PLAY/PAUSE button on the CD Player; then, press the PLAY/PAUSE button again to place the CD Player in the PAUSE mode.
- Page 13 Left and right CD OUTPUT jacks are located on the back of the unit. These jacks enable you to: RECORD TO AN EXTERNAL TAPE SOURCE 1. FUNCTION switch: CD. fr ll 2. Insert a compact disc and press PLAY/PAUSE 3. Set the external tape deck or tape recorder mode.
-
Page 14: Points To Remember
POINTS TO REMEMBER If the player is brought from a cold environment to a warm one or was in‘s cold room that has been quickly heated, conden- sation forms on the pickup preventing proper operation. To remove the condensation, remove the disc and leave the power ON for about one hour. -
Page 15: Cassette Tapes
FOR CASSETTE DECK CLEANING THE ,HEADS Iron oxide particles from the magnetic tape will, in time, build up on the parts that come in direct contact with the tape. These deposits can cause incomplete erasure, a “muffled” ing playback, and may prevent Automatic With the cassette door open and the PLAY button pushed down, the parts indicated can be cleaned... -
Page 16: Fcc Information
Service literature is available for your unit. For information on how to order, note the complete model number of your unit and, then, call: RCA Publications Ordering (502)491-8110 Do not use the Accessory Order Form (or its mailing address) in- cluded in this Guide, as service literature is hot available from that location. - Page 17 If a problem arises, these simple checks are recommended. PROBLEM turn “ON”. SYSTEM does DISC In place but unit will not go into play mode. DISC in place. ,zi ,’ ‘{ ,‘- is displayed. The sound skrps in DISC mode. No sound Poor FM reception Distorted...
- Page 18 What does your warranty Covw? Anv delecl in material or workmanshtip For how long an*1 the orlglnal pw&e? year. The warranty for rental unils begins wilh the lirst rental. what will we de? Provide you with a new, or al our option. a reconditioned unit. The exchange unit is warranted for the remainder 01 your product’s orrginal oneyear war- ranty period.
- Page 19 NUMBER ONE WITH THE TOUGHEST CRITICS IN THE WORLD. Model RP-7946 347Ab917-oooi (RN. 2 ) 91-60 PtintedhUsA...


Need help?
Do you have a question about the SoundTrak RP-7946 and is the answer not in the manual?
Questions and answers