Table of Contents
Advertisement
Quick Links
Integrated Dash Cam
D11&D12
User Manual
For 12v cars only
The device can be used with the official PC player and get more features.
Please download it from our website (https://www.yeecoreshop.com/).
・In the accident, be sure to turn the power off and remove the SD card
before storing it to avoid overwriting the recorded files.
・Please don't insert or remove the SD card while the power is on.
Otherwise, this may cause damage to the SD card. Be sure to confirm that
the power is turned off (power LED is off for at least 3 seconds) before
inserting or removing the SD card.
Warnings
Advertisement
Table of Contents

Subscribe to Our Youtube Channel
Related Manuals for YEECORE D11


Summary of Contents for YEECORE D11
- Page 1 Integrated Dash Cam D11&D12 User Manual For 12v cars only The device can be used with the official PC player and get more features. Please download it from our website (https://www.yeecoreshop.com/). Warnings ・In the accident, be sure to turn the power off and remove the SD card before storing it to avoid overwriting the recorded files.
- Page 3 https://www.questionpro.com/t/AUY5NZsBB6 support@yeecoreshop.com support@yeecoreshop.com...
-
Page 4: Table Of Contents
Content Note....................1 Package Includes ................2 Product Details ................... 3 Installation ..................8 How to use dash cam................. 17 How to use App(Wi-Fi Connection) ............ 35 Playback Video................39 PC Tool ....................43 Frequent Q&A..................48 Specifications ..................50 Security Tips..................51... -
Page 5: Note
Note 1. Please format Micro SD card on the camera before initial use, and choose the high speed brand card. (Class 10/U3 or above) 2. Make sure the power to the machine is off when inserting and removing the SD card. -
Page 6: Package Includes
(optional) (optional) -
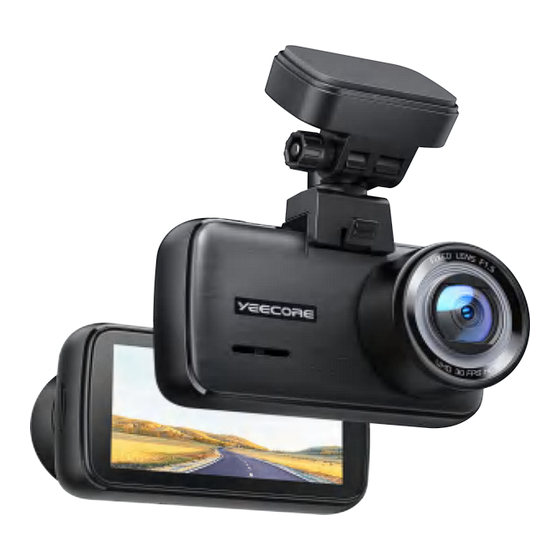
Page 7: Product Details
Product Details ■ Front Cam Front Connection Port Connect with the mount. Lens A protective film is attached to the lens when you purchase it. Please remove it when you are the first time to use it. Speaker Where the sound of the Back recording file is output. - Page 8 Bottom Microphone Record sounds from the surround. Left Right Micro SD insert Port Button (The SD card in not include in the package) Switching screen Click button to switch front/rear camera display. MODE The button appears only after playback has been paused. Press in none recording to display the "File Management", "Video", and "Settings"...
- Page 9 Optional Accessory ■ Hardwire Kit A21 (approx 16.5 ft) By connecting the car battery directly from the vehicle's ACC line, the dash cam can be in powered without using the car's cigarette charger port in parking monitoring function. ※ The hardwire kit (A21) with 5V converter (buy extra ASIN B09DSK58MW) is necessary to activate the parking monitor.
- Page 10 Remove/Insert the SD card In this manual, "Micro SD card" is referred to as "SD card" unless otherwise noted. ※This dash cam supports micro SD cards of 8 GB or more and 256 GB or less. (SD write speed U3 or higher) Warnings ・...
- Page 11 2. Install the SD card into the front cam. Turn off the car's engine. After turning off the power, make sure that the power LED is off for at least 3 seconds. Insert the SD card. Push the card into the SD card slot until you hear a "click" sound.
-
Page 12: Installation
Installation 1.Determine the mounting position Determine the position where the mount is attached to the windshield. ※ Note: Please refer to the recommended mounting position for the main unit installation location. ●Location of the Front Cam Different states have different laws regarding the installation of dash cams. In general, a dash cam is considered an obstruction if it occupies more than 5 inches on the driver's side or 7 inches on the passenger's side. - Page 13 2. Use the mount to predict the position of the front cam to be installed(Attach the electrostatic adhesive film) Wipe the windshield clean.(To avoid that the video quality is affected by dirty) Wipe the windshield clean of dirt and grease with a commercially available cleaning cloth.
- Page 14 3. Attach the front cam to the windshield Combine the mount and the front cam. Tear off the paper from the electrostatic film's another side. Tear off the paper from the adhesive tape on the mount. Attach the mount and front cam to the electrostatic film. ※...
- Page 15 Adjust the angle of mount so that the lens is level with the direction of vehicle travel. Tighten the nut to fix the dash cam. 4.Connect the front cam to the car Connect the cigarette charger cable to the mount's Type-C port.
- Page 16 Plug the cigarette charger cable into the cigarette lighter port. ※Clean the cigarette lighter port. Turn on the car, check the video, and adjust the angle. After connecting the front cam to the car, turn on the car and adjust the mount's angle based on the video.
-
Page 21: How To Use Dash Cam
How to use dash cam Procedure of Power ON to OFF After purchase, if you want to use the product with the default settings, follow the steps below. Power ON Start recording Stop recording Language Setup Time Setup Restart recording Stop recording Manual recording Voice recording... - Page 22 Turn on the car's engine Recording The recording icon will appear as "●" (red). GPS Tracking of GPS information. ※ While GPS information is acquired, the date and time will be adjusted automatically based on the timezone ※If the GPS fails to locate the device, this icon will be displayed.
- Page 23 2. Stop recording Press the button. Recording icon Stop recording be displayed as ※When recording is stopped, the recording icon be displayed as 3.Language Setup Click the button - Select "System Settings"-Click "Language" Click the button Select "System Settings" and click "Language"...
- Page 24 "Language". Click Click the < and > buttons to select the "Language", c l i c k S a v e c u r r e n t s e l e c t i o n . 4.Time Setup Click the button and Select "System Setup".
- Page 25 Click【>】to select "Time&Date" and click Save current selection. Click【>】 to Select "Time&Date" After setting the time & date click [√] s a v e c u r r e n t s e l e c t i o n . Click 【+】&【—】...
- Page 26 6. Manual locking video In normal recording mode, click button, dash cam will open emergency recording. button. Click The "Warning" will light up, and a manual emergency recording file will be generated. ※ After the emergency recording file is accomplished, the recording automatically returns to normal.
- Page 27 8. Snapshot Pressing the power button while the recording is on will take a snapshot. Press the power button Short press power button 9. Power off (stop recording) This unit will stop recording with the car off. Turn off the vehicle's engine. Recording will stop and the power will be turned off.
- Page 28 Video Recording Mode In the video recording mode, the dash cam records video continuously. ⑦ ⑤ ⑥ ④ ⑧ ③ ① ② Status Introduction In recording, “●” is displayed. Rocrding is ① Recording stopped ② Emergency recording In emergency recording is displayed.
- Page 29 ■ Function of the buttons in video recording mode Button Function Power Press the button in recording to take a snapshot. Mode When recording is stopped, press the button to access the menu page. 1.Pressing the button during recording will stop the recording. 2.When recording is stopped, press the button will start recording.
- Page 30 Recording There are two recording methods: normal recording and emergency recording. Two ways to start emergency recording Power ON ① ② Press the Power OFF (Start normal recording) Detects mode button (Stop normal recording) collision ■ Normal Recording Video Files mal Accident Happens Saved in a special folder named "...
- Page 31 1.Normal Recording The dash cam start recording the video from car on (ACC ON) to car stop (ACC OFF) to the SD card at all times. · Video Duration Each video is saved in "1 minute / 2 minutes / 3 minutes“ 2.Emergency Recording When the emergency recording starts, there will be a warning.
- Page 32 Playback 1.Playback the video Confirm that the dash cam is turned on, and if recording is in progress, press the button to stop recording. Press the Mode button button, select "Playback Menu", and then click on the option Press the according to the type to go to the replay page.
- Page 33 2 -2 Select the video you want to play and press the button. Click the button - select the file you want to play - click the right interface to enter the playback interface - click Playback the videos. ※ Videos are recorded in single 1-min files. ※ If the video has ended, it will return to where it started. ※...
- Page 34 Video playback mode In video playback mode, you can playback recorded files on the front cam. ② ④ ① ③ ⑦ ⑥ ⑤ Item Introduction Videos named with the time and number, help to ① Video Name find the video. ②...
- Page 35 ■ Function of the buttons in video playback mode Button Action Function Preview window Power Playing window Preview window Enter File operations window Mode Playing window Enter File operations window Preview window Back to Files window Back Playing window Back to Files window File Preview window Enter playback file directory...
- Page 36 Select the "Playback Menu" and open the Event. Select "Playback" and press the "Event" Click【>】to slide through the pages to select the video you want to play.Or click on the to find the video by filename. Click Select the video then click the Image 2.Unlock and Delete Click the...
- Page 37 Click the button, select the [Delete File] to delete the current file. Set up 1. Display the setting menu. Click the button.
- Page 38 Click button, click [Record Setup] or [System Setup] to enter the setup interface. Select "Record Setup" Select "System Setup" 2. Restart recording After completing the settings, follow the steps below to restart recording. When recording is restart, the recording icon display as "●". 2-1 Click the button to return to the video recording window.
-
Page 39: How To Use App(Wi-Fi Connection)
How to use App 1.Download APP 1. Open "Google Play" 1. Open the "App Store" 2. Search for "YeecoreViewer". 2. Search for "YeecoreViewer". 3.Follow the instructions to install 3.Follow the instructions to install (free of charge). (free of charge). Android QR Code iPhone QR Code Scan the QR code and you can view the APP use introduction video on... - Page 40 2.Connect your phone to the dash cam. Click the Wi-Fi button. Wait a few seconds to check the Wi-Fi information. Connect your phone to the dash cam. Turn on your phone's WLAN Enter the password (PWA) and Select the YEECORE and connect the network. WiFi.
- Page 41 3.APP Open the YeecoreViewer App. Click the YeecoreViewer Launch the dedicated app. 4. App Introduction ⑨ ① ⑩ ② ③ ⑪ ④ ⑫ ⑤ ⑬ ⑥ ⑭ ⑦ ⑮ ⑧ Click "JOIN CAM".
- Page 42 Item Introduction ① Back Back to the previous window. ② Resolution Display the resolution ③ Recording time Displays the recording time of the video. ④ Recording window Displays the recording image. Car License plate Displays the car license plate. ⑤ Display the latitude and longitude.
-
Page 43: Playback Video
Playback Video 1.Display video playback mode. Press the button to the video selection window. Press button Press the "Camera" button to switch between "Camera" and "Local. Press button... - Page 44 Click the "Select" button to select the file you want to "Download" or "Delete".
- Page 45 Reading Files Videos and photos recorded by this dash cam can be handled by a computer in the same way as ordinary files. They can be playback and on computer that meets the following specifications. OS: Microsoft Windows 7, 8, 10CPU: Core2Duo equivalent, 2.0GHz or higher Memory: 2GB or higher Recommended playback software: Windows Media Player (Windows standard)*1 YeeCorePlayer (official viewer software)*2...
- Page 46 1. Connect the dash cam to the PC. Connect the dash cam to the PC. USB Cable Open the SD card Folder and open the folder containing the file want to play. ・Folder Name Normal Video ………… VIDEO Folder Emergency Video………EVENT Folder Snapshot…………...
-
Page 47: Pc Tool
PC Tool 1. Preparing Please download the official player software from our website and install it. ※ Please refer to our website for installation instructions: https://www.yeecoreshop.com/Support/ ※ If you accidentally delete the viewer software, or if it no longer works properly due to an OS or system update, please download the latest version of the player software from our website. - Page 48 Click the Icon Click Select the connected SD card, and then click [OK]. ・Folder Name Normal Video…………VIDEO Folder Emergency Video………EVENT Folder Snapshot…………PHOTO Folder ※ When you select an SD card, all the data will be loaded and displayed in the dedicated viewer software as one group of files from the start of recording to the end of recording.
- Page 49 Official Video Player With the Official Video Player, you can play back videos and display your vehicle's position, route, speed and time. ※ Please refer to our website for installation instructions: https://www.yeecoreshop.com/Support ※ Internet connection is required to display the vehicle's GPS information.
- Page 50 Item Introduction ② Video display Video display window Video Time The duration of the past video Next Play next video ③ Play/stop Play/stop the video. Previous Replay previous video Video Duration the total video duration. Displays the latitude and longitude. ④...
- Page 51 Item Introduction The loaded video is linked to OpenStreeMap and your ⑪ Map Display vehicle's position will move. Window If you are not connected to the Internet, the map (OpenStree Map) will not be displayed. Playback speed You can change the playback speed. Enlarge the video Enlarge the video window.
-
Page 52: Frequent Q&A
Frequent Q&A I can't record any video ■ Is the SD card inserted correctly? When the SD card is not inserted or there is an error, or "Please insert SD card" is displayed. When the SD card is abnormal, video cannot be recorded. Please format the SD card in this unit. - Page 53 It is difficult for this product to acquire GPS information ■ GPS reception signal will be affected. Some car navigation GPS antennas may affect the GPS reception of this product. Install the product as far away from the antenna as possible. It is difficult for this product to acquire GPS information ■...
-
Page 54: Specifications
Specifications Voltage DC5V Power Rating Pixels 8M pixels Front: 140° Rear:130° Screen 2.45 inch full color LCD Resolution Display the resolution Video duration 1 min/2 min/3 min Storage Micro SD card: not include Format MP4(Video)/JPG(Photo) 30 frame per second Temperature range -14°F ~ 158°F Wi-Fi Built-in 2.4G... -
Page 55: Security Tips
Security Tips Please observe the following safety precautions Warning Don't attempt to disassemble or repair the Stop using the product immediately if device or its accessories unless servicing is there are the following abnormalities: carried out by profession personnel. Non-compliance action may result in electric ・... - Page 56 Don't use this product in places where its Please keep the SD card and other use is prohibited,such as hospitals and on accessories out of the reach of children to aircraft. prevent accidental ingestion. This may result in the failure of lectronice quipment or other components and ause serious accidents.
- Page 57 Warning Attention: Different states have different Don't install or wire the device near the laws regarding the installation of dash airbag. cams. In general, a dash cam is considered In the accident, the airbag may blow up an obstruction if it occupies more than 5 and cause an accident or injury.
- Page 58 Warning If your vehicle is equipped with a continuous When unplugging the cigarette plug cord, power supply cigarette lighter out let that do not pull the power cord. provides a supply of energy even when the This could damage the cord and cause an engine is turned off,unplug the cigarette electric shock or short circuit, which could lighter.
- Page 59 Precautions for Use ●We are not responsible for any personal violations. Please keep driving safely. ● We are not responsible for any incidental damage to the vehicle or on-board equipment due to the incorrect installation of dash cam. · · We are not responsible for any damage caused by natural disasters, fire, other accidents, intentional or negligent acts of the customer, or modification of the product.
- Page 60 ■ Precautions for GPS ■ Precautions for Installation · When using this unit for the first time, · Install this unit correctly according to the it may take more than 2 minutes for instruction manual. completing GPS positioning. · Don't install products with GPS functions ·...
- Page 61 However, when data is repeatedly braking suddenly to check the operation recorded, the location of the bad sectors of this unit. cannot be determined and the apparent · In order to record images properly, lways recordable area decreases. keep the camera lens and the windshield However, if data is repeatedly recorded, of the vehicle clean.
- Page 62 What should I do if there is an acciden? In the event of an accident, be sure to remove the SD card and store it in a safe place to prevent the event videos being overwritten. ※ It can be used as reference material in the event of an accident. It is not guaranteed to be effective as evidence of an accident.
- Page 63 Unplug the power cord from the front cam USB port Power LED USB Port After the power is turned off, check that the power indicator is off for at least 3 seconds. Push the SD card in, let it pop out a little, then pull it out. ※Please be careful not to lose the SD card when it pops out.
- Page 64 Warranty 1.During the warranty period (one year from the date of purchase), the product will be repaired free of charge if it should fail under normal use. If you wish to have the product repaired during the warranty period, please take the product and the warranty card to your dealer for repair.
- Page 65 Warranty Warranty Period 12 months from purchase Dash Cam D11 Product name Dash Cam D12 Purchase Date Year Month Date Your name: Phone Number: Customer Address: Store Name: Issue information log Made in China...
- Page 66 This device complies with part 15 of the FCC Rules. Operation is subject to the following two conditions: (1) This device may not cause harmful interference, and (2) this device must accept any interference received, including interference that may cause undesired operation.
Need help?
Do you have a question about the D11 and is the answer not in the manual?
Questions and answers