Table of Contents
Advertisement
Quick Links
Advertisement
Table of Contents
Troubleshooting

Summary of Contents for schmersal AM-T100
- Page 1 Manual AM-T100 3D INDUSTRIAL CAMERA...
- Page 3 This document is valid for the device Type designation: AM-T100 Version: as of 1.3.0.0 Document status Version: 0.00 Date: 28/06/2023 Article number: 103052115...
-
Page 4: Table Of Contents
CONSAM-T application software ......8 2.1.2 AM-T100 OS operating system ......8 2.1.3 System requirements . - Page 5 Diagnosis ......... . 37 6.2.5 AM-T100 OS Update ....... . . 38 6.2.6 Virtual Camera .
-
Page 6: About This Document
The user must observe the safety instructions in this operating instructions manual, the country specific installation standards as well as all prevailing safety regulations and accident prevention rules. Further technical information can be found in the Schmersal catalogues or in the online catalogue on the Internet: products.schmersal.com. About this document... -
Page 7: Warning About Misuse
1 .8 Supporting documents The following documents are supporting documents: – AM-T100 operating instructions (included or available for download at prod- ucts.schmersal.com) – Software Licence Contact (on the internet at products.schmersal.com) – Declaration of conformity 1 .9... -
Page 8: Product Description
Product description 2 .1 Performance features The AM-T100 is a ToF camera with an image rate of up to 60 fps and a resolution of 640 x 480 pixels. With a field of vision of 67" x 51" and high- performance IR illumination, it can detect objects within a range of up to 6 metres The camera is configured using the CONSAM-T application software, which allows for creation and monitoring of the complex 3D zones. If the camera... - Page 9 Emitted light Reflected light Phase shift Fig. 1: The greater the phase shift, the greater the distance to the object The results can be depicted in several ways: A 2D greyscale image, a 2D image in which the depth information of an object is shown through greyscales, and a point cloud, in which each measured point contains depth information.
-
Page 10: Technical Data
2 .3 Technical data Designation Description Standards EN 61326-1, EN IEC 60825-1 Working principle iToF (indirect Time-of-Flight) Material of the housings Die-Cast Aluminum Mechanical data Dimensions (H x W x D) 70 x 70 x 72 mm Mounting holes 2x Ø 5.3 mm x 70 mm Tightening torque, 1.4 Nm fixing screws... - Page 11 Designation Description Electrical data 24 VDC ±10 % or Operating voltage PoE IEEE 802.3bt Electrical power consumption, 15 W / 40 W typically / max. Electrical data - Digital inputs/outputs 2x opto-isolated, potential-free input Inputs/outputs 2x opto-isolated, potential-free output Interface Ethernet 10/100/1000 Mbps Ethernet, GigE Vision 2.0 Compliant...
-
Page 12: Assembly
Assembly 3 .1 General mounting instructions Fitting is only authorised in a de-energised condition • Do not install the camera near high-voltage equipment and power consumers. To prevent additional reflection surfaces, the field of view and the installation level must not intersect. Correct Assembly... - Page 13 False In order to optimally dissipate the heat generated during operation and to guarantee the performance data of the camera over the entire operating temperature range, the camera must be mounted in such a way that the heat is dissipated. This is done via a suitable holder or via contact surfaces between the housing and the environment.
-
Page 14: Dimensions
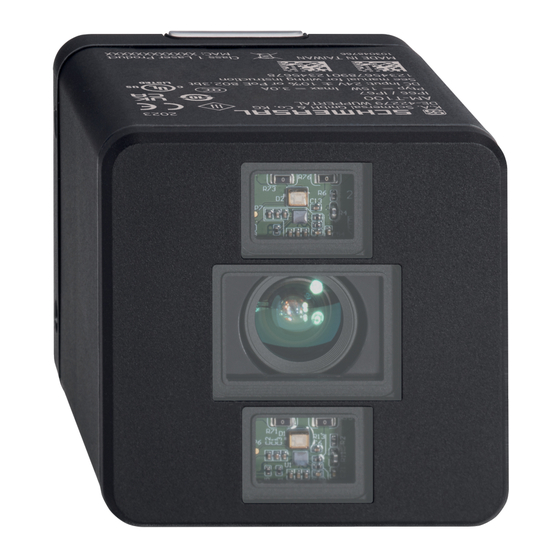
Insert the camera into the hollow space in the bracket. Tighten the fixing bolts on the camera. • Adjust the azimuth and elevation angles. • 3 .2 Dimensions Camera AM-T100 18.5 51.5 11.9 ¤5.3 Fig. 5: Dimensions of camera AM-T100 (measurements in mm) Pos . Designation A I/O connection B Ethernet connection C Laser diode D Lens Assembly... - Page 15 Mounting bracket ACC-AM-MS-F Fig. 6: Dimensions of mounting bracket ACC-AM-MS-F (measurements in mm) Assembly...
-
Page 16: Electrical Connection
Electrical connection 4 .1 General information for electrical connection The electrical connection may only be carried out by authorised personnel in a de-energised condition. • Provide the requisite electrical cable fuse for the installation. • Before switching on, ensure that all signal connections and the power supply are correctly connected to prevent damage. -
Page 17: Connector Accessories
BI_DB+ BI_DB- BI_DC+ BI_DC- BI_DD+ BI_DD- I/O connecting cable M12, 8-pole, A-coded ACC-AM-CON-A-K8P-M12-G-5M-S, 103048464 Colour code of the Schmersal Function connector plug to DIN 47100 Input 1 Output 1 (Warning) Input 2 Output 2 (Alarm) 24 VDC power supply GND outputs... -
Page 18: Commissioning
Commissioning 5 .1 Tips for using the camera When acquiring images, the following must be taken into consideration in order to obtain accurate distance measurements: Assembly The camera must be installed so that there are no unnecessary objects or reflections in the field of view. Large surfaces in the foreground of the field of view must be removed in particular in order to avoid over-exposure of the sensor. - Page 19 Multiple Transparent reflections objects Fig. 7: Unwanted reflections Flying pixel When the light beams hit corners and edges of objects, "flying pixels" become visible. At these points, multiple measurement points come together, which may be at different depths. The measured distance is between the foreground and the background. Fig. 8: Flying pixel Commissioning...
- Page 20 Influence of the distance on accuracy The accuracy of image acquisition decreases as distance increases, as the intensity of the reflected light falls, leading to reduced signal quality. With this in mind, it's important to take the distance between the object and the camera into consideration when planning ToF acquisition and, if necessary, to adjust the position of the camera or the exposure.
- Page 21 Distance calculation The distances are calculated from the front edge of the camera to the reflecting object. Objects that are outside the visible axis of the camera are calculated as farther away accordingly. The distances are not converted into absolute values (dashed arrow). Fig. 10: Distance calculation Setting the range The range under "Device Settings > Range Mode" should be greater than or equal to the maximum radial distance in a scene in order to prevent distortion (see thick arrow in Fig.
- Page 22 Possible distances Fig. 13: Distance ambiguity due to periodic phase angle To ensure unambiguous results at greater distances, the AM-T100 uses multi- frequency technology. This uses two phases with different frequencies for distance measurement. Each modulation frequency has a different ambiguity distance (D1, D2). The actual distance of an object can therefore match only at points at which the results of both measurements are identical.
- Page 23 – Y – X Fig. 15: Coordinate system of the sensor GigE Vision and GenICam The camera is equipped with GigE Vision and GenICam interfaces to enable simple and standardised data exchange. The GigE Vision standard (Gigabit Ethernet for Machine Vision) offers reliable and cost-effective options for the transmission of image data over a Gigabit Ethernet interface. With standard network cables, distances of up to 100 metres can be bridged without difficulty.
-
Page 24: Download
Start the setup assistant by double clicking on the installation file. • • Select "Complete". The software is installed in "C:\Programs\Schmersal\CONSAM-T\desktop". • Carry out the AM-T100 OS Update. Do not switch off the power supply during the update and do not cancel the update. Otherwise the camera may be damaged. 5 .3 Uninstalling the software Here's how to uninstall the CONSAM-T application software: Start the setup assistant by double clicking on the installation file. -
Page 25: Functional Testing
This section outlines installation of the camera. Further information and camera assembly can be found in the operating instructions. The AM-T100 can be connected in two ways. 1. I/O cable and Ethernet cable (permanently or temporarily) The I/O cable must be used if the camera is to be controlled via the digital inputs and outputs. -
Page 26: Establishing The Connect To The Camera
The following describes the basic configuration of the camera. An extensive description can be found in chapter 1 “About this document” from page 6 and in chapter 7 “AM-T100 OS operating system user interface” from page 53. More information can be found in chapter 8 “Diagnosis and troubleshooting” from page 60. -
Page 27: Configuring The Camera
• Click on the "Connection" button (4) to establish the connection to the camera. The "Status" indicator (5) lights up green if the connection is successful. Configuring the camera 5 .8 ③ ④ ⑤ ① ② Fig. 22: Upload & download This menu allows projects to be managed on the PC and on the camera. -
Page 28: Implementing Settings
⑥ ⑦ Fig. 23: Start Running • Navigate to the "Start Running" menu (6). • Click on the "Run Project on device in web user interface" button (7) to call the AM-T100 OS operating system. A browser window opens. Commissioning... -
Page 29: Reading Out Log And Point Cloud Files
⑧ ⑨ Fig. 24: More > Configuration Navigate to the "More > Configuration" menu (8). • • Select the "Auto run on startup" checkbox (9). The selected projected is loaded and started automatically. Reading out log and point cloud files 5 .11 Each entry and exit into/from a zone is saved in a log file. A point cloud file is also saved each time an event occurs. The data can be read out as outlined in chapter 6.2.3 “Data Logging”... -
Page 30: Consam-T Application Software User Interface
CONSAM-T application software user interface 6 .1 Overview ① ② ③ ④ ⑤ Fig. 25: Start screen Pos . Designation Description Symbol bar for quick access Displays the active project name, create, save, save as and edit a project. Main menu Main menu bar Submenu Submenu bar... -
Page 31: Devices
6 .2 Devices 6 .2 .1 Device Connection ① ② ③ ④ ⑤ ⑥ Fig. 26: Devices > Device Connection Pos . Designation Description Search for connected devices Searches for new connected devices. Adds a new camera to the connection list. Force IP Changes an IP address. -
Page 32: Device Settings
6 .2 .2 Device Settings ② ① ③ Fig. 27: Devices > Device Settings Pos . Designation Description Device Information Detailed information on the connected device. Default Settings The "Default Settings" button resets all values to the factory settings. Image Acquisition The parameters for image acquisition can be set under "Image Acquisition". - Page 33 Parameter description Exposure time setting (in μs) Exposure Time: Value range: from 1.00 to 1000.00 Selection of the optimal exposure time depends on the degree of reflection of the surfaces to be measured and their distances. If heavily and poorly reflective surfaces need to be acquired at the same time, the exposure time must be adjusted so that the most heavily reflective surface at the shortest distance is no longer over-exposed. This can be checked in the intensity image and then on the depth chart.
- Page 34 This parameter determines the spatial sensitivity of the bilateral filter. Bilateral Filter SigmaSpace: Value range: from 1.00 to 300.00 The higher the value, the wider the range around each pixel in order to find similar pixels that should be taken into account when smoothing. This function activates the exponential filter. Exponential Filter Enable: The exponential filter weights the pixel values from frame n and frame n-1 according to the smooth factor. This parameter determines the smoothing factor of the exponential filter: Exponential Filter Smooth Factor: Value range: from 0.00 to 1.00 The higher the value, the higher the value is weighted.
-
Page 35: Data Logging
6 .2 .3 Data Logging ① ② ③ ④ ⑤ ⑥ Fig. 28: Devices > Data Logging Pos . Designation Description Saves log and point cloud files in the vent of an entry or exit into/from a zone. Recording log and saving PLY files when A point cloud file of several megabytes is created for each event. Sufficient disc intrusion occurs space must be made available. Directory for saving the log and point cloud files to the PC. Default directory: C:\Users\Public\Public documents\CONSAM-T\ Choose data log directory on PC Entry and exit into/from a zone are saved to the "intrusion.log" log file in the "Intrusion"... - Page 36 The following must be satisfied for acquisition on the PC: – The camera must be switched on. – The PC and the application software must have been started. – The save location must have been determined. – The connection to the camera must be inactive in the operating system under "Platform >...
-
Page 37: Diagnosis
6 .2 .4 Diagnosis ① Fig. 29: Devices > Diagnosis Pos . Designation Description Temperature display for the individual components: Sensor, Laser Diode Driver, FPGA (Field-Programmable Gate Array), Temperature Sensor FPGA PL (FPGA Programmable Logic), FPGA PS (FPGA Processing System), FPGA PS Remote (FPGA Processing System Remote) The temperatures of the individual components are displayed in this menu. -
Page 38: Am-T100 Os Update
6 .2 .5 AM-T100 OS Update ① Fig. 30: Devices > AM-T100 OS Update Pos . Designation Description Update of the device firmware. AM-T100 OS Update The camera firmware can be updated in this menu. Click on the "AM-T100 OS Update" button to start the firmware update. • The update may take several minutes. Do not switch the camera off while the update is underway. The message "Firmware update successed" will appear when the update is complete. -
Page 39: Virtual Camera
6 .2 .6 Virtual Camera ③④ ⑤ ① ② Fig. 31: Devices > Virtual camera Pos . Designation Description Add Virtual Camera Adds a virtual camera. Delete Virtual Camera Removes a virtual camera. Loads one or several point cloud files in PCD file format. Load File Discards a selected point cloud file. Discard File Discard all point cloud files. Discard all Files In this menu, saved point cloud files can be assigned to a virtual camera. The virtual camera can then be selected in the "Zone Configuration" menu. -
Page 40: Zone Configuration
Zone Configuration 6 .3 ① ② ③ ④ ⑥ ⑦ ⑧ ⑤ ⑩ ⑨ ⑪ ⑬ ⑫ Fig. 32: Zone Configuration Pos . Designation Description Configuration with point clouds from Configuration on – ToF device: depiction of the point clouds of the connected camera point clouds from –... - Page 41 Pos . Designation Description Depiction of the point cloud – Perspective: in the perspective view, all edges have a common vanishing point in the origin of the optical axis in the sensor. Objects that are located Projection close to the sensor are depicted large, while objects farther away from the sensor are depicted small.
- Page 42 A zone comprises the shell geometry, which is formed from a defined surface and the origin of the camera coordinate system. Fig. 33: Example zone The zones are depicted as follows: Zone Warning Alarm Runtime Result Message Inactive/free Safe Active/busy {Alarm/Warning}{Zone Number} The area within this shell geometry must be free. If an object is permanently within this shell geometry, the zone must be designed such that permanently penetrating objects are left out. The surface of a zone must not be defined too close to objects/walls. Points that penetrate the zone due to measurement inaccuracies can trigger a warning or alarm.
-
Page 43: Defining Zones
Defining zones 6 .3 .1 ① ② As an option, the depiction of the point cloud can be changed to perspective depiction (1). To define a zone, adjacent points and surfaces (triangles) must be determined. • Double click on a point in the image (2) to create a new point. The values can be modified by clicking on the value field (X, Y, Z). For example, multiple points can be created at the same height. - Page 44 • Select three points while pressing and holding the CTRL key. • Right click on the selected points and select "Form a triangle". A triangular surface is created. The "Delete point" menu item can be used to delete selected points. At present, zones, surfaces and must be selected and deleted individually.
- Page 45 • Select multiple surfaces by pressing and holding the CTRL key. Right click on the selected surfaces and select "Form a zone". • A zone is created from the selected surfaces. The "Delete zone" menu item can be used to delete individually selected zones. Select a zone. • Assign the warning stage "Warning" or "Alarm" to the zone under "Level". • Assign the combination of digital inputs that should activate zone monitoring • to the zone under "Pair". • After each change to the "Pair" assignment, click on the "Generate Zone Configuration" button in order to activate the assignment. IN 1 IN 2 Pair 1 Pair 2 24 V...
-
Page 46: Setting
A zone with warning stage "Warning" and a zone with warning stage "Alarm" can be activated via the combination of digital inputs. The high and low signals can each be inverted under "Device Settings" (chap. 6.2.2, p. 32). If the camera is not connected to a control system, both digital inputs are set to "Low" by default. In that case, the zones must be assigned to "Pair 1" so that the zones can be depicted under "Acquisition & Validation" and triggered on image acquisition. - Page 47 ① ② ③ Fig. 36: Setting > Color Bar Pos . Designation Description The following options can be selected in the "Mode" selection field: – Auto (automatic): the colour palette is constantly adjusted to the minimum and maximum distance. This is useful if the camera is moving. – Only Initial: the colour palette is adjusted to the minimum and maximum Mode distance only once, at the start.
-
Page 48: Acquisition & Validation
6 .4 Acquisition & Validation ① ① ② ② ③ ③ ④ ④ ⑥ ⑦ ⑧ ⑤ ⑤ ⑩ ⑨ ⑪ Fig. 37: Acquisition & Validation Pos . Designation Description One-off image acquisition Execute Once Continuous image acquisition to test zone switching. Execute Continuous Execute Stop End image acquisition View type Display mode –... - Page 49 Image acquisition can be started in this menu, and configured zones can be tested. • Click on the "Execute Continuous" button to start continuous image acquisition. When zones are created and configured, they are displayed accordingly and can be tested. If no zone are displayed, the configuration is incomplete –– this can be identified by the "Runtime Result Message: Configuration setting is wrong" error message in the status bar. In that case, complete a complete configuration of the zones, as outlined in • chapter 6.3.1 “Defining zones” from page 43. Assign the combination of digital inputs to each zone under "Pair". • • After each change to the "Pair" assignment, click on the "Generate Zone Configuration" button in order to activate the assignment.
-
Page 50: Upload & Download
6 .5 Upload & Download ④ ⑤ ⑥ ⑦ ⑧ ① ⑨ ② ⑩ ③ ⑪ ⑫ Fig. 38: Upload & download Pos . Designation Description PC Project Directory Display projects saved on the PC Delete PC project Delete PC project Upload PC project to device Upload PC project to device Save... -
Page 51: Managing Projects On The Pc
6 .5 .1 Managing projects on the PC Create project • Save the settings, if necessary. • Click on the "New" button (4) to create a new project. A newly created project is activated automatically. Save project • Click on the "Save" button (5) to save changed settings in a project. Save project to a different name Click on the "Save As" button (6) to save the settings under a different •... -
Page 52: Start Running
Run Project on device in web user interface Run project on device in web user interface. This menu is used to open the user interface of the AM-T100 OS operating system. If the camera is still connected to the CONSAM-T application software, the connection must be interrupted beforehand. -
Page 53: Am-T100 Os Operating System User Interface
AM-T100 OS operating system user interface The AM-T100 OS internal camera operating system is generic software that has been developed for different devices and applications. It includes menu items that are not intended for use with the AM-T100 camera. 7 .1 Overview ① ② ③ ④ ⑤ ⑥ Fig. 40: Homepage Pos . -
Page 54: Homepage
7 .1 .1 Homepage • Click on the Schmersal logo to go to the homepage. ① ② ③ Fig. 41: Homepage Pos . Designation Description – CAConfigCore.AlarmZone: Depiction of the non-triggered zone (dark green area) – CAConfigCore.InAlarmZone: Depiction of the triggered zone (dark-red area) Camera.PointCloud – CAConfigCore.WarningZone: Depiction of the non-triggered zone (light-green area) – CAConfigCore.InWarningZone: Depiction of the triggered zone (light-red area) View area... -
Page 55: Project
The current project is marked in blue. Copy project to PC • Under "Project List", click on the "Download" button (4) to copy a project to the PC. Copy project to the camera Under "Project Upload", click on the "Select file" button (5) and select a project • file. The project is automatically uploaded and activated. AM-T100 OS operating system user interface... -
Page 56: Platform
Communication without function Register without function System Log Display of system events. The internal camera software is generic software that has been developed for different devices and applications. As a result, it contains menu items that are not intended for use with the camera. AM-T100 OS operating system user interface... - Page 57 The connection status changes to "Connected" (3). • Click on the "X" button (5) to remove the camera from the "Camera Use Device" list. System Log Fig. 45: Platform > System Log System events are logged in this menu. AM-T100 OS operating system user interface...
-
Page 58: More
Fig. 47: More > Editor Pos . Designation Description Editor Edit the homescreen Load the saved XML file. Save the changed XML file. SAVE Calling the "More > Editor" menu requires a login. The homescreen can be edited and changed in the "More > Editor" menu. AM-T100 OS operating system user interface... -
Page 59: Language)
The language can be changed in the "EN (Language)" menu. 7 .1 .6 Login Fig. 50: Login Access to the editor under "More > Editor" can be granted for software developers in this menu. AM-T100 OS operating system user interface... -
Page 60: Diagnosis And Troubleshooting
Diagnosis and troubleshooting 8 .1 Diagnostic The camera signals the operating status via the assigned LEDs on the back of the unit. LED display Power display (green) No function No function Status display (green / red / orange) Power display F-1 Color Continuous light Green... -
Page 61: Troubleshooting
The camera cannot connect. If access to the camera is not possible, the camera firmware can be re-installed. Server is not ready. A connection could not be Navigate to "Devices > AM-T100 OS Update" and click on the "AM-T100 OS Update" button. The firmware update may take several minutes. established as the destination computer refused the connection. No image. - Page 62 Menus are not shown or are The version of the CONSAM-T application software does not match the AM- incomplete. T100 OS operating system version. Perform a AM-T100 OS Update. AM-T100 OS operating system Error message Description The camera cannot connect.
-
Page 63: Maintenance And Cleaning
Maintenance and cleaning In the case of correct installation and intended use, the camera is maintenance- free. A regular visual inspection and functional test, including the following steps, is recommended: Check that the camera is firmly seated. • • Check the integrity of the cable connections. If necessary, use connector caps. - Page 64 A major contribution to the systems and solutions offered by the Schmersal Group is made by tec.nicum with its comprehensive range of services: Certified Functional Safety Engineers advise machinery manufacturers and machinery operators in all aspects relating to machinery and occupational safety –...
Need help?
Do you have a question about the AM-T100 and is the answer not in the manual?
Questions and answers