Chapters
Table of Contents

Related Manuals for Samsung HW-B67C


Summary of Contents for Samsung HW-B67C
- Page 1 FULL MANUAL HW-B67C Imagine the possibilities Thank you for purchasing this Samsung product. To receive more complete service, please register your product at www.samsung.com/register...
- Page 2 PERSONNEL. CAUTION Refer to the table below for an explanation of symbols which may be on your Samsung product. • Do not expose this apparatus to dripping or splashing. Do not put objects filled with liquids, such as vases, on the apparatus.
- Page 3 Radiation Exposure Statement 10. Protect the power cord from being walked This equipment complies with IC RSS-102 on or pinched particularly at plugs, radiation exposure limits set forth for an convenience receptacles, and the point uncontrolled environment. This equipment should where they exit from the apparatus.
- Page 4 PRECAUTIONS 5. The battery used with this product contains chemicals that are harmful to the environment. Do not dispose of the battery 1. Ensure that the AC power supply in your in the general household trash. Do not house complies with the power expose the battery to excess heat, direct requirements listed on the identification sunlight, or fire.
-
Page 5: Table Of Contents
CONTENTS Checking the Components Product Overview Front Panel / Top Panel of the Soundbar ------------------------- Bottom Panel of the Soundbar ------------------------- Using the Remote Control Inserting Batteries before using the Remote Control (AAA batteries X 2) ------------------------- How to Use the Remote Control ------------------------- Using the Hidden Buttons (Buttons with more than one function) -------------------------... - Page 6 Connecting an External Device Method 1. Connecting using an HDMI Cable ------------------------- Method 2. Connecting using an Optical Cable ------------------------- Connecting a USB Storage Device Connecting a Mobile Device Connecting via Bluetooth ------------------------- Installing the Wall Mount Installation Precautions ------------------------- Wallmount Components ------------------------- Software Update...
-
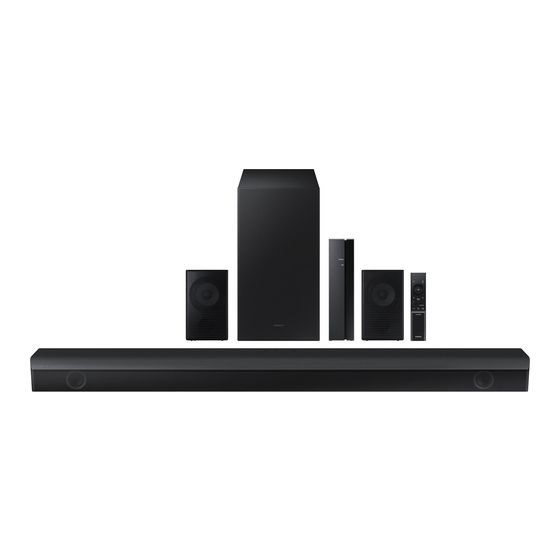
Page 7: Checking The Components
• For more information about the power supply and power consumption, refer to the label attached to the product. (Label: Bottom of the Soundbar Main Unit) • To purchase additional components or optional cables, contact a Samsung Service Center or Samsung Customer Care. -
Page 8: Product Overview
02 PRODUCT OVERVIEW Front Panel / Top Panel of the Soundbar Top Panel Display Displays the product’s status and current mode. (Power) Button Turns the power on and off. • Auto Power Down Function The unit turns off automatically in the following situations: –... -
Page 9: Bottom Panel Of The Soundbar
Bottom Panel of the Soundbar DIGITAL AUDIO IN HDMI (OPTICAL) DIGITAL AUDIO IN HDMI (OPTICAL) HDMI IN DIGITAL AUDIO IN HDMI IN HDMI (OPTICAL) HDMI IN USB (5V 0.5A) USB (5V 0.5A) HDMI TO TV (ARC) HDMI TO TV (ARC) USB (5V 0.5A) HDMI OUT HDMI TO TV... -
Page 10: Using The Remote Control
03 USING THE REMOTE CONTROL Inserting Batteries before using the Remote Control (AAA batteries X 2) Slide the back cover in the direction of the arrow until it is completely removed. Insert 2 AAA batteries (1.5V) oriented so that their polarity is correct. - Page 11 WOOFER By pressing the button, you can adjust the volume of the each speaker. SOUND TONE CH LEVEL MODE • Press the button to select CENTER LEVEL and then adjust the volume between -6~+6 CONTROL by using the Up/Down buttons. CH LEVEL •...
- Page 12 Press the indicated areas to select Up/Down/Left/Right. Up/Down/ PAIR Left/Right Press Up/Down/Left/Right on the button to select or set functions. SOUND MODE • Repeat To use the Repeat function in “USB” mode, press the Up button. • Music Skip WOOFER Press the Right button to select the next music file.
- Page 13 SOUND MODE WOOFER SOUND WOOFER MODE TONE CH LEVEL CONTROL (BASS) LEVEL Push the button up or down to adjust the level of the woofer (bass) to -12 or between -6 to +6. To set the woofer (bass) volume level to 0 (Default), press the button. WOOFER By pressing the button, you can adjust the volume of the treble or bass sound.
-
Page 14: Using The Hidden Buttons (Buttons With More Than One Function)
Using the Hidden Buttons (Buttons with more than one function) Hidden Button Reference page Remote Control Button Function WOOFER (Up) TV remote control On/Off (Standby) page 15 Left TV Auto connect On/Off (BT Ready) page 27 ID SET page 12 7 Band EQ page 11 (Sound Control) -
Page 15: Adjusting The Soundbar Volume With A Tv Remote Control
• Set the TV speaker to External Speaker to use this function. • Manufacturers supporting this function: Samsung, VIZIO, LG, Sony, Sharp, PHILIPS, PANASONIC, TOSHIBA, Hisense, RCA 1. Turn Off the Soundbar. 2. Push up and hold the WOOFER button for 5 seconds. -
Page 16: Connecting The Soundbar
04 CONNECTING THE SOUNDBAR Connecting Electrical Power Use the power components to connect the Subwoofer and Soundbar to an electrical outlet in the following order: 1. Connect the power cord to the Subwoofer. 2. Connect the power output cable to the power adapter, and then to the Soundbar. 3. -
Page 17: Connecting The Soundbar To The Subwoofer
Soundbar unit is connected properly. Connect again. See the Connection failed instructions for manual connection on page 18. Red and blue See the contact information Blinking Malfunction for the Samsung Service Center in this manual. ENG - 17... - Page 18 • The Soundbar will automatically power on when ID SET is complete. ID SET SAMSUNG logo is on the top 5 Sec 3. Check if the LINK LED is solid blue (connection complete). The LINK LED indicator stops blinking and...
- Page 19 NOTES • Do not connect the power cord of this product or your TV to a wall outlet until all connections between components are complete. • Before moving or installing this product, be sure to turn off the power and disconnect the power cord. •...
-
Page 20: Connecting An Swa-9100 To Your Soundbar
Connecting an SWA-9100 to your Soundbar Expand to true wireless surround sound by connecting the Samsung Wireless Rear Speaker Kit (SWA-9100) to your Soundbar. 1. Connect the Wireless Receiver Module to 2 Surround Speakers Use the speaker cables to connect the two surround sound speakers to the Wireless Receiver Module. - Page 21 • The ID SET message appears on the display of the Soundbar for a moment, and then it disappears. • The Soundbar will automatically power on when ID SET is complete. ID SET SAMSUNG logo is on the top 5 Sec CAUTION •...
- Page 22 Connection failure SURROUND SPEAKERS OUT (Red) SPEAKER IMPEDANCE : 3 5 Sec SURROUND SPEAKERS OUT ID SET SPEAKER IMPEDANCE : 3 ID SET 2. Repeat steps 3 through 4. POWER Others Errors Contact a Samsung Service Center. POWER ENG - 22...
-
Page 23: Using A Wired Connection To The Tv
05 USING A WIRED CONNECTION TO THE TV Hear TV sound from your Soundbar through wired or wireless connections. • When the Soundbar is connected to selected Samsung TVs, the Soundbar can be controlled using the TV’s remote control. – This feature is supported by 2017 and later Samsung Smart TVs that support Bluetooth when you connect the Soundbar to the TV using an optical cable. - Page 24 • If TV sound is inaudible, press the (Source) button on the remote control or on the top of the Soundbar to switch to “D.IN” mode. The screen displays “D.IN” and “TV ARC” in sequence, and TV sound is played. •...
-
Page 25: Method 2. Connecting Using An Optical Cable
Method 2. Connecting using an Optical Cable Pre-connection Checklist • When both the HDMI cable and optical cable are connected, the HDMI signal is received first. • When you use an optical cable and the terminals have covers, be sure to remove the covers. Bottom of the Soundbar Optical Cable (not supplied) -
Page 26: Using A Wireless Connection To The Tv
06 USING A WIRELESS CONNECTION TO THE TV Connecting a TV via Bluetooth When a TV is connected using Bluetooth, you can hear stereo sound without the hassle of cabling. • Only one TV can be connected at a time. The initial connection 1. - Page 27 Disconnecting the Soundbar from the TV Press the (Source) button on the top panel or on the remote control and switch to any mode but “BT”. • Disconnecting takes time because the TV must receive a response from the Soundbar. (The time required may differ, depending on the TV model.) •...
- Page 28 07 CONNECTING AN EXTERNAL DEVICE Connect to an external device via a wired connection or Bluetooth connection to play the external device’s sound through the Soundbar. Method 1. Connecting using an HDMI Cable Top of the Soundbar HDMI External Device HDMI HDMI Cable HDMI OUT...
- Page 29 Method 2. Connecting using an Optical Cable BD / DVD player / Optical Cable Bottom of the Soundbar Set-top box / (not supplied) Game console DIGITAL AUDIO IN (OPTICAL) OPTICAL OUT Top of the Soundbar D.IN 1. Connect DIGITAL AUDIO IN (OPTICAL) on the main unit to the OPTICAL OUT port of the Source Device using a digital optical cable (not supplied).
-
Page 30: Connecting A Usb Storage Device
08 CONNECTING A USB STORAGE DEVICE You can play music files located on USB storage devices through the Soundbar. USB port DIGITAL AUDIO IN (OPTICAL) HDMI USB (5V 0.5A) HDMI TO TV (ARC) DC 24V DIGITAL AUDIO IN (OPTICAL) USB (5V 0.5A) 1. -
Page 31: Connecting A Mobile Device
(Source) button on the top panel of the Soundbar for more than 5 seconds to display “BT PAIRING”. 2. On your device, select “[AV] Samsung Soundbar B6-Series” from the list that appears. • When the Soundbar is connected to the Bluetooth device, [Bluetooth Device Name] → “BT”... - Page 32 • You cannot connect the Soundbar to a Bluetooth device that supports only the HF (Hands Free) function. • Once you have paired the Soundbar to a Bluetooth device, selecting “[AV] Samsung Soundbar B6-Series” from the device’s scanned devices list will automatically change the Soundbar to “BT”...
- Page 33 Disconnecting the Bluetooth device from a Soundbar You can disconnect a Bluetooth device from the Soundbar. For instructions, see the Bluetooth device’s user manual. • The Soundbar will be disconnected. • When the Soundbar is disconnected from the Bluetooth device, the Soundbar will display “BT DISCONNECTED”...
- Page 34 Soundbar at the same time. NOTES • Only 1 Samsung TV, or 2 Bluetooth devices can be connected to the Soundbar at one time. • The Soundbar will be disconnected from Bluetooth devices when it receives a connection request from a Samsung TV.
-
Page 35: Installing The Wall Mount
10 INSTALLING THE Wallmount Components WALL MOUNT Wall Mount Guide Installation Precautions • Install on a vertical wall only. (M4 x L10) • Do not install in a place with high temperature or humidity. Holder-Screw Screw • Verify whether the wall is strong enough to support the product’s weight. - Page 36 2. Align the Wall Mount Guide’s Center Line 5. Push a screw (not supplied) through each with the center of your TV (if you are Holder-Screw, and then screw each screw mounting the Soundbar below your TV), and firmly into a support screw hole. then fix the Wall Mount Guide to the wall using tape.
-
Page 37: Software Update
(bottom) part of the Bracket-Wall your Soundbar. For more information about how Mounts, and then slide the Bracket-Wall to download update files, go to the Samsung Mounts down so that the Bracket-Wall Electronics website at Mounts rest securely on the www.samsung.comSupport. -
Page 38: Update Procedure
USB thumb drive. This may cause if audio files supported by the Soundbar are the firmware update to fail. stored in the USB storage device. 2. Go to (samsung.com) select Enter Model • Do not disconnect the power or remove the Number and enter the model of your USB device while updates are being applied. -
Page 39: Troubleshooting
; The cable connection to the Soundbar may ; HDMI-CEC may not be activated on the TV. not be loose. Remove the cable and Turn on the CEC on the TV menu. (Samsung connect again. TV: Home ( ) → Menu → Settings ( ) →... - Page 40 Change the TV’s audio output to Bluetooth moves too far away from the PCM or Dolby Digital. Soundbar, it may cause the sound to drop (For a Samsung TV: Home ( ) → Menu → out. Move the device closer to the Settings ( ) →...
-
Page 41: License
The Bluetooth® word mark and logos are ENERGY STAR qualified model only (The other registered trademarks owned by Bluetooth SIG, models) Inc. and any use of such marks by Samsung – As an ENERGY STAR Partner, Samsung has Electronics Co., Ltd. is under license. Other determined that this product or product... -
Page 42: Open Source License Notice
14 OPEN SOURCE LICENSE NOTICE To send inquiries and requests for questions regarding open sources, contact Samsung Open Source (http://opensource.samsung.com) 15 IMPORTANT NOTES ABOUT SERVICE Figures and illustrations in this User Manual are provided for reference only and may differ from actual product appearance. -
Page 43: Specifications And Guide
+41°F to +95°F (+5°C to +35°C) Operating Humidity Range 10 % ~ 75 % Frequency range 20Hz~20kHz NOTES • Samsung Electronics Co., Ltd reserves the right to change the specifications without notice. • Weight and dimensions are approximate. ENG - 43... - Page 44 SECA will repair or replace the product at its option. All warranty repairs must be performed by a SECA Authorized Service Center. (The name and address of the location nearest you can be obtained by calling toll free: 1- 800- SAMSUNG) LABOR...
- Page 45 © 2022 Samsung Electronics Co., Ltd. All rights reserved. Contact SAMSUNG WORLD WIDE If you have any questions or comments relating to Samsung products, please contact the SAMSUNG customer care Center. HEADQUARTERS Samsung Electronics Canada Inc. 2050 Derry Road West, Mississauga, Ontario L5N 0B9 Canada TEL: 1-800-SAMSUNG (1-800-726-7864) www.samsung.com/ca/support...
- Page 46 MANUEL COMPLET HW-B67C Imaginez les possibilités Merci d’avoir choisi un appareil Samsung. Pour recevoir une assistance plus complète, veuillez enregistrer votre produit sur www.samsung.com/register...
- Page 47 Reportez-vous au tableau ci-dessous pour MISE EN GARDE comprendre les symboles pouvant figurer sur votre produit Samsung. • Veillez à éviter toute projection sur l’appareil. Ne placez jamais de récipients contenant un liquide (ex. : vase) dessus.
- Page 48 Declaration d’exposition aux radiations: 10. Placez le cordon d’alimentation de sorte qu’il Cet equipement est conforme aux limites ne puisse être ni piétiné ni pincé, d’exposition aux rayonnements IC RSS-102 particulièrement au niveau de la fiche, de la etablies pour un environnement non controle. prise de courant et du point de sortie de Cet equipement doit etre installe et utilise avec l’appareil.
- Page 49 PRÉCAUTIONS 5. Les piles utilisées dans ce produit peuvent contenir des produits chimiques dangereux pour l’environnement. Ne jetez pas les piles 1. Assurez-vous que le bloc d’alimentation CA dans votre poubelle habituelle. Ne vous chez vous est conforme aux exigences de débarrassez pas des piles en les faisant puissance figurant sur la plaque brûler.
- Page 50 SOMMAIRE Vérification des Composants Présentation du Produit Panneau avant/Panneau supérieur du Soundbar ------------------------- Partie inférieure du panneau du Soundbar ------------------------- Utlisation de la Télécommande Insertion des piles avant d’utiliser la télécommande (2 piles AAA) ------------------------- Procédure d’utilisation de la télécommande ------------------------- Utilisation des boutons masqués (boutons ayant plusieurs fonctions) ------------------------- Caractéristiques de sortie pour les différents modes d’effets sonores -------------------------...
- Page 51 Branchement d’un Périphérique Externe Méthode 1. Branchement à l’aide d’un câble HDMI ------------------------- Méthode 2. Branchement à l’aide d’un câble optique ------------------------- Connexion à un périphérique de stockage USB Branchement d’un Appareil Mobile Connexion par Bluetooth ------------------------- Installation du Support Mural Précautions d’installation ------------------------- Composantes murales...
-
Page 52: Vérification Des Composants
• Pour acheter des composants supplémentaires ou des câbles en option, veuillez contacter un centre de service Samsung ou le service clientèle Samsung. • Selon votre zone géographique, la prise CA peut avoir différents aspects et peut être fournie avec l’adaptateur CA/CC intégré. -
Page 53: Présentation Du Produit
02 PRÉSENTATION DU PRODUIT Panneau avant/Panneau supérieur du Soundbar Panneau supérieur Affichage Affiche le statut et le mode actuel du produit. Bouton (Alimentation) Permet d'allumer et d'éteindre l'appareil. • Fonction Auto Power Down L’unité se met automatiquement hors tension dans les situations suivantes. – Mode D.IN / HDMI / BT / USB: si, pendant 20 minutes, aucun signal audio n’est émis. Bouton (volume) Permet de régler le volume. -
Page 54: Partie Inférieure Du Panneau Du Soundbar
Partie inférieure du panneau du Soundbar DIGITAL AUDIO IN HDMI (OPTICAL) DIGITAL AUDIO IN HDMI (OPTICAL) HDMI IN DIGITAL AUDIO IN HDMI IN HDMI (OPTICAL) HDMI IN USB (5V 0.5A) USB (5V 0.5A) HDMI TO TV HDMI TO TV (ARC) (ARC) USB (5V 0.5A) HDMI OUT... -
Page 55: Utlisation De La Télécommande
03 UTLISATION DE LA TÉLÉCOMMANDE Insertion des piles avant d’utiliser la télécommande (2 piles AAA) Faites glisser le panneau arrière dans le sens de la flèche jusqu’à ce qu’il soit complètement retiré. Insérez 2 piles AAA (1,5V) dans le bon sens (polarité correcte). Refaites glisser le panneau arrière dans sa position initiale. - Page 56 WOOFER SOUND En appuyant sur le bouton, vous pouvez ajuster le volume de chaque haut-parleur. MODE TONE CH LEVEL • Appuyez sur le bouton CENTER LEVEL, puis réglez le volume entre -6 et +6 à l’aide des CONTROL boutons Haut/Bas. CH LEVEL •...
- Page 57 Appuyez sur les zones indiquées pour sélectionner le bouton du Haut/Bas/Gauche/Droite. Haut/Bas/ PAIR Gauche/ Appuyez sur le bouton du Haut/Bas/Gauche/Droite pour sélectionner ou définir des Droite SOUND MODE fonctions. • Répéter Pour utiliser la fonction Répéter en mode «USB», appuyez sur le bouton du Haut. •...
- Page 58 SOUND MODE WOOFER NIVEAU du TONE CH LEVEL SOUND CONTROL WOOFER MODE (BASSES) Faites basculer ce bouton vers le haut ou vers le bas pour régler le niveau du haut-parleur (basses) sur -12 ou entre -6 et +6. Pour régler le niveau de volume du haut-parleur (basses) sur 0 (par défaut), appuyez sur ce bouton.
-
Page 59: Utilisation Des Boutons Masqués (Boutons Ayant Plusieurs Fonctions)
Utilisation des boutons masqués (boutons ayant plusieurs fonctions) Bouton masqué Page de référence Bouton de la télécommande Fonction Activer/Désactiver la fonction Télécommande de votre WOOFER (Haut) page 15 téléviseur (mode veille) Activation/Désactivation de la connexion automatique Gauche page 27 du téléviseur (BT Prêt) Haut ID SET page 12... -
Page 60: Réglage Du Volume Du Soundbar Avec Une Télécommande Du Téléviseur
• Réglez le haut-parleur du téléviseur sur Haut-p. externe pour utiliser cette fonction. • Fabricants qui utilisent cette fonction : Samsung, VIZIO, LG, Sony, Sharp, PHILIPS, PANASONIC, TOSHIBA, Hisense, RCA 1. Éteignez le Soundbar. 2. Appuyez sur le bouton WOOFER et maintenez-le enfoncé pendant 5 secondes. -
Page 61: Branchement Du Soundbar
04 BRANCHEMENT DU SOUNDBAR Branchement de l’alimentation Utilisez les composants d’alimentation afin de brancher le caisson de basses et le Soundbar dans une prise électrique dans l’ordre suivant : 1. Raccordez le cordon d’alimentation au caisson de basses. 2. Branchez le câble d’alimentation de sortie dans l’adaptateur d’alimentation puis dans le Soundbar. 3. -
Page 62: Raccordement Du Soundbar Au Caisson De Basses
Soundbar. Activé Rebranchez le produit. Reportez- vous aux instructions relatives au Échec de la connexion branchement manuel à la page Rouge et bleu Recherchez les coordonnées du Clignotant Dysfonctionnement Centre de service Samsung dans le manuel. FRA - 17... - Page 63 5 secondes. • Le message ID SET apparaît sur l’écran du Soundbar pendant un moment, puis disparaît. • Le Soundbar est mis sous tension automatiquement lorsque ID SET est terminé. Le logo SAMSUNG est situé sur le ID SET dessus. 5 Sec 3.
- Page 64 REMARQUES • Ne branchez pas le cordon d’alimentation de ce produit ou de votre téléviseur à une prise murale tant que tous les composants ne sont pas connectés. • Avant de déplacer ou d’installer ce produit, veillez à couper l’alimentation et à débrancher le cordon d’alimentation.
-
Page 65: Raccordement Du Module Swa-9100 Au Soundbar
Raccordement du module SWA-9100 au Soundbar Passez à un véritable son ambiophonique sans fil en connectant l’ensemble de haut-parleurs ambiophoniques sans fil Samsung (SWA-9100) à votre Soundbar. 1. Raccordez le module récepteur sans fil à 2 haut-parleurs Surround Utilisez les câbles des haut-parleurs pour raccorder deux haut-parleurs Surround au module récepteur sans fil. - Page 66 Appuyez sur la touche Haut de la télécommande et maintenez-le enfoncé pendant au moins 5 secondes. • Le message ID SET apparaît sur l’écran du Soundbar pendant un moment, puis disparaît. • Le Soundbar est mis sous tension automatiquement lorsque ID SET est terminé. Le logo SAMSUNG est situé sur le ID SET dessus.
- Page 67 SURROUND SPEAKERS OUT (rouge) SPEAKER IMPEDANCE : 3 5 Sec SURROUND SPEAKERS OUT ID SET SPEAKER IMPEDANCE : 3 ID SET 2. Répétez les étapes 3 à 4. POWER Autres Erreurs Contactez un centre de service Samsung. POWER FRA - 22...
-
Page 68: Utilisation D'une Connexion Filaire Au Téléviseur
– Cette fonction est prise en charge par les téléviseurs Samsung Smart sortis en 2017 ou après et qui prennent en charge le Bluetooth lors de la connexion du Soundbar au téléviseur à l’aide d’un câble optique. - Page 69 • Si le son du téléviseur est inaudible, appuyez sur le bouton (Source) de la télécommande ou sur le dessus du Soundbar pour basculer en mode «D.IN». L’écran affiche à la suite «D.IN» et «TV ARC», et le son du téléviseur est diffusé. •...
-
Page 70: Méthode 2. Branchement À L'aide D'un Câble Optique
Méthode 2. Branchement à l’aide d’un câble optique Liste de contrôle de pré-connexion • Lorsque le câble HDMI et le câble optique sont tous les deux connectés, le signal HDMI est reçu en premier. • Lorsque vous utilisez un câble optique et que les bornes ont leurs caches, assurez-vous de retirer les caches. -
Page 71: Utilisation D'une Connexion Sans Fil Avec Le Téléviseur
06 UTILISATION D’UNE CONNEXION SANS FIL AVEC LE TÉLÉVISEUR Connexion par Bluetooth Lorsqu’un téléviseur est connecté par Bluetooth, vous pouvez profiter du son stéréo sans vous encombrer avec des câbles. • Un seul téléviseur peut être connecté à la fois. Connexion initiale 1. - Page 72 Déconnexion du Soundbar du téléviseur Appuyez sur le bouton (Source) du panneau supérieur ou de la télécommande, puis sélectionnez n’importe quel mode sauf «BT». • La déconnexion prend du temps car le téléviseur doit recevoir une réponse du Soundbar. (Le temps requis peut différer en fonction du modèle du téléviseur.) •...
-
Page 73: Branchement D'un Périphérique Externe
07 BRANCHEMENT D’UN PÉRIPHÉRIQUE EXTERNE Connectez un périphérique externe via une connexion filaire ou Bluetooth pour lire le son du périphérique externe via le Soundbar. Méthode 1. Branchement à l’aide d’un câble HDMI Dessus du Soundbar HDMI Périphérique externe HDMI Câble HDMI HDMI OUT HDMI TO TV... -
Page 74: Méthode 2. Branchement À L'aide D'un Câble Optique
Méthode 2. Branchement à l’aide d’un câble optique Partie inférieure du panneau du Lecteur BD/DVD / Câble optique Soundbar Décodeur / (non fourni) Console de jeu DIGITAL AUDIO IN (OPTICAL) OPTICAL OUT Dessus du Soundbar D.IN 1. Branchez le connecteur DIGITAL AUDIO IN (OPTICAL) de l’unité principale sur le connecteur OPTICAL OUT du périphérique source à... -
Page 75: Connexion À Un Périphérique De Stockage Usb
08 CONNEXION À UN PÉRIPHÉRIQUE DE STOCKAGE USB Vous pouvez diffuser des morceaux se trouvant sur des périphériques de stockage à l’aide du Soundbar. Port USB DIGITAL AUDIO IN (OPTICAL) HDMI USB (5V 0.5A) HDMI TO TV (ARC) DC 24V DIGITAL AUDIO IN (OPTICAL) USB (5V 0.5A) 1. -
Page 76: Branchement D'un Appareil Mobile
Soundbar et maintenez-le enfoncé pendant plus de 5 secondes pour afficher «BT PAIRING». 2. Sur votre appareil, sélectionnez «[AV] Samsung Soundbar B6-Series» dans la liste qui apparaît. • Lorsqu’un Soundbar est connecté au périphérique Bluetooth, [Nom du périphérique Bluetooth] →... - Page 77 HF (Hands Free). • Une fois l’appariement du Soundbar avec un périphérique Bluetooth réalisé, la sélection de «[AV] Samsung Soundbar B6-Series» dans la liste des périphériques numérisés de l’appareil fera automatiquement passer le Soundbar en mode «BT». – Accessible seulement si le Soundbar est énuméré dans la liste des dispositifs Bluetooth appariés.
- Page 78 Déconnexion d’un périphérique Bluetooth d’un Soundbar Vous pouvez déconnecter le périphérique Bluetooth à partir du système Soundbar. Pour des directives, consultez le manuel d’utilisation du périphérique Bluetooth. • Le système Soundbar sera déconnecté. • Lorsque le système Soundbar est déconnecté du périphérique Bluetooth, Soundbar affiche le message «BT DISCONNECTED»...
- Page 79 Soundbar en même temps. REMARQUES • Un seul téléviseur Samsung ou deux appareils Bluetooth peuvent être connectés au Soundbar en même temps. • Le Soundbar se déconnecte des appareils Bluetooth lorsqu’il reçoit une demande de connexion d’un téléviseur Samsung.
-
Page 80: Installation Du Support Mural
10 INSTALLATION Composantes murales DU SUPPORT MURAL Guide de montage mural Précautions d’installation (M4 x L10) • Effectuez l’installation sur un mur vertical Vis de support uniquement. • N’installez pas le produit dans un endroit où la température ou l’humidité sont élevées. •... - Page 81 2. Alignez la Ligne Centrale du Guide de 5. Poussez une vis (non fournie) dans chaque montage mural sur le centre de votre Vis de support, puis vissez fermement téléviseur (si vous montez le Soundbar sous chaque vis dans un trou de vis de support. ce dernier), puis fixez le Guide de montage mural au mur avec du ruban adhésif.
-
Page 82: Mise À Jour Logicielle
7. Installez le Soundbar à l’aide des Support de fixation murale en accrochant ces derniers LOGICIELLE sur les Vis de support fixées au mur. Il se peut que Samsung propose ultérieurement des mises à jour pour le micrologiciel du système du Soundbar. Port USB... -
Page 83: Procédure De Mise À Jour
à jour du micrologiciel fonctionner correctement si les fichiers audio est susceptible d’échouer. pris en charge par le Soundbar sont stockés 2. Accédez au site (samsung.com) dans le périphérique de stockage. sélectionnez Entrez le numéro de modèle. -
Page 84: Dépannage
; Vérifiez que le câble HDMI est ; Pour la sortie audio du téléviseur, correctement connecté à la borne ARC. sélectionnez Soundbar. (Téléviseur Samsung : (Voir la page 23.) Accueil ( ) → Menu → Paramètres ( ) →... - Page 85 Changez la sortie audio du téléviseur est trop éloigné du Soundbar, il est possible et réglez-la sur PCM ou sur Dolby Digital. que le son soit coupé. Rapprochez l’appareil (Pour un téléviseur Samsung : Accueil ( ) → du Soundbar. Menu → Paramètres ( ) →...
-
Page 86: Licence
Bluetooth SIG, – As an ENERGY STAR Partner, Samsung has Inc. and any use of such marks by Samsung determined that this product or product Electronics Co., Ltd. is under license. Other models meets the ENERGY STAR guideline trademarks and trade names are those of their for energy efficiency. -
Page 87: Avis De Licences Libres
14 AVIS DE LICENCES LIBRES Pour envoyer des questions concernant les sources ouvertes, communiquez avec Samsung Open Source (http://opensource.samsung.com). 15 REMARQUE IMPORTANTE CONCERNANT LE SERVICE Les chiffres et les illustrations contenus dans ce Guide d’utilisation sont fournis à titre de référence uniquement et pourraient ne pas représenter... -
Page 88: Caractéristiques Et Guide
Plage d’humidité en fonctionnement 10 % à 75 % Plage de fréquences 20Hz~20kHz REMARQUES • Samsung Electronics Co., Ltd se réserve le droit de modifier les caractéristiques sans préavis. • Le poids et les dimensions sont approximatifs. FRA - 43... - Page 89 Toutes les réparations sous garantie doivent être effectuées par un Centre de service autorisé SECA. Le nom et l’adresse du Centre de service le plus près de chez vous peut être obtenu en composant sans frais le 1- 800- SAMSUNG ou en visitant notre site web au www.samsung.ca MAIN-D’OEUVRE...
- Page 90 © 2022 Samsung Electronics Co., Ltd. Tous droits réservés. Comment contacter Samsung dans le monde Si vous avez des suggestions ou des questions concernant les produits Samsung, veuillez contacter le Service Consommateurs Samsung. SIÈGE SOCIAL Samsung Electronics Canada Inc. 2050 Derry Road West, Mississauga, Ontario L5N 0B9 Canada TEL: 1-800-SAMSUNG (1-800-726-7864) www.samsung.com/ca_fr/support...
Need help?
Do you have a question about the HW-B67C and is the answer not in the manual?
Questions and answers