Table of Contents
Advertisement
Quick Links
Advertisement
Table of Contents

Related Manuals for Lanix X400


Summary of Contents for Lanix X400
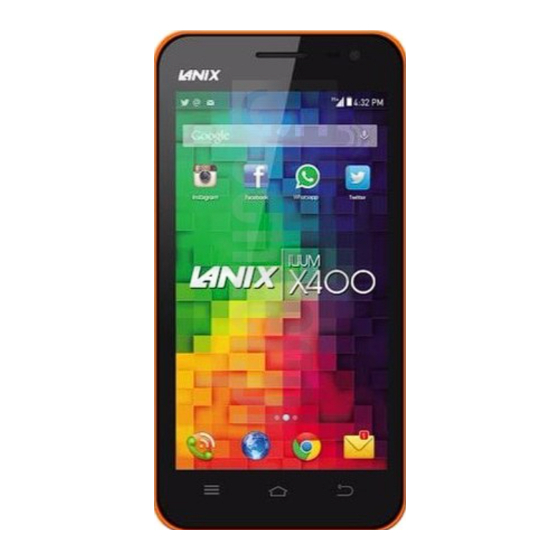
- Page 1 LANIX X400 USER MANUAL...
-
Page 2: Table Of Contents
Table of Contents Safety Information ............................4 Appearance and Key Function........................7 Introduction..............................8 Call Functions ............................10 Notifications Bar ............................12 Contacts ..............................14 Messaging ..............................17 Bluetooth & Wi-Fi ............................. 18 Internet Browser ............................21 Play Store ..............................24 Downloads .............................. - Page 3 Music ............................... 29 FM Radio ..............................32 Sound Recorder ............................34 File Manager ............................36 Calendar ..............................37 Alarm Clock ............................. 38 Settings ..............................39 Storage ..............................45 Troubleshooting ............................46...
-
Page 4: Safety Information
Safety Information Please carefully read the terms below: Use Safely Do not use the phone in situations where it might cause danger. Transportation Safety Please observe all transportation laws and regulations. Please drive with both hands on the wheel. Hospital Safety Please follow hospital rules and limitations. - Page 5 Do not subject your phone to extreme temperature conditions. Water Hazard Your phone is not waterproof. Keep your phone away from water or liquid to avoid damage. Emergency Calls Make sure your mobile phone is switched on and in a service area. In home screen, tap the phone key and dial the emergency number.
- Page 6 - Immediately stop using the battery if it produces an odor, cracks and leaks, overheats, distorts or has any other type of physical damage. - Avoid using the charger near or around liquids. If the charger comes in contact with water or any liquids, immediately unplug it from the outlet to reduce the risk of overheating, charger malfunction, electric shock or fire.
-
Page 7: Appearance And Key Function
Appearance and Key Function... -
Page 8: Introduction
Introduction Installation of the SIM Card Warning: Please keep the SIM card out of the reach of children. The SIM card and its contact are easily damaged due to scratching or bending. Please use caution when carrying, installing, or taking out the SIM card. - Page 9 Memory Card Slot SIM Slot 3. Insert the battery, replace the battery cover, and power on the phone. Power On and Off On - Please ensure the SIM card has been properly inserted into the phone. Long press the Power key to switch the phone on.
-
Page 10: Call Functions
settings. Call Functions At the dial keyboard, enter the phone number and then click the dial key. If dialing an extension, you may click the dial pad icon in the bottom of the screen to open the interface and enter the number of the extension. - Page 11 Call Log History Call Logs Every telephone number called and received will be saved in the phones call log. All numbers in the call log can be dialed directly by clicking the dial icon on the screen. When the number appears on the list, click it to view details.
-
Page 12: Notifications Bar
Call Options There are different options that can be used in the call log and dialing interface. You may press the menu key while in the dial interface and adjust call settings. In the call logs, you may press browse through contacts list or set default contact resources. - Page 13 Clear Notification and Quick Settings menu buttons Pending Notifications and Applications Quick Notification Settings Notification Settings The notification settings window provides shortcuts to different phone settings for quick access. Click on any of the shortcut notification icons to power on or off. Note: To clear notifications, drag down the notification bar and click the clear notification icon on the upper right hand part of the screen (3 horizontal lines).
-
Page 14: Contacts
Contacts Enter: Click on the applications menu and select contacts. The default display is the phone contacts and SIM card contacts. The contacts are organized alphabetically by default. Search Add Contact Click the Search icon to enter the contact search interface. Any numbers or letters associated with any of the contacts saved in the list will be shown in the search results. - Page 15 Add New Contact Click the add contact icon (+) to add contact. Select to save your contacts to your Google account, the phone or the SIM card. You may enter different contact details which include adding a picture, name, telephone number, group, address, and email among other options.
- Page 16 Delete Contact Click on the Contacts icon to enter the phonebook. Click the menu key to access the Contacts menu. Click on Delete Contact and scroll to select which contact(s) you wish to delete. Note: You may also search for an individual contact in the phonebook. Once the contact is found click the contact name to enter the contact profile, press the menu key to bring up the contact menu and select delete to eliminate from the phonebook.
-
Page 17: Messaging
Messaging You may use this function to exchange text messages and multimedia messages with your family and friends. The messages to and from the same contact or phone number will be saved into a single conversation so you may see the entire message history conveniently. Send an SMS Application Menu »... -
Page 18: Bluetooth & Wi-Fi
Add Recipient Attachment button Text message entry field Bluetooth & Wi-Fi Bluetooth is a short-range wireless communications technology that devices can use to exchange information and connect to different types of devices which include headsets and other devices. - Page 19 Power on Bluetooth Settings » Bluetooth and select to power on Bluetooth. The Bluetooth icon will appear in the notification bar. The Bluetooth will then start to scan for all devices within its range and will display all available devices in a list. ...
- Page 20 List of available Bluetooth devices Power on Wi-Fi Settings » Wi-Fi and select ON to power on Wi-Fi Click on the desired Wi-Fi network to be connected. Note: Unsecured networks can be connected to directly - secured networks require a password or credentials prior to connection.
-
Page 21: Internet Browser
To display advanced options, click on the available option tab. List of available networks and the network connection screen Internet Browser Menu Functions Backward • This option will return the user to the previous page. - Page 22 Forward • This option will move to a web page after the current page. Windows • View all windows open by clicking the windows icon in the browser. Bookmarks • Click the save to Bookmarks option to save to Bookmarks. More Find on page: Search current page.
- Page 23 Click menu to access the internet browser options...
-
Page 24: Play Store
Play Store Google Play allows you to download music, movies, and games directly to your device. To access the Google Play Store, click on the applications menu and then the Play Store icon. Note: You will need to log in to your Google account when configuring the phone for the first time. Search and select between different Play Store categories... -
Page 25: Downloads
Downloads The download section of the phone keeps sorted all of the files that have been downloaded on the phone. The section can display the download by date or by size. To clear the file from the list, click on the box to the left of the file and then select the delete icon. -
Page 26: Camera
Camera Prior to use: Insert SD card before using the camera or video camera. All photos or videos taken by the phone are typically stored in the memory card for large storage capacity of images and videos. Open Camera Click the Applications Menu » Camera ... -
Page 27: Gallery
Camera Options Select between Camera & Video Gallery Open Images Click on the Applications Menu then click on the Gallery icon. - Page 28 Pictures and videos are stored in separate albums Share Pictures You may share pictures by sending them through different types of installed applications. You may also send pictures through the MMS message function by attaching a picture and also via Bluetooth. Adjust Image Press Menu and select edit to adjust images.
-
Page 29: Music
Vintage, Black and White, Instant, Latte, Litho, X-Process, Crop, Rotate, Mirror, Straighten, Vignette, Contrast, Exposure, Auto color, Shadows, and Vibrancy. Crop Pictures Click menu and crop to adjust the size of the picture. Once the picture appears, pinch your fingers in or out to adjust the size. - Page 30 Playback Options Track Controls Song Status Search Music You may choose to search for music from media folder through artist name, song name, album name. The following formats are available: AMR, MIDI, MP3, WAV, and OGG.
- Page 31 On the Music Player, press and hold down from one of the following options: Artist, Album, or Track name for quick search options regarding your selection. Set Music Player in the Background Click on the Home key to move the Music Player to the background. You will see an icon on the status bar indicating that the music player is active.
-
Page 32: Fm Radio
FM Radio FM Radio Through this function, you may listen to FM radio on the device. The FM radio uses the wired headphones as an antenna in order to receive signal. Before using this function, connect the original equipment headphones that came with the phone. Open FM radio Press the FM Radio icon to open the application. - Page 33 Radio Options Click the star to Add to Favorite Radio Stations Scan FM Radio as Background Click on the Home key to move the FM Radio to the background.
-
Page 34: Sound Recorder
Favorite Channels Click on the Star to add to Favorite Channels. You may also click on the Channel List to browse through added stations. Sound Recorder You may send any recorded audio via Bluetooth or MMS and also have the option to make any recorded audio the phones default ring tone. - Page 35 Recording Time Recording Controls Note: All recordings are typically saved in the SD card folder. Please ensure the SD card is installed prior to recording.
-
Page 36: File Manager
File Manager The file manager allows you to search and organize your stored phone files conveniently and efficiently through one program. Scroll and search through the File Manager for stored phone files. You may also search or add new folders from the File Manager interface... -
Page 37: Calendar
Calendar The calendar helps keep track of your life‟s most important moments in one application. Long press the specific day or hour you wish to enter a new event to Enter Calendar information that ranges from Name, Location, Date, and Time among other options... -
Page 38: Alarm Clock
Alarm Clock Click on the Clock icon then click the alarm tab to enter the alarm clock interface. This option allows you to add and edit alarms. Click to add, edit or delete alarms Then click on the specific hour and minute to set the alarm. -
Page 39: Settings
Settings Wireless & Networks Wi-Fi Settings » Wi-Fi to power on. When on, the Wi-Fi will automatically search for available networks. Any unsecured network can be used directly and any secured network requires a password or credentials prior to connection Bluetooth ... - Page 40 Device Audio Profiles This option sets the phone ring tone settings for receiving calls and notifications. Some of the settings include: Vibrate, volume, ring tones, ring tones notification, dial touchpad, and haptic feedback and tones Display Brightness, Auto rotating screen, Wallpaper, Screen Timeout Storage ...
- Page 41 Personal Location High Accuracy – Use Wi-Fi and Mobile Networks to determine location. Battery Saving – Use Mobile Networks to determine location. Security Set up basic screen locks: Use slide, pattern, PIN or password to lock the screen. ...
- Page 42 The phone will then prompt you that the change was successful. If you enter the PIN incorrectly three times, the SIM and PIN codes will be automatically locked. You will need the PUK code to unlock the phone which is available through your service provider. If you enter the PUK code incorrectly 10 times, the SIM card will be permanently locked.
- Page 43 System Date & Time Date and Time adjustment. Select Date Format Schedule Power On & Off Schedule power on and off Accessibility Power button ends call and auto rotate screen Speak Passwords and large text Printing ...
- Page 44 Developer Options If the phone does not display Developer options press “build number” five (5) times in the about phone tab in settings. The developer option gives access to USB Debugging and other developer options About Device Phone information status and firmware updates...
-
Page 45: Storage
Storage Connect the phone with the USB cable provided. Once connected, a connection interface will appear. In the connection mode interface, select one of the available options to transfer files to your computer. You may select to transfer files through MTP. -
Page 46: Troubleshooting
Troubleshooting Below is a list of common problems that may occur when using your mobile phone. Try these easy troubleshooting steps to resolve any type of issues you may encounter. The phone does not power on Press and hold the power key until the startup sequence appears on the display. ... - Page 47 The standby time is too short Please keep in mind that standby time relates directly to phone usage (Internet, Text, Voice Calls, Maps, etc.). Batteries typically have to be replaced after a year of use. The phone cannot connect to the network (Voice or Data) ...
- Page 48 The caller ID does not display on incoming calls Contact your local network service provider and verify you have the caller ID feature enabled on your account or verify if the caller may have blocked his number from appearing. The caller cannot leave a voicemail message ...
- Page 49 (1) This device may not cause harmful interference. (2) This device must accept any interference received, including interference that may cause undesired operation. NOTE: Changes or modifications not expressly approved by the party responsible for compliance could void the user's authority to operate the equipment.
- Page 50 This phone is designed and manufactured not to exceed the emission limits for exposure to radio frequency (RF) energy set by the Federal Communications Commission of the U.S. Government: The exposure standard for wireless mobile phones employs a unit of measurement known as the Specific Absorption Rate, or SAR.
Need help?
Do you have a question about the X400 and is the answer not in the manual?
Questions and answers