
Summary of Contents for Invision AROHA CO11
- Page 1 User Manual CARBON MONOXIDE (CO) ALARM CO11 EN / NL / DE / FR / IT / ES Manufacturer: Invision Retail, Postbus 135, 4900AC EN50291-1:2018 Oosterhout, The Netherlands info@invisionretail.nl...
- Page 2 EN WARNING: Carbon monoxide alarms are not smoke alarms. This carbon monoxide alarm is not a substitute for installing and maintaining an appropriate number of smoke alarms alarms in your home. NL WAARSCHUWING: Koolmonoxidemelders zijn geen rookmelders. Deze koolmonoxide- melder is geen vervanging voor het installeren en onderhouden van een passend aantal rookmelders in uw woning.
- Page 3 Specifications / Leistungsbeschreibung / Indicazioni/ Características técnicas Power: 3VDC, Lithium Battery (sealed in)CR123A,1600mAh Operation Current: <30uA (standby); <70mA (alarm) Alarm Volume: >85 dB(A) at 3 meters CO sensor: Electrochemical sensors, 10 years lifetime CO Sensitivity: 50ppm 60~90min 100ppm 10~40min 300ppm 1~3min Accuracy of Digital Display: 30-999 PPM +/-30% Operating Temperature:...
- Page 4 Location / Locatie / Ort / Emplacement / Ubicazione / Ubicación EN Carbon monoxide (CO) detectors should be installed in a room with a combustion appliance (possible source of CO). • At a horizontal distance between 1-3 meters from the CO source; •...
- Page 5 DE Kohlenmonoxiddetektoren sollten in einem Raum mit einem Verbrennungsgerät (mögliche CO-Quelle) installiert werden. • In einem horizontalen Abstand zwischen 1-3 Metern von der CO-Quelle; • Zentrale Lage im Zimmer, mindestens 30 Zentimeter von den Wänden entfernt; • In Räumen ohne Verbrennungsgerät den CO-Melder auf Atemhöhe platzieren; •...
- Page 6 IT I rilevatori di monossido di carbonio IT devono essere installati in una stanza con un apparecchio a combustione (possibile fonte di CO). • A una distanza orizzontale compresa tra 1-3 metri dalla sorgente di CO; • Posizione centrale nella stanza, ad almeno 30 centimetri dalle pareti; •...
- Page 7 Mounting / Montage / Montante / Montura EN Use the sticky pad or use screws to mount the unit. Use a ⌀5mm drill for the plugs. NL Gebruik de dubbelzijdige tape of gebruik de schroeven om het apparaat te monteren. Gebruik een ⌀5mm boor voor de pluggen.
- Page 8 Activate / Activeren / Aktivieren / Activer / Attivare / Activar...
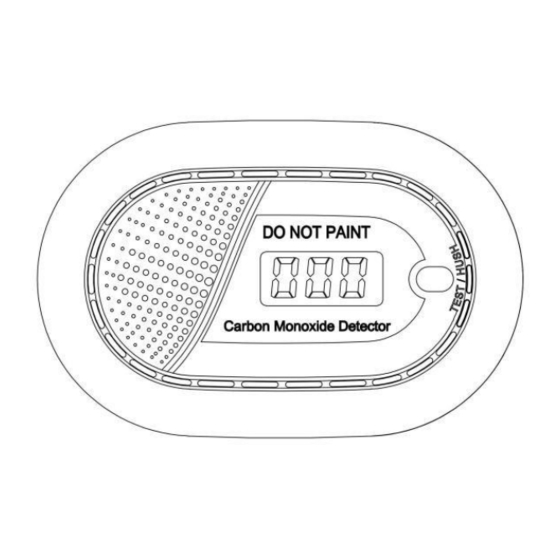
- Page 9 Testing / Testen / Test / Collaudo / Ensayo EN Test the alarm once a week by pressing the TEST/HUSH button, the alarm will sound if the unit is working well. If there is no sound, you can refer to “Trouble shooting” section. Do not stand close to the alarm when the alarm is sounding to protect your ears.
- Page 10 FR Testez l’alarme une fois par semaine en appuyant sur le bouton TEST/HUSH, l’alarme retentira si l’appareil fonctionne bien. S’il n’y a pas de son, vous pouvez vous référer à la section « Dépannage ». Ne vous tenez pas près de l’alarme lorsque l’alarme retentit pour protéger vos oreilles.
- Page 11 Alarm / Alarme / Alarm / Allarme / Alarma EN If an alarm signal sounds immediately move to fresh air and do not re-enter the premises until it has been aired out and your alarm returns to its normal condition. Investigate the source of the CO release and repair the defect.
- Page 12 FR Si un signal d’alarme retentit, jepasse immédiatement à l’air frais et ne rentre pas dans les locaux tant qu’il n’a pas été aéré et que votre bras ne revient pas à son état normal. Enquêter sur la source du dégagement de CO et réparer le défaut. N’IGNOREZ JAMAIS AUCUNE ALARME, Le monoxyde de carbone peut être mortel.
- Page 13 Trouble shooting / Problemen / Fehlerbehebung / Dépannage / Problemi / Problemas Unit status 1x → 60sec EN Dangerous CO concentration. Read chapter 'Alarm'. 4x → 5 sec NL Gevaarlijke CO-concentratie. Lees hoofdstuk 'Alarm'. DE Gefährliche CO-Konzentration. Lesen Sie das Kapitel 'Alarm'. FR Concentration dangereuse de CO.
- Page 14 EN End of life, replace unit. 2x → 30sec NL Einde levensduur, vervang unit. DE Ende der Lebensdauer, Einheit austauschen. EN Fin de vie, remplacer l’unité. IT Fine vita, unità di ricambio. ES Fin de vida útil, sustituir unidad.
- Page 15 Silence mode / Stilte modus / Stillemodus / Mode silencieux / Modalita silenzio / Mode de silencio EN When the carbon monoxide detector is going off you can push the test button to pause it for approx. 10 minutes. During this silence mode the red LED will flash once every 8 second. The silence feature is only to be used when the source of the alarm is known and safe.
- Page 16 DE Wenn das Gerät Alarm schlägt, können Sie die Testtaste drücken, um es für ca. 10 Minuten anzuhalten. Während dieses Ruhemodus blinkt die rote LED einmal alle 8 Sekunden. Die Stummschaltfunktion darf nur verwendet werden, wenn die Quelle des Rauchmelder bekannt und sicher ist.
- Page 17 IT Quando il rilevatore di monixide di carbonio si spegne, è possibile premere il pulsante di prova per metterlo in pausa per circa 10 minuti. Durante questa modalità di silenzio il LED rosso lampeggia una volta ogni 8 secondi. La funzione di silenzio deve essere utilizzata solo quando la fonte dell'allarme è...
-
Page 18: Mantenimiento
Maintenance / Onderhoud / Wartung / Entretien / Manutenzione / Mantenimiento EN There are a few simple steps you need do to keep it working properly: • Test the alarm once a week; • Do not paint the alarm; • Never attempt to disassemble or repair the alarm as it will void warranty; •... - Page 19 NL Er zijn een paar eenvoudige stappen die u moet doen om het goed te laten werken: • Test het alarm eenmaal per week; • Schilder het alarm niet; • Probeer nooit het alarm te demonteren of te repareren, omdat dan de garantie vervalt; •...
- Page 20 FR Il y a quelques étapes simples que vous devez faire pour qu’il fonctionne correctement: • Testez l’alarme une fois par semaine; • Ne peignez pas l’alarme; • N’essayez jamais de démonter ou de réparer l’alarme car cela annulerait la garantie; •...
- Page 21 ES Hay algunos pasos simples que debe seguir para que funcione correctamente: • Pruebe la alarma una vez a la semana; • No pinte la alarma; • Nunca intente desmontar o reparar la alarma, ya que anulará la garantía; • Nunca utilice soluciones de limpieza en el detector. Enjugar un paño ligeramente húmedo. Algunos materiales, vapores o gases, pueden afectar a la fiabilidad de las alarmas a corto o largo plazo.
- Page 22 Warranty / Garantie / Garanzia / Garantía EN Each carbon monoxide detector has to be free from defects in material and workmanship under normal use and service for a period of 2 years from the date of purchase. During the specified warranty period, we will repair or replace any defective carbon monoxide detector that is returned.
- Page 23 DE Jeder Kohlenmonoxiddetektor muss bei normalem Gebrauch und Service für einen Zeitraum von 2 Jahren ab Kaufdatum frei von Material- und Verarbeitungsfehlern sein. Während der angegebenen Garantiezeit reparieren oder ersetzen wir defekte Kohlenmonoxiddetektoren, die zurückgegeben werden. Schäden durch Vernachlässigung, Missbrauch oder Nichtbeachtung einer der beigefügten Anweisungen führen zum Ende der Garantie und das Gerät wird nicht ersetzt oder repariert.
- Page 24 IT Ogni rilevatore di monossido di carbonio deve essere privo di difetti di materiale e di fabbricazione in condizioni di uso e manutenzione normali per un periodo di 2 anni dalla data di acquisto. Durante il periodo di garanzia specificato, ripareremo o sostituiremo qualsiasi rilevatore di monossido di carbonio difettoso che viene restituito.
Need help?
Do you have a question about the AROHA CO11 and is the answer not in the manual?
Questions and answers