Table of Contents
Advertisement
Quick Links
Advertisement
Table of Contents

Subscribe to Our Youtube Channel
Summary of Contents for iRay Technology IRS FB4-T
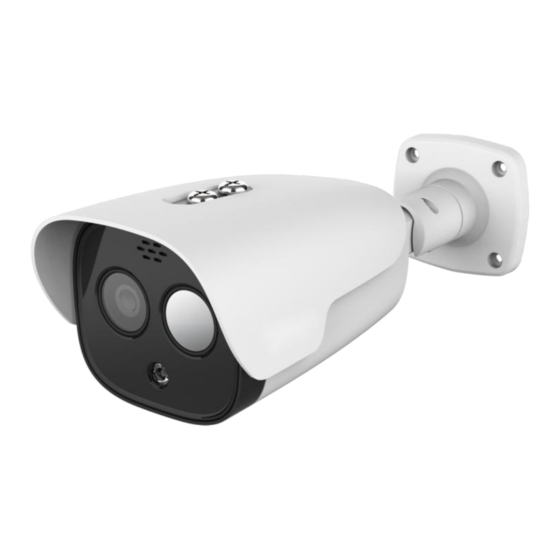
- Page 1 Dual-spectrum Bullet Network Camera User Manual V2.0.0...
-
Page 2: Table Of Contents
Dual-spectrum Bullet Network Camera User Manual Table of Contents ............................1 Camera Login ..........................1 1.1 Default Account ........................1 1.2 Login to Web Interface ..............................2 Preview ............................. 3 2.1 System Menu ..........................4 2.2 Video Adjustment ........................4 2.3 Video Function Options ............................ - Page 3 Dual-spectrum Bullet Network Camera User Manual ..........................99 3.5.1 Schedule ..........................103 3.5.2 Storage ........................107 3.5.3 Record Control ........................108 3.6 System Management ..........................108 3.6.1 General ....................... 111 3.6.2 User Management ......................117 3.6.3 System Maintenance ..............................120 4 Playback ..........................121 4.1 Video Playback ........................
-
Page 4: Camera Login
Dual-spectrum Bullet Network Camera User Manual 1. Camera Login 1.1 Default Account The factory default super administrator account of the camera: admin. The factory default super administrator password of the camera: admin. The factory default IPv4 address of the camera: 192.168.1.123. 1.2 Login to Web Interface Step 1 Open the IE browser, enter the IP address of the camera in the address bar and press the [Enter] key. -
Page 5: Preview
Dual-spectrum Bullet Network Camera User Manual Figure 1.2-2 Passwords Modification For successful login, the web will display the interface as shown in Figure 1.2-3. Fig1.2-3 Schematic Diagram of Web Video Browsing ● The interface and settings are only for reference, and the specific interface shall be subject to actual conditions. -
Page 6: System Menu
Dual-spectrum Bullet Network Camera User Manual Fig. 2-1 Browse Interface Refer to Table 2-1 for the description of the interface functions. Descriptions System menu Video window adjustment Video window function-option 2.1 System Menu Click each function menu to enter the corresponding interface, and the system menu is shown in Figure 2.1-1. -
Page 7: Video Adjustment
Dual-spectrum Bullet Network Camera User Manual 2.2 Video Adjustment The video adjustment is as shown in Figure 2.2-1, referring to Table 2.2-1 for the parameter descriptions. Fig. 2.2-1 Video Adjustment Parameters Descriptions 1 Fluency adjustment Click the button to select any of the three fluency levels (real-time, normal, and smooth). - Page 8 Dual-spectrum Bullet Network Camera User Manual Parameters Descriptions Click the button, and click any position of the thermal imaging video to Temperature measure and display the temperature of the point. measurement 2 Alarm Display the state of alarm output 1. The alarm output light turns on when the output 1 conditions for triggering the alarm are reached in the event.
-
Page 9: System Settings
Dual-spectrum Bullet Network Camera User Manual 3. System Settings 3.1 Camera Settings 3.1.1 Conditions 3.1.1.1 Visible light Image Set the visible light properties of the camera according to the following configuration steps, so as to achieve the best presentation effect. Step 1 Select "Settings >... - Page 10 Dual-spectrum Bullet Network Camera User Manual Parameters Descriptions Profile The normal mode, daytime mode or nighttime mode are available. When a mode is selected, the corresponding configuration and effect can be set and viewed. Brightness It is for setting the tone of pictures within a range of 0 to 100, and a larger value realizes a brighter picture.
- Page 11 Dual-spectrum Bullet Network Camera User Manual jittering during use, and makes the high-definition pictures more stable and clearer. It is set "OFF" as default. Table 3.1-1 Description of Image Setting Parameters Step 3 Click "Save" to complete the setting. Exposure This function is for adjusting the camera's exposure to the surveillance images.
- Page 12 Dual-spectrum Bullet Network Camera User Manual Fig. 3.1-3 Exposure - Shutter Priority Fig. 3.1-4 Exposure - Gain priority...
- Page 13 Dual-spectrum Bullet Network Camera User Manual Fig. 3.1-5 Exposure - Manual Mode Step 2 Configure information of each parameter according to actual needs. For the description of parameters, please refer to Table 3.1-2. Parameters Descriptions Mode It is for setting the camera's exposure modes that include automatic, manual, aperture priority, shutter priority and gain priority mode, and the "Auto"...
- Page 14 Dual-spectrum Bullet Network Camera User Manual Shutter It is for adjusting the camera exposure time. A larger shutter value produces a darker picture, otherwise a brighter picture. Shutter range It is for setting the camera exposure time in a range of 0 to 1000, and the unit is Exposure It is for setting the compensation value of exposure in a range of 0 to 100.
- Page 15 Dual-spectrum Bullet Network Camera User Manual Step 2 Select the backlight mode to view the turnoff mode, backlight compensation, highlight compensation and WDR in the drop-down box. The turnoff mode is set as default. ● Backlight compensation: this function can prevent the dark part of a subject shot in a backlighting environment from appearing too dark.
- Page 16 Dual-spectrum Bullet Network Camera User Manual Step 2 Select the white balance mode.Auto, indoor, outdoor, tracking, manual, sodium lamp, natural light or street light options. The "Auto" mode is set as default. Step 3 Click "Save" to complete the configuration. Day &...
- Page 17 Dual-spectrum Bullet Network Camera User Manual affected by the selected configuration file), and the "Automatic" mode is set as default. ● Color: enable the camera to only output color picture. ● Black and white: enable the camera to only output black and white pictures. ●...
- Page 18 Dual-spectrum Bullet Network Camera User Manual Fig. 3.1-9 Fill-in Light Setting Step 2 Select the "Fill-in Light" mode to view the manual and automatic options in the drop-down box, and this function is set off as default. Step 3 Click "Save" to complete the configuration. Defog The picture quality of the device will be lower in a foggy or haze environment, and the defog mode can automatically correct pictures, or enable adjustment of picture definition by manually select the intensity...
- Page 19 Dual-spectrum Bullet Network Camera User Manual Fig. 3.1-10 Defog Settings (Automatic) Fig. 3.1-11 Defog Settings (Manual) Step 2 Configure information of each parameter according to actual needs, referring to the follows for the description of parameters. Mode: it is for setting the defog mode of the camera with the auto, manual and off modes, off by default. Intensity: it can be configured when the defog mode is set to manual, which contains low, middle and high levels, middle by default Step 3 Click "Save"...
- Page 20 Dual-spectrum Bullet Network Camera User Manual 3.1.1.2 Thermal imaging Image This function is for setting the thermal picture properties to achieve the best presentation effect. The configuration steps are as follows: Step 1 Select "Settings > Camera Settings > Conditions" Step 2 Select channel "2"...
- Page 21 Dual-spectrum Bullet Network Camera User Manual Electric Zoom This function supports magnification configuration of 1~8×. FFC Mode It is provided with the automatic and manual options, and the "Automatic" option is set as default. FFC switch This can be set when the FFC mode is set as auto, the time interval of auto cycle shutter correction Shutter...
- Page 22 Dual-spectrum Bullet Network Camera User Manual ●Image fusion ratio: affects the surface of the object in the fusion image. The higher the value, the closer to the image effect of visible light, and the range is 0-100. ●Horizontal offset: adjust the fusion deviation of the visible light image and the infrared image in the horizontal direction, the range is -100~100.
-
Page 23: Encoding Settings
Dual-spectrum Bullet Network Camera User Manual Fig. 3.1-15 Configuration File Management - Full Time ● When the "Schedule" type is selected, you can choose a period of time for day configuration and another period of time for night configuration. The configuration interface is as shown in Figure 3.1-16. For example, you can set 7:00~17:00 for day configuration, and 17:00~7:00 for night configuration. - Page 24 Dual-spectrum Bullet Network Camera User Manual 3.1.2.1 Video stream It is for setting the video stream of the surveillance pictures. The configuration steps are as follows: Step 1 Select "Settings > Camera Settings > Encoding Settings > Video" to enter the "Video stream" interface of the system.
- Page 25 Dual-spectrum Bullet Network Camera User Manual Resolution There are a variety of resolution types, each of which corresponds to a different stream value recommended. Frame Rate The number of video frames per second, and the frame rate will vary with (FPS) different device models and resolutions.
- Page 26 Dual-spectrum Bullet Network Camera User Manual 3.1.2.2 Picture Stream It is for setting the stream information of the image captured by the surveillance, and the configuration steps are as follows: Step 1 Select "Settings > Camera Settings > Encoding Settings > Snapshot" to enter the "Snapshot" interface of the system, as shown in Figure 3.1-18.
- Page 27 Dual-spectrum Bullet Network Camera User Manual 3.1.2.3 Video Overlay It is for setting the information overlaid on the surveillance video pictures, and the configuration steps are as follows: Step 1 Select "Settings > Camera Settings > Encoding Settings > Overlay" to enter the "Video Overlay" interface of the system.
- Page 28 Dual-spectrum Bullet Network Camera User Manual Fig. 3.1-21 Video Overlay - Time Title Fig. 3.1-22 Video Overlay – Text Overlay...
- Page 29 Dual-spectrum Bullet Network Camera User Manual Fig. 3.1-23 Video Overlay - Font Size Fig. 3.1-24 Video Overlay - Picture Overlay...
- Page 30 Dual-spectrum Bullet Network Camera User Manual Fig. 3.1-25 Video Overlay – OSD Warning Parameters Descriptions Privacy Mask Privacy Mask refers to setting a certain shielding area within the monitoring screen for privacy protection ● Click "Draw" to draw the privacy mask in the preview picture ●...
- Page 31 Dual-spectrum Bullet Network Camera User Manual Step 3 Click "Save" to complete the configuration. 3.1.2.4 ROI To set the key monitoring region as ROI, it can set the image quality of this region. The configuration steps are as follows: Step 1 Select " Settings > Camera Settings > Encoding Settings > ROI" The system displays the "ROI"...
- Page 32 Dual-spectrum Bullet Network Camera User Manual Figure 3.1-27 PIP Step 2 Select "Enable" to turn on the PIP function Step 3 Adjust the position and size of the thermal imaging region in the visible light monitoring screen Step 4 Click "Save" to make the configuration effective 3.1.2.6 Audio To set the audio parameters of the device, the configuration steps are as follows: Step 1 Select "Settings >...
- Page 33 Dual-spectrum Bullet Network Camera User Manual Figure 3.1-28 Audio Setting Step 2 Configure each parameter information according to actual needs, and please refer to Table 3.1-9 for parameter description. Parameters Descriptions Enable Audio Select the audio channel number to be enabled, and the code stream transmitted by the network is a composite audio and video stream, otherwise only video images are included Audio Codec...
-
Page 34: Network Settings
Dual-spectrum Bullet Network Camera User Manual Microphone Adjust the volume of the microphone within the range of 0~100, 100 by Volume default. Speaker Adjust the volume of the speaker within the range of 0~100, 100 by default. Volume Table 3.1-9 Audio Parameter Setting Description Step 3 Click "Save"... - Page 35 Dual-spectrum Bullet Network Camera User Manual Figure 3.2-1 TCP/IP Configuration Step 2 To configure TCP/IP parameters, please refer to Table 3.2-1 for detailed parameter descriptions. Parameters Descriptions Host Name Set the name for the current host device within the maximum length of 15 characters Select the network interface card (NIC) to be configured, with Wire as default Note: When the device has multiple NICs, the default one can be changed.
- Page 36 Dual-spectrum Bullet Network Camera User Manual IP Address Enter the corresponding number to change the IP address Subnet Mask Make settings according to the actual situation. The numeric subnet prefix supports to enter 1~255, and identifies a specific network link, usually including a hierarchical structure Note: The device will check the validity of all IPv6 addresses, and the IP address and the default gateway must be in the same network segment,...
- Page 37 Dual-spectrum Bullet Network Camera User Manual Note: Before configuration, please confirm whether the device supports the domain name server type, and log in to the website of the DDNS server provider on the WAN PC to register the domain name and other information If DDNS type is selected as other types, the interface is shown in Figure 3.2-2.
- Page 38 Dual-spectrum Bullet Network Camera User Manual 1. After setting, click "Save" 2. Enter the domain name in the PC web browser and press [Enter]; if the device web interface can be displayed, it is successful; if not, the configuration is failed. 3.2.1.3 PPPoE By enabling the PPPoE (Point-to-Point Protocol over Ethernet) dial-up mode to establish a network connection, the device will obtain a dynamic IP address for the WAN.
- Page 39 Dual-spectrum Bullet Network Camera User Manual Step 1 Select "Settings > Network Settings > General Settings > Connection". The system displays the "Connection" interface as shown in Figure 3.2-4 Figure 3.2-4 Connection Step 2 To Configure the value of each port for the device, please refer to Table 3.2-3 for detailed parameter description.
- Page 40 Dual-spectrum Bullet Network Camera User Manual stream RTSP streaming media service, the requested channel number and stream type should be specified in the URL. If authentication information is required, the username and password should also be provided. rtsp://username:password@ip:port/cam/realmonitor?channel=1&subtype=0 Username: User name, such as admin. Password: Password, such as admin.
- Page 41 Dual-spectrum Bullet Network Camera User Manual 3.2.1.5 RTSP You can configure the RTSP authentication method of the camera on this interface. Step 1 Select "Settings> Network Settings> General Settings> RTSP", the system displays the "Connect" interface, as shown in Figure 3.2-5: Figure 3.2-5 RTSP Setting Step 2 Select the authentication method to be set: None/Basic/Digest, the default is Digest;...
- Page 42 Dual-spectrum Bullet Network Camera User Manual Step 4 Select "Internet Gateway Device Discovery and Control Client" and "UPnP User Interface", confirm and install. The UPnP configuration steps are as follows: Step 1 Select "Settings > Network Settings > General Settings > UPnP". The system displays the "UPnP" interface as shown in Figure 3.2-5 Figure 3.2-6 UPnP Step 2 Select the check box to enable the UPnP function.
- Page 43 Dual-spectrum Bullet Network Camera User Manual Figure 3.2-7 Multicast Step 2 Select "Enable" to enable the multicast function. Step 3 Enter the multicast address and port. Step 4 Click "Save" to complete the configuration. 3.2.1.7 IP Filter The user can set the users allowed to access the camera through IP Filter ●...
-
Page 44: Advanced Settings
Dual-spectrum Bullet Network Camera User Manual Step 2 Select the corresponding check box to enable the Trusted Sites Step 3 Click "Add IP/MAC", and configure the IP address information in the pop-up dialog box, by reference to Table 3.2-4 Parameter Description IP Address Enter the host IP address to be added... - Page 45 Dual-spectrum Bullet Network Camera User Manual Figure 3.2-9 SNMP (1) Figure 3.2-10 SNMP (2) Step 2 To configure each parameter information according to actual needs, refer to Table 3.2-5 for parameter description Parameters Descriptions...
- Page 46 Dual-spectrum Bullet Network Camera User Manual SNMP ● For SNMP v1, the device can only process the information in v1 version Version ● For SNMP v2, the device can only process information in v2 version ● for SNMP v3, it supports the settings of the account, password and authentication type.
- Page 47 Dual-spectrum Bullet Network Camera User Manual Authentication The password length is no less than 8 digits Password Encryption The default is CBC-DES Type Encryption The password length is no less than 8 digits Password Table 3.2-5 SNMP Parameter Setting Description Step 3 Click "Save"...
- Page 48 Dual-spectrum Bullet Network Camera User Manual Figure 3.2-11 Email Setup Step 2 To configure each parameter information according to actual needs, refer to Table 3.2-6 for parameter description. Parameters Descriptions SMTP Server The IP address of the outgoing SMTP mail server Port The port number of the outgoing SMTP mail server, with 25 as default Anonymous...
- Page 49 Dual-spectrum Bullet Network Camera User Manual Username Username of the email-sending mailbox Password Password of the email-sending mailbox Sender Address of the email-sending mailbox Authentication It supports SSL, TLS or none Attachment If attachment is selected, an email with a Image capture picture can be sent Title The email title is subject to customization Mail Receiver...
- Page 50 Dual-spectrum Bullet Network Camera User Manual 3.2.2.3 Qos QoS (Quality of Service) is a security mechanism for the network, which is a kind of technology used to solve such problems as network delay and congestion. For network services, QoS includes transmission bandwidth, transmission delay, data packet loss rate;...
- Page 51 Dual-spectrum Bullet Network Camera User Manual Table 3.2-7 QoS Parameter Setup Description Step 3 Click "Save" to complete the configuration. 3.2.2.4 802.1x 802.1x is called port based network access control protocol. It supports users to manually select the authentication type to control whether the device connected to the LAN can access the LAN, and can well support the network authentication, billing, security and management requirements.
- Page 52 Dual-spectrum Bullet Network Camera User Manual After the Bonjour function is enabled, the network camera will be automatically detected in Bonjour-supported operating systems and clients. When the network camera is automatically detected by Bonjour, the "Server Name" configured by the user will be displayed. Step 1 Select "Settings >...
- Page 53 Dual-spectrum Bullet Network Camera User Manual Figure 3.2-15 Platform Access-GB 28181 Step 2 To configure each parameter information according to actual needs, please refer to Table 3.2-9 for parameter description. Parameters Descriptions SIP Server No. 28181 Server platform number SIP domain 28181 Server platform domain number SIP Server IP 28181 Server IP...
-
Page 54: Event Management
Dual-spectrum Bullet Network Camera User Manual the value agreed between the device side and the server side Table 3.2-9 Platform Access-GB 28181 Parameter Setup Description Step 3 Click "Save" to complete the configuration. 3.2.3.2 ONVIF The ONVIF (Open Network Video Interface Forum) standard aims to implement a network video framework protocol, making network video products (including the camera front end and the video taking equipment) produced by different vendors fully interoperable. - Page 55 Dual-spectrum Bullet Network Camera User Manual Figure 3.3-1 Video Detection-Motion Detection Setting Step 2 Select "Enable" and to configure each parameter information according to actual needs, refer to Table 3.3-1 for parameter description Parameter Description Anti-Dither It means that the Motion detection time is recorded only once in this anti-dither period, in unit of second with the value range of 0 ~100 Burst Flash When an alarm occurs, the system is linked the burst flash.
- Page 56 Dual-spectrum Bullet Network Camera User Manual Record It indicates that when the alarm is over, the alarm video taking will continue for Delay a period of time before stopping, in unit of second with the value range of 10~ Relay-out Connect the alarm device (such as lights, sirens) to the Alarm Output, select the check box and set the Alarm Output device, and start the alarm linkage output port.
- Page 57 Dual-spectrum Bullet Network Camera User Manual Figure 3.3-2 Scheduled Period Setup Set the alarm time period, and the alarm event will be activated only within the set time period There are 6 time periods available for setting every day. Select the check box in front of the time period, and the set time will be valid Select the day of the week (the default is Sunday;...
- Page 58 Dual-spectrum Bullet Network Camera User Manual Figure 3.3-3 Area Setup Parameters Descriptions Name The default names are Region1, Region2, Region3, Region4, which can be customized Sensitivity Sensitivity to brightness changes; for the same brightness change, the higher the sensitivity, the easier it is to generate motion detection events The settings of sensitivity can vary for each area, with the value range of 0~100, and the recommended value is 30~70 Threshold...
- Page 59 Dual-spectrum Bullet Network Camera User Manual Step 3 Click "Save" to complete the configuration. 3.3.1.2 Video Block Step 1 Select "Settings > Event Management > General Events > Video Block". The system displays the "Video Block" interface as shown in Figure 3.3-4. Figure 3.3-4 Video Detection-Video Block Settings Step 2 Select "Enable", and configure each parameter information according to actual needs (please refer to "3.4.1.1 Motion Detection"...
- Page 60 Dual-spectrum Bullet Network Camera User Manual Figure 3.3-5 Video Detection-Scene Change Settings Step 2 Select "Enable", and configure each parameter information according to actual needs (please refer to "3.3.1.1 Motion Detection" for parameter configuration) Step 3 Click "Save" to complete the configuration. 3.3.1.4 Audio Detection Step 1 Select "Settings >...
- Page 61 Dual-spectrum Bullet Network Camera User Manual Figure 3.3-6 Audio Detection Step 2 To configure each parameter information according to actual needs, please refer to Table 3.3-3 for parameter description. Parameters Descriptions Abnormal Select "Abnormal Input Detection" and an alarm will be generated when an Input abnormal audio input is detected Detection...
- Page 62 Dual-spectrum Bullet Network Camera User Manual volume changes over the continuous environment volume before it can be judged as the audio abnormality; the user needs to make tests and adjustments according to the actual environment Threshold The value range is 1 ~ 100. It is used to set the intensity of the filtered environment sound.
- Page 63 Dual-spectrum Bullet Network Camera User Manual Figure 3.3-7 No SD Card Figure 3.3-8 SD Card Error Figure 3.3-9 Capacity Warning...
- Page 64 Dual-spectrum Bullet Network Camera User Manual Step 2 To configure each parameter information according to actual needs, please refer to Table 3.3-4 for parameter description. Parameters Descriptions Enable Select to enable the SD card abnormality alarm function Space It can set Capacity Limit and when the remaining capacity is below this limit, it will capacity of trigger an alarm SD Card...
- Page 65 Dual-spectrum Bullet Network Camera User Manual Figure 3.3-10 Network Disconnection Figure 3.3-11 IP Conflict Step 2 To configure each parameter information according to actual needs. Please refer to Table 3.3-5 for parameter description Parameters Descriptions Enable Select to enable the network abnormality alarm function Table 3.3-5 Network Abnormality Setting Parameter Description Please refer to "3.3.1.1 Motion Detection"...
-
Page 66: Smart Plan
Dual-spectrum Bullet Network Camera User Manual Figure 3.3-12 Unauthorized Access Step 2 To configure each parameter information according to actual needs. Refer to Table 3.3-6 for parameter description Parameter Description Enable Select to make settings of the unauthorized access alarm Login error Entering the wrong password this time is when the unauthorized access alarm is triggered and the account is locked... -
Page 67: General Behavior Analysis
Dual-spectrum Bullet Network Camera User Manual Figure 3.3-13 Smart Plan Step 2 Turn on the corresponding smart functions according to actual needs ● Enable the general behavior analysis, face detection or license plate recognition functions 1. Select the preset point in "Add Plan", and the system will display the plan corresponding to the preset point 2. - Page 68 Dual-spectrum Bullet Network Camera User Manual ● Where conditions permit, the complexity of monitoring and analyzing scenes should be reduced to the minimum; for scenes with dense targets and frequent light changes, it is not recommended to turn on the General Behavior Analysis function ●...
- Page 69 Dual-spectrum Bullet Network Camera User Manual Step 3 Click to add smart rules ● Double click "Rule Type" to modify the type of the rule ● On entering the IP Rule interface, the lock function will be automatically turned on, and the lock time is 180s.
- Page 70 Dual-spectrum Bullet Network Camera User Manual Figure 3.3-15 Tripwire Intrusion Settings Step 2 Click "Draw Rule" to draw rules in the monitoring screen Step 3 Configure the parameter information according to actual needs. Please refer to Table 3.3-7 for parameter description. Parameters Descriptions Scheduled...
- Page 71 Dual-spectrum Bullet Network Camera User Manual Select the day of the week (the default is Sunday; if "All" is ticked, it means that the setting will be applied to the entire week; or it supports to tick the check box in front of the days to make separate settings for certain days) After completing the settings, click "Save"...
- Page 72 Dual-spectrum Bullet Network Camera User Manual Snapshot After being selected, when an alarm occurs, the system will automatically take an alarm Image capture, while the alarm Image capture time period should be set in "Setup > Storage Management> Schedule" Table 3.3-7 Tripwire Intrusion Parameter Description Step 4 Click "Save"...
- Page 73 Dual-spectrum Bullet Network Camera User Manual Figure 3.3-16 Virtual Fence Setting Step 2 Click "Draw Rule" to draw rules in the monitoring screen Step 3 Configure the parameter information according to actual needs. Refer to Table 3.3-8 for parameter description Parameters Descriptions Direction...
- Page 74 Dual-spectrum Bullet Network Camera User Manual ● The “appear” function means that in the set alarm area, at a given time, when a specified number of targets appear, an alarm will be issued. This function is simply to count the number of targets in the detection area, regardless of whether they are the same target ●...
- Page 75 Dual-spectrum Bullet Network Camera User Manual Step 2 Click "Draw Rule" to draw rules in the monitoring screen Step 3 Configure the parameter information according to actual needs. Please refer to Table 3.3-9 for parameter description Parameter Description Action Set Action for regional intrusion, with Appear or Cross available Direction Set the direction of Cross from entry and exit Table 3.3-9 Regional Intrusion Parameter Description...
- Page 76 Dual-spectrum Bullet Network Camera User Manual Figure 3.3-18 Abandoned Object Setting Step 2 Click "Draw Rule" to draw rules in the monitoring screen Step 3 Configure the parameter information according to actual needs. Please refer to Table 3.3-10 for parameter description Parameters Descriptions Tracking Time Set the shortest time from leaving the object to triggering the alarm...
- Page 77 Dual-spectrum Bullet Network Camera User Manual 3.3.3.1.5 Fast-Moving This function must first be configured for depth-of-field calibration, and calculate the actual movement speed of the target according to depth-of-field calibration. If the movement speed exceeds the set alarm speed, an alarm will be triggered (triggering speed is linked to sensitivity, with sensitivity 1 ~ 10 corresponding to actual speed 10m/s~1m/s) Application Scenarios: suitable for scenarios with sparse targets and no obvious occlusion.
- Page 78 Dual-spectrum Bullet Network Camera User Manual Step 3 Configure the parameter information according to actual needs. Please refer to Table 3.3-11 for parameter description. Parameters Descriptions Sensitivity Set Sensitivity for alarm triggering, with the value range of 1~10, and the default is 5 Table 3.3-11 Fast-Moving Parameter Description Please refer to "3.3.3.1.1 Tripwire"...
- Page 79 Dual-spectrum Bullet Network Camera User Manual Figure 3.3-20 Parking Detection Setting Step 2 Click "Draw Rule" to draw rules in the monitoring screen. Step 3 Configure the parameter information according to actual needs. Please refer to Table 3.3-12 for parameter description. Parameters Descriptions Tracking Time Set the shortest time from leaving the object to triggering the alarm...
- Page 80 Dual-spectrum Bullet Network Camera User Manual 3.3.3.1.7 Crowd Detection Crowd Detection is mainly aimed at outdoor squares, government gates, station entrances and other areas. When there is an event of crowd gathering and staying or excessive crowd density, an alarm will be triggered False positives will occur in the continuous shaking of the camera, leaves and shades, the frequent opening and closing of the retractable doors of the park, the dense traffic or the flow of people...
- Page 81 Dual-spectrum Bullet Network Camera User Manual Step 2 Click "Draw Rule" to draw rules in the monitoring screen Step 3 Configure the parameter information according to actual needs. Please refer to Table 3.3-13 for parameter description Parameters Descriptions Tracking Time Set the minimum time between the target appearance in the area and the trigger of the alarm Sensitivity Set Sensitivity for alarm triggering, with the value range of 1 ~...
- Page 82 Dual-spectrum Bullet Network Camera User Manual Step 1 If the rule type is selected as "Missing Object", the configuration interface is as shown in Figure 3.3-22 Figure 3.3-22 Missing Object Setting Step 2 Click "Draw Rule" to draw rules in the monitoring screen Step 3 Configure the parameter information according to actual needs.
- Page 83 Dual-spectrum Bullet Network Camera User Manual 3.3.3.1.9 Loitering Detection When the target has a trajectory in the set area and its stay exceeds the set time, an alarm will be generated; for a stationary target, the wandering is invalid. The configuration steps are as follows: Step 1 If the rule type is selected as "Loitering Detection", the configuration interface is as shown in Figure 3.3-23 Figure 3.3-23 Wandering Setting...
- Page 84 Dual-spectrum Bullet Network Camera User Manual Parameters Descriptions Tracking Time Set the shortest time between the disappearance of the object and the triggering of the alarm Table 3.3-15 Wandering Parameter Description Please refer to "3.3.3.1.1 Tripwire" for other parameter descriptions Step 4 Click "Save"...
- Page 85 Dual-spectrum Bullet Network Camera User Manual Figure 3.3-24 Global Settings Step 2 Select Preset point for the Global Settings function ● This preset point has been configured with a smart plan. Please refer to "3.3.2 Smart Plan" for details on the smart plan configuration method Step 3 Click "Add Calibration"...
- Page 86 Dual-spectrum Bullet Network Camera User Manual Step 6 Click "Add Rulers" and draw a ruler in the monitoring screen Step 7 Select the calibration type, and click "Calibration" and drawing a line in the monitoring screen can display its corresponding actual length ●...
-
Page 87: Fire Alarm
Dual-spectrum Bullet Network Camera User Manual Effective The value range is 0~100, and the default value is 0. The larger the value, the Target easier the detection frame will appear, the lower the missed detection rate, Overlap Rate and the higher the false detection rate Effective The value range is 0~100, and the default value is 10. - Page 88 Dual-spectrum Bullet Network Camera User Manual Figure 3.3-25 Fire Alarm Step 2 Select preset point The default is Preset 0:Unrelated. All scenarios can use this configuration. If it needs to set the fire alarm of a particular scenario, the settings can be made by the first setting of preset points. The user has to select the fire alarm function associated with the preset points first, and the fire alarm setting can vary for each preset point.
- Page 89 Dual-spectrum Bullet Network Camera User Manual on the setting interface for setting. Method 2: Click "Setup" corresponding to the day of weeks, tick the box in front of the time period at the bottom of the interface, and enter the time value. There are 6 time periods available for setting each day.
-
Page 90: Alarm Setup
Dual-spectrum Bullet Network Camera User Manual corresponding channel will automatically take a snapshot of the image. Table 3.3-17 Fire Alarm Parameter Step 5 Click "Save" to complete the setting. 3.3.5 Alarm Setup 3.3.5.1 Alarm To set the enabling conditions for the alarm event, the configuration steps are as follows: Step 1 "Settings >... - Page 91 Dual-spectrum Bullet Network Camera User Manual Parameters Descriptions Enable After being selected, the alarm linkage can be enabled Relay-in Alarm 1 is corresponding to AlarmIn1 and Alarm GND; Alarm 2 is corresponding to AlarmIn 2 and Alarm GND. Sensor There are two types: normally open and normally closed; Type Normally open: the alarm will be triggered when the relay-in terminal is disconnected;...
-
Page 92: Intelligent Temperature Measurement
Dual-spectrum Bullet Network Camera User Manual Enable After being selected, the Burst Flash function can be enabled Brightness Set the brightness of the burst flash. The larger the value, the brighter the burst flash; the value range is 0~100 Flash The flash mode of the burst flash includes medium, high, low, and on. - Page 93 Dual-spectrum Bullet Network Camera User Manual Figure 3.4-1 Global Config Step 2 Set global configuration parameters. Please refer to Table 3.4-1 for detailed parameter descriptions. Parameters Descriptions Temp Switch Tick the box to enable the Temp switch function. Temp Tick the box to turn on the temperature statistics function. Statistics Temp Unit The units of temperature displayed include ℃...
-
Page 94: Rule Set
Dual-spectrum Bullet Network Camera User Manual Reflection The temperature of the target. The value range is -50℃~+327.7℃. Temp Temp Range There are High Gain (-20℃~150℃) and Low Gain(100℃~550℃), High Gain by default. Table 3.4-1 Global Config Parameter Description Step 3 Click "Save" to complete the setting. 3.4.2 Rule Set It supports the settings of the temperature measurement rules and temperature comparison. - Page 95 Dual-spectrum Bullet Network Camera User Manual Note: The settings for the preset points of the temperature measurement and the fire alarm are different. The preset point rule of the temperature measurement rule includes the rules of Preset 0, while preset point of the fire alarm is set individually or synchronized with the setting of Preset 0. Step 3 Set temperature measurement rules and parameters.
- Page 96 Dual-spectrum Bullet Network Camera User Manual Distance The distance between the camera and the target. The value range is 0~10000m. Reflection Temp The temperature of the target. The value range is -50℃~+327.7℃. Table 3.4-2 Local Configuration Parameter Description 5. Select "Alarm Output" and set its parameters. Refer to Table 3.4-3 for detailed parameter descriptions. Parameters Descriptions The value method of the temperature that triggers the alarm.
- Page 97 Dual-spectrum Bullet Network Camera User Manual Temperature The duration of temperature or temperature change. The value range is 0s ~ Duration 1000s. Table 3.4-3 Alarm Parameter Description Step 3 Click "Save" to complete the setting. After the setting, the preview interface on the left displays the temperature of the temperature measurement rule.
- Page 98 Dual-spectrum Bullet Network Camera User Manual Figure 3.4-5 New Temperature Contrast Rules 2. Double click the new temperature contrast rule to select the contrast object. 3. To set the alarm parameters, refer to Table 3.4-4 for detailed parameter descriptions. Parameters Descriptions The value method of the contrast temperature that triggers the alarm.
- Page 99 Dual-spectrum Bullet Network Camera User Manual 3.4.2.3 Temp Alarm Set When the temperature meets the alarm conditions of the temperature measurement rules, the system will generate an alarm and link the set action. Prerequisites The temperature measurement rules have been set, and please refer to "3.4.2.1 Temperature Measurement Rule Set"...
-
Page 100: Hot Trace
Dual-spectrum Bullet Network Camera User Manual Please refer to "3.3.1.1 Motion Detection" for other parameter descriptions Step 4 Click "Save" to complete the setting. 3.4.3 Hot Trace After the Hot Trace function is turned on, the highest temperature and lowest temperature will be displayed in different colors on the monitoring screen. -
Page 101: Heat Map
Dual-spectrum Bullet Network Camera User Manual Parameter Description Color Mode The high and low temperature points are displayed in colors. Auto: Select the colors of the high-temperature point and the low-temperature point according to the current screen. Manual: Customize high temperature and low temperature colors. The conditions to trigger the alarm. -
Page 102: Storage Management
Dual-spectrum Bullet Network Camera User Manual Figure 3.4-8 Heat Map Settings Step 2 Click "Export" to export the heat map file 3.5 Storage Management 3.5.1 Schedule Before the setup of Schedule, it should make sure that the Record Mode is Auto in Record Control Note: If Record Mode in Record Control is "Off", the device will not record or capture pictures as set in Schedule 3.5.1.1 Record Schedule... - Page 103 Dual-spectrum Bullet Network Camera User Manual Figure 3.5-1 Record Schedule Step 2 Select the record time from "Monday to Sunday", click "Setup" on the right and it will display the interface as shown in Figure 3.6-2 ● Set the record time period according to your needs, with 6 time periods available every day ●...
- Page 104 Dual-spectrum Bullet Network Camera User Manual Step 3 Click "Save" to return to the "Record Schedule" interface as shown in Figure 3.5-3 At this time, the color bar graph intuitively represents the set time zone, where: Green: General Yellow: Motion Red: Alarm Figure 3.5-3 Record Schedule-Schedule Setting Completed Step 4 Click "Save"...
- Page 105 Dual-spectrum Bullet Network Camera User Manual Figure 3.5-4 Snapshot Schedule Step 2 Refer to steps 2 to 3 of "3.5.1.1 Recording Schedule" to set the time period for snapshot Step 3 Click "Save", the system prompts "Save successfully", and the schedule setting is completed 3.5.1.3 Holiday Schedule Holiday schedule can set specific dates as holidays Step 1 Select “Settings >...
-
Page 106: Storage
Dual-spectrum Bullet Network Camera User Manual Figure 3.5-5 Holiday Schedule Step 2 Select the date that you want to set as a holiday, and the selected date is displayed in blue Step 3 Select “Record/Snapshot”, click “Save”, and system notes “Saved successfully” Step 4 In the “Record Schedule/Snapshot Schedule”... - Page 107 Dual-spectrum Bullet Network Camera User Manual Figure 3.5-6 Storage Type Step 2 Select the corresponding event type and storage mode according to the actual needs. For the description of parameters, please refer to Table 3.5-1 Parameters Descriptions Event Type Including “Scheduled”, “Motion Detection” and “Alarm” Memory Card To store in the SD card To store on the FTP server...
- Page 108 Dual-spectrum Bullet Network Camera User Manual ● Click “Read Only” to set the SD card to read only ● Click “Read & Write” to set the SD card to read/write ● Click “Hot Swap” to hot swap the SD card ●...
- Page 109 Dual-spectrum Bullet Network Camera User Manual Port Port of FTP server User Name User name to log in to the FTP server Password User name to log in to the FTP server Remote Directory stored on the FTP server directory Emergency After you check it, the records and snapshots will be stored to the local SD storage (Local)
-
Page 110: Record Control
Dual-spectrum Bullet Network Camera User Manual 3.5.3 Record Control Step 1 Select “Settings > Storage Management > Record Control”, and the system displays the “Record Control” interface, as shown in Figure 3.5-10 Figure 3.5-10 Record Control Step 2 Configure information of each parameter according to actual needs. For the description of parameters, please refer to Table 3.5-4 Parameters Descriptions... -
Page 111: System Management
Dual-spectrum Bullet Network Camera User Manual will record within the scope of the schedule. Table 3.5-4 Description of Parameters of “Video Taking Control” Step 3 Click “Save” to complete the configuration. 3.6 System Management 3.6.1 General 3.6.1.1 General Step 1 Select “Settings > System Management > General > General”, and the system displays the “General”... - Page 112 Dual-spectrum Bullet Network Camera User Manual Video The video standard of the display device, 50 Hz and 60 Hz are optional, and Standard 50 Hz by default Table 3.6-1 Description of Parameters of “General” Step 3 Click “Save” to complete the configuration. 3.6.1.2 Save Path In the “Save Path”...
- Page 113 Dual-spectrum Bullet Network Camera User Manual The Image capture and video taking paths of thermal imaging are not displayed in “Save Path”. By default, the suffix of the above paths of the visible light is added with “_Heat”. Step 3 Click "Save" to complete the configuration. 3.6.1.3 Date &Time Step 1 Select “Settings >...
-
Page 114: User Management
Dual-spectrum Bullet Network Camera User Manual DST Enable Set the start time and end time of DST, which can be set in the time or week format. Synchronize Set whether to enable the network time synchronization function, and enable it after with NTP you check it NTP Server... - Page 115 Dual-spectrum Bullet Network Camera User Manual Figure 3.6-4 User Management Anonymous Login When you check “Anonymous Login”, you can log in to the device anonymously without entering a user name or password after entering IP. The anonymously logged-in user has only the preview authority listed in the “Authority List”.
- Page 116 Dual-spectrum Bullet Network Camera User Manual Figure 3.6-5 Add User Step 2 Enter the user name and password, select a user group, and select the authority ● Once the required group is selected, the user’s authority can only be a subset of the group, and cannot exceed the authority attribute of the group.
- Page 117 Dual-spectrum Bullet Network Camera User Manual Figure 3.6-6 Modify User Step 2 Modify the user information according to actual needs Step 3 Click “Save” to complete the configuration Modify Password Step 1 Check the “Modify Password” check box Step 2 Enter the old password, and enter the new password and confirm it Figure 3.6-7 Modify Password Step 3 Click “Save”...
- Page 118 Dual-spectrum Bullet Network Camera User Manual Delete User You can delete the user by clicking the corresponding of the user to be deleted. 3.6.2.1.2 User Group In “Settings > System Management > User Management > Account > Group”, you can click “Add Group”, “Delete Group”...
- Page 119 Dual-spectrum Bullet Network Camera User Manual Figure 3.6-9 ONVIF User Add User For specific operations, please refer to “3.6.2.1.1 User” Modify User For specific operations, please refer to “3.6.2.1.1 User” Delete User For specific operations, please refer to “3.6.2.1.1 User” 3.6.2.3 Online User In “Settings >...
-
Page 120: System Maintenance
Dual-spectrum Bullet Network Camera User Manual 3.6.3 System Maintenance 3.6.3.1 System Log In “Settings > System Management > System Maintenance > Log”, you can view the user’s operation information on the device and some system information, as shown in Fig. 3.6-11. For the description of parameters, please refer to Table 3.6-3 Figure 3.6-11 System Log Parameters... - Page 121 Dual-spectrum Bullet Network Camera User Manual cleared by categories however. Backup Back up the searched system log information to the PC currently used by the user Table 3.6-3 Description of Parameters of “Log” The meanings of different log types are as follows: ●...
- Page 122 Dual-spectrum Bullet Network Camera User Manual Step 3 Click “Import” in the “Import/Export” interface of the WEB side to be configured with device, and import the configuration file into the system, and the device will be configured. User can set to automatically reboot the system or delete a file. To automatically reboot the system, you need to set the period and time, being 02:00 every Tuesday by default.
-
Page 123: Playback
Dual-spectrum Bullet Network Camera User Manual Figure 3.6-13 Firmware Upgrade When upgrading the firmware, you can click “Browse…” to select the file to be upgraded, and click “Upgrade” to upgrade the firmware. Files to be upgraded belong to the “*.bin” type. 4 Playback Saved videos and pictures can be played back in the “Playback”... -
Page 124: Video Playback
Dual-spectrum Bullet Network Camera User Manual 4.1 Video Playback Select the file type as “mp4”, and the system will display the interface as shown in Figure 4.1-1. For the description of parameters, please refer to Table 4.1-1 Figure 4.1-1 “Video Playback” Interface Description Play function bar Progress bar... -
Page 125: Play Function
Dual-spectrum Bullet Network Camera User Manual 4.1.1 Play function The play function bar is shown in Figure 4.1-2. For the description of parameters, please refer to Table 4.1-2 Figure 4.1-2 Play Function Bar Parameters Descriptions 1 Play When this button is displayed, it indicates that the video taking is paused or not played. -
Page 126: Miscellaneous Function
Dual-spectrum Bullet Network Camera User Manual 4.1.3 Miscellaneous Function The miscellaneous function bar is shown in Figure 4.1-4. For the description of parameters, please refer to Table 4.1-3 Figure 4.1-4 Miscellaneous Function Bar Parameters Descriptions 1 Image capture Click the button to conduct image capture of the video, and save the pictures in the set path. - Page 127 Dual-spectrum Bullet Network Camera User Manual Figure 4.1-5 Playback File (1) Parameters Descriptions File Type ● Select “mp4” to play back the video taking ● Select “jpg” to play back the picture Source Default SD card Table 4.1-4 Description of Parameters of "Playback File" (1) The configuration steps are as follows: Step 1 Click the date in blue, and the progress bar of the video taking file with color will be displayed on the time axis.
- Page 128 Dual-spectrum Bullet Network Camera User Manual Step 3 Check “Sync” to set the visible light and thermal imaging playback video takings as synchronous. The synchronization box is shown in Figure 4.1-7. synchronization Figure 4.1-7 Synchronization Box Step 4 Select the channel. ●...
-
Page 129: Progress Bar Time Format
Dual-spectrum Bullet Network Camera User Manual Parameters Descriptions Search, indicating to search all video taking files between the input start time and the end time of the selected date Click the download icon to save the video taking file in the set download path of playback file Click it to return to the calendar page, and you can re-select the time for operation... - Page 130 Dual-spectrum Bullet Network Camera User Manual Operating Steps Step 1 Click the “Report” page, and the system displays the “Report” interface, as shown in Figure 5-1. Figure 5-1 Report Step 2 Set the query conditions and click “Search”, and the system displays the queried temperature data, as shown in Figure 5-2.
-
Page 131: Logout
Dual-spectrum Bullet Network Camera User Manual 6 Logout Click “Log out” to log out the system, and the system will pop up the interface as shown in Figure 6-1. To enter the system again, you need to log in it again. Figure 6-1 Logout Interface...
Need help?
Do you have a question about the IRS FB4-T and is the answer not in the manual?
Questions and answers