Advertisement
Product Features
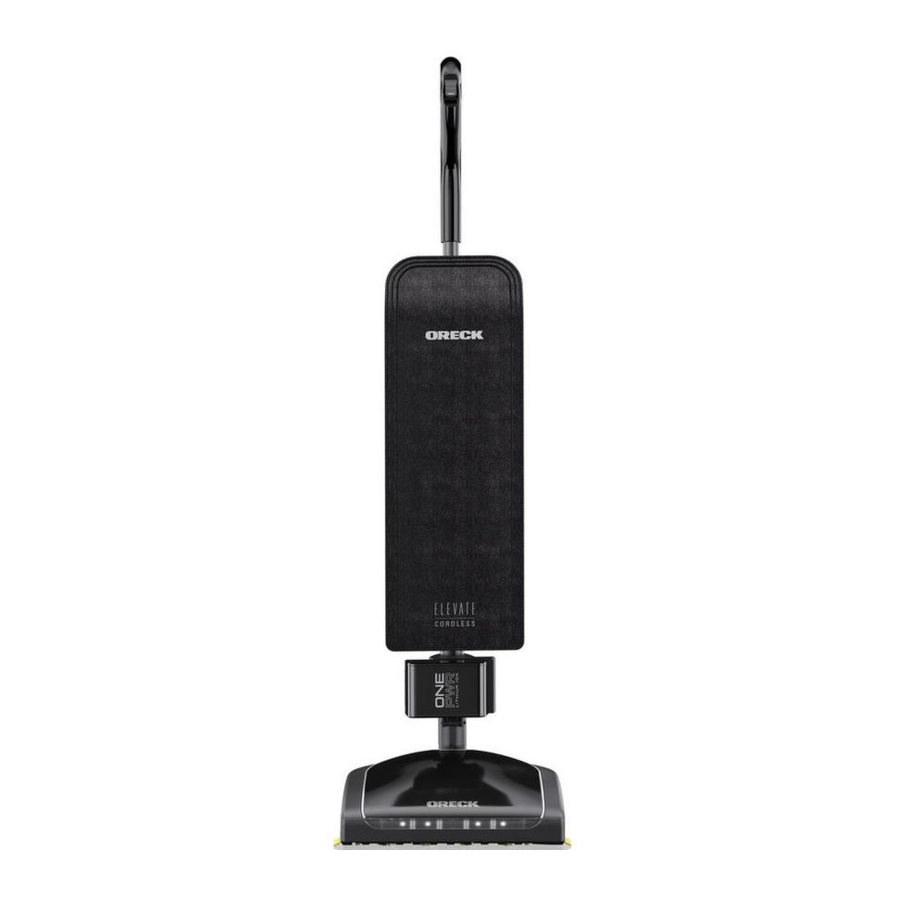
Carton Contents

- On/Off Fingertip Controls
- Ergonomic Handle
- Outer Bag
- Power Head
- Battery
- Charger
+ Manual
18V ONE PWR Battery & Charger
NOTE: Batteries are shipped in a low charge condition to prevent possible problems. You should charge them before first use.
NOTE: If the light on the charger flashes red, there is an error with the battery or the charger. Try again or call customer service for support at 800-406-2005.
CHARGING AMBIENT TEMPERATURE RANGE: 5°C – 40°C (41°F – 104°F)
Every ONEPWR™ battery works with every ONEPWR™ product.
| BATTERY | MODEL NUMBER |
| 2.0Ah | BH15020 |
| 3.0Ah | BH15030 |
| 3.0Ah MAX | BH25030 |
| 4.0Ah | BH15240 |
| 4.0Ah MAX | BH25040 |
| 6.0Ah | BH15260 |
NOTE: Use with any thing other than the 6Ah pack will yield lower runtime.
- To charge align the ribs on the battery pack to the grooves in the charger. Slide the battery pack into the charger.
![]()
- When charging, the lights on the battery will illuminate to show the state of charge. The light on the charger will flash.
![]()
- When charge is complete the lights on the battery will turn off and the light on the charger will be solid.
![]()
- To remove the battery pack from the charger, press the latches and pull up on the battery pack.
![]()


How To Insert The Battery
- Insert battery into housing by aligning grooves with ribs on the battery and sliding battery into until it clicks into battery dock.
![]()
- To remove battery press both grey side tabs and slide battery out of battery dock.
![]()


Getting Started

NOT TO BE USED FOR GROOMING A PET. FULLY ASSEMBLE PRODUCT TO USE.
- Make sure Upper Tube Connector (A) is installed on Upper Tube (B).
![]()
- Insert Upper Tube into the top of Debris Transfer Tube (C) until it locks in place.
![]()
- Twist Upper Tube Connector (A) clockwise until it clicks to secure Upper Tube (B).
![]()


Please read "Important Safety Instructions" before use.
- Make sure the filtration bag (A) is attached properly to the filtration bag dock (B). Attachment instructions are located on the filtration bag and in the maintenance section of this manual. Your vacuum comes with a bag preinstalled for your convenience. Do not operate without a bag.
![]()
- Step on (A) power head and pull handle back to lower into operating position. Return handle to full upright position to engage lock. This product features Auto Stop and will not operate in the upright position by disengaging power to the motor.
![]()
- Push fingertip controls forward to select hard floor or carpet. Push the controls back to the off position when the product is not in use.
![]()


Maintenance
How To Replace The Filter Bag

IF APPLIANCE OR CHARGER IS NOT WORKING AS IT SHOULD, HAS BEEN DROPPED, DAMAGED, LEFT OUTDOORS, OR DROPPED INTO WATER, CALL CUSTOMER SERVICE AT 1-800-406-2005 PRIOR TO CONTINUING USE.
TO REDUCE THE RISK OF PERSONAL INJURY, BEFORE CLEANING OR SERVICING. DO NOT USE VACUUM WITHOUT FILTRATION BAG IN PLACE.
VERY FINE MATERIALS, SUCH AS FACE POWDER OR CORNSTARCH MAY SEAL THE FILTRATION BAG AND CAUSE IT TO BURST EVEN THOUGH IT IS ONLY PARTIALLY FULL. CHANGE THE BAG OFTEN WHEN CLEANING THIS TYPE OF MATERIAL.
- Unzip the Filtration Bag Case completely.
![]()
- Pull the cardboard collar on the filtration bag downward to release the bag dock from the dock port.
![]()
- Gently pull the cardboard collar on the filtration bag up to engage the self sealing lock and remove from the bag dock. Discard.
![]()
- Slide a new filtration bag collar firmly into the bag dock ensuring all hooks on dock door are inserted on the cardboard collar.
![]()
- Rotate bag dock up and press firmly on the filtration bag at indicated points until it snaps into place.
![]()
- Zip up the filtration bag case completely.
![]()


IF APPLIANCE OR CHARGER IS NOT WORKING AS IT SHOULD, HAS BEEN DROPPED, DAMAGED, LEFT OUTDOORS, OR DROPPED INTO WATER, CALL CUSTOMER SERVICE AT 1.800.406.2005 PRIOR TO CONTINUING USE.
Quick Access Brushroll Cleaning
RISK OF PERSONAL INJURY-BRUSHROLL MAY SUDDENLY RESTART-TURN POWER SWITCH OFF AND REMOVE BATTERY BEFORE CLEANING OR SERVICING.
- Remove the two black screws.
![]()
- Lift wiper blade from the bottom plate.
![]()
- Lift up metal guards to access the brushroll channel.
![]()
- Clear brushroll of debris and obstructions by using scissors to cut across the channel.
![]()
- Put metal guards back into place and secure wiper back into place with the two black screws.
![]()


Removing the Brushroll and Belt
- Lay the unit flat to access the power head nozzle. Remove the 7 screws to take off the baseplate from the power head.
![]()
- Remove the brushroll belt and brushroll from the holding channels inside of the power head nozzle.
![]()
- Rotate both plastic black endcaps at the ends of the brushroll to show a single notch "NORMAL" position. Insert back into the holding channels of the power head nozzle.
![]()
- When rotating the black endcaps on the brushroll, make sure both endcap settings are the same and faceup when you insert the brushroll.
![]()
- Reassemble the brushroll belt.
![]()
- Manually spin the brushroll to see that it turns freely.
![]()
- Replace the 7 screws to secure the baseplate to the power head nozzle.
![]()


Clearing Clogs
TO REDUCE THE RISK OF INJURY FROM MOVING PARTS — REMOVE BATTERY BEFORE CLEANING OR SERVICING.
- An overloaded filtration bag may cause dirt and debris to back up into the air flow system. Open the bag dock and check for visible clogs at the bag port. Change filtration bag if contents have reached the MAXIMUM FILL LINE.
![]()
- Also, check for blockages in the power head nozzle.
![]()
- If blockage is not in the power head nozzle, remove the lower tube. Detach rubber straps at bottom of bag and remove screws to tilt battery dock forward.
![]()
- Twist lower tube connector counterclockwise and slide up. Pull the lower tube out of the fan housing. Once removed, check for blockage.
![]()
- If the lower tube is not blocked, look into the fan housing for blockage. Be sure to reassemble lower tube and tighten the lower tube connector before continuing use.
![]()


TO REDUCE THE RISK OF INJURY FROM MOVING PARTS — REMOVE BATTERY BEFORE CLEANING OR SERVICING.
Lubrication
The motor and brushroll are equipped with bearings which contain sufficient lubrication for their lifetime. The addition of lubricant could cause damage. Do not add lubricant to motor or brushroll.
The Belt
This vacuum is equipped with the Enduralife ™ Belt, which is designed for long life and doesn't need changing.
Motor Protections
If the vacuum becomes overloaded (which could occur when a large obstruction is sucked up or when vacuuming extremely thick carpet), the electronics are designed to shut down the vacuum. If this happens, the vacuum will automatically shut off. To reset the vacuum, turn the unit to "O" or off, then turn on to continue use. If it shuts down again there may be a large obstruction in the vacuum. See Clearing Clogs for the steps on clearing a clog from the air path.
Service
Annual Service Tune-ups will keep your Oreck ® vacuum operating at optimal performance for years to come. Oreck ® Clean Home Centers and Oreck ® Authorized Retail Dealers offer customized maintenance, expert repair and specialized service to ensure the best cleaning experience at every use.

IF YOU NEED ASSISTANCE
Please call 1-800-406-2005 (Mon-Fri 8am-5pm EST) to speak with a customer service representative; or visit our website at Oreck.com.
Troubleshooting
IF APPLIANCE OR CHARGER IS NOT WORKING AS IT SHOULD, HAS BEEN DROPPED, DAMAGED, LEFT OUTDOORS, OR DROPPED INTO WATER, CALL CUSTOMER SERVICE AT 1-800-406-2005 PRIOR TO CONTINUING USE.
| MODE | BATTERY PACK | RED LED ON CHARGER | WHITE LED ON CHARGER | ACTION NEEDED |
| POWER | Without Battery Pack | On for 3 seconds | On for 3 seconds | Ready to charge battery pack |
| TESTING | Hot Battery Pack | ON | OFF | When battery pack reaches normal temperature, charger begins charge mode |
| COLD Battery Pack | ON | OFF | When battery pack reaches normal temperature, charger begins charge mode | |
| DEFECTIVE | Defective | Flashing | OFF | Battery pack or charger is defective |
| ||||
| CHARGING | Charging – LED lights will flash depending on charge level | OFF | Flashing | Battery is being charged |
| FULL | Charged – lights will go off | OFF | On for 15 seconds | Charging is complete; charger maintains charge mode |
| Problem | Possible Cause | Possible Solution | ||
Vacuum won't run |
|
| ||
|
| |||
|
| |||
|
| |||
|
| |||
Vacuum won't pick up OR Low suction |
|
| ||
|
| |||
|
| |||
Dust escaping from vacuum |
|
| ||
|
| |||
|
| |||
Vacuum is difficult to push or won't move forward |
| |||
Smoky/burning smell detected |
|
| ||
|
| |||
3 YEAR LIMITED WARRANTY
If you require warranty assistance or have questions about your Oreck product, contact Oreck Customer Service. For service in the U.S. or Canada, dial 800-406-2005. Costs of any shipping and/or transportation to and from any place of repair are to be paid by the owner. Identify your product by the model number and manufacturing code when requesting information or ordering replacement parts. (The model number and manufacturing code for the product appears on the bottom of the vacuum foot and on the back of the charger). LIMITED Three YEAR WARRANTY (DOMESTIC USE) (LIMITED THREE YEAR BATTERY WARRANTY)

Documents / Resources
References
Download manual
Here you can download full pdf version of manual, it may contain additional safety instructions, warranty information, FCC rules, etc.
Download Oreck BK95519 - Elevate Cordless Upright Vacuum Manual
Advertisement


Need help?
Do you have a question about the BK95519 and is the answer not in the manual?
Questions and answers