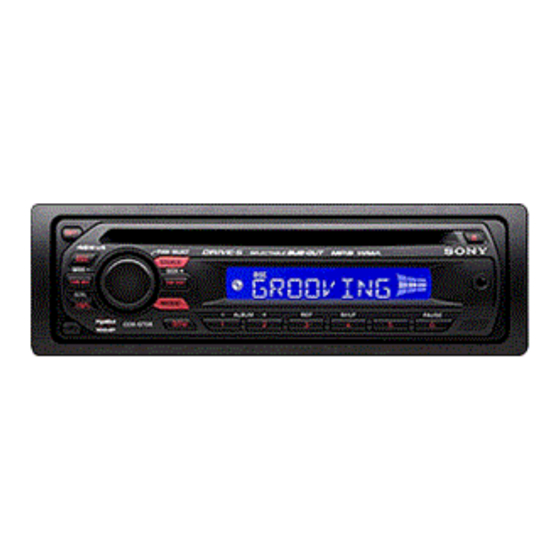
Sony CDX-GT08 - FM/AM Compact Disc Player Manual
- Operating instructions (2 pages)
Advertisement
- 1 Getting Started
- 2 Setting the clock
- 3 Detaching the front panel
- 4 Location of controls and basic operations
- 5 CD
- 6 Repeat and shuffle play
- 7 Radio Storing and receiving stations
- 8 Other functions Changing the sound settings
- 9 Adjusting setup items — SET
- 10 Using optional equipment
- 11 Playback order of MP3/WMA files
- 12 About MP3 files
- 13 About WMA files
- 14 Maintenance
- 15 Removing the unit
- 16 Specifications
- 17 Troubleshooting
- 18 Documents / Resources
Getting Started
Preparing the card remote commander
Before using the card remote commander for the first time, remove the insulation film.

 Tip
Tip
For how to replace the battery, see "Replacing the lithium battery of the card remote commander."
Setting the clock
The clock uses a 12-hour digital indication.
- Press and hold the select button.
The setup display appears. - Press the select button repeatedly until "CLOCK-ADJ" appears.
- Press
![]() +.
+.
The hour indication flashes. - Rotate the volume control dial to set the hour and minute.
To move the digital indication, press![]() –/+.
–/+. - Press the select button.
The setup is complete and the clock starts.
 +.
+. To display the clock, press  . Press again to return to the previous display.
Detaching the front panel
You can detach the front panel of this unit to prevent theft.
Caution alarm
If you turn the ignition switch to the OFF position without detaching the front panel, the caution alarm will sound for a few seconds. The alarm will only sound if the built-in amplifier is used.
- Press
![]() . The unit is turned off.
. The unit is turned off. - Press
![]() , then pull it off towards you.
, then pull it off towards you.

 . The unit is turned off.
 , then pull it off towards you.
 Notes
Notes
- Do not drop or put excessive pressure on the front panel and display window.
- Do not subject the front panel to heat/high temperature or moisture. Avoid leaving it in a parked car or on a dashboard/rear tray.
Attaching the front panel
Engage part  of the front panel with part
  of the unit, as illustrated, and push the left side into position until it clicks.

Note
Do not put anything on the inner surface of the front panel.
Location of controls and basic operations
Main unit

This section contains instructions on the location of controls and basic operations.
- OFF button
To power off; stop the source. - EQ3 (equalizer) button
To select an equalizer type (XPLOD, VOCAL, EDGE, CRUISE, SPACE, GRAVITY, CUSTOM or OFF). - Volume control dial/select button
To adjust volume (rotate); select setup items (press and rotate). - SOURCE button
To power on; change the source (Radio/CD/ AUX). - Disc slot
To insert the disc (label side up), playback starts. - Display window
- AUX input jack
To connect a portable audio device. ![]() (eject) button
(eject) button
To eject the disc.![]() (front panel release) button
(front panel release) button- DSPL (display)/SCRL (scroll) button
To change display items (press); scroll the display item (press and hold). - SEEK –/+ buttons
CD:
To skip tracks (press); skip tracks continuously (press, then press again within about 1 second and hold); reverse/fastforward a track (press and hold).
Radio:
To tune in stations automatically (press); find a station manually (press and hold). - MODE button
To select the radio band (FM/AM). - BTM button
To start the BTM function (press and hold). - Number buttons
CD:
![]() : ALBUM –/+ (during MP3/ WMA playback)
: ALBUM –/+ (during MP3/ WMA playback)
To skip albums (press); skip albums continuously (press and hold).
![]() : REP
: REP
![]() : SHUF
: SHUF
![]() : PAUSE
: PAUSE
To pause playback. To cancel, press again.
Radio:
To receive stored stations (press); store stations (press and hold). - Receptor for the card remote commander
 (eject) button
  (front panel release) button
 : ALBUM –/+ (during MP3/ WMA playback)
 : REP
: REP  : SHUF
  : PAUSE
Card remote commander RM-X151

The following buttons on the card remote commander have also different buttons/ functions from the unit. Remove the insulation film before use.
![]() buttons
buttons
To control CD/radio, the same as![]() –/+ on the unit.
–/+ on the unit.
Setup, sound setting, etc., can be operated by![]() .
.- DSPL (display) button
To change display items. - VOL (volume) +/– button
To adjust volume. - ATT (attenuate) button
To attenuate the sound. To cancel, press again. - SEL (select) button
To same as the select button on the unit. ![]() (+)/
(+)/![]() (–) buttons
(–) buttons
To control CD, the same as![]() (ALBUM –/+) on the unit.
(ALBUM –/+) on the unit.
Setup, sound setting, etc., can be operated by![]() .
.- SCRL (scroll) button
To scroll the display item. - Number buttons
To receive stored stations (press); store stations (press and hold).
 buttons
  –/+ on the unit.
 .
. (+)/
(+)/ (–) buttons
  (ALBUM –/+) on the unit.
 .
. Note
If the unit is turned off and the display disappears, it cannot be operated with the card remote commander unless  on the unit is pressed, or a disc is inserted to activate the unit first.
CD
Display items

Track number/Elapsed playing time,
Disc/artist name, Album number*1,
Album name, Track name,
Text information*2, Clock
*1 Album number is displayed only when the album is changed.
*2 When playing an MP3, ID3 tag is displayed, and when playing a WMA, WMA tag is displayed.
To change display items, press  .
.
Tip
Displayed items will differ, depending on the disc type, recorded format and settings. For details on MP3/ WMA, see "About MP3 files" and "About WMA files."
Repeat and shuffle play
- During playback, press
![]() (REP) or
(REP) or ![]() (SHUF) repeatedly until the desired setting appears.
(SHUF) repeatedly until the desired setting appears.
 (REP) or
  (SHUF) repeatedly until the desired setting appears.
| Select | To play |
 TRACK TRACK | track repeatedly. |
| ALBUM* | album repeatedly. |
| SHUF ALBUM* | album in random order. |
| SHUF DISC | disc in random order. |
* When an MP3/WMA is played.
To return to normal play mode, select " OFF" or "SHUF OFF."
Radio
Storing and receiving stations

When tuning in stations while driving, use Best Tuning Memory (BTM) to prevent an accident.
Storing automatically — BTM
- Press
![]() repeatedly until "TUNER" appears. To change the band, press
repeatedly until "TUNER" appears. To change the band, press ![]() repeatedly. You can select from FM1, FM2, FM3, AM1 or AM2.
repeatedly. You can select from FM1, FM2, FM3, AM1 or AM2. - Press and hold
![]() until "BTM" flashes.
until "BTM" flashes.
The unit stores stations in order of frequency on the number buttons.
A beep sounds when the setting is stored.
 repeatedly. You can select from FM1, FM2, FM3, AM1 or AM2.
 until "BTM" flashes.
Storing manually
- While receiving the station that you want to store, press and hold a number button (
![]() to
to ![]() ) until "MEMORY" appears.
) until "MEMORY" appears.
 to
to  ) until "MEMORY" appears.
 Note
If you try to store another station on the same number button, the previous stored station will be replaced.
Receiving the stored stations
- Select the band, then press a number button (
![]() to
to ![]() ).
).
 to
to  ).
).Tuning automatically
- Select the band, then press
![]() –/+ to search for the station.
–/+ to search for the station.
Scanning stops when the unit receives a station. Repeat this procedure until the desired station is received.
 –/+ to search for the station.
 Tip
If you know the frequency of the station you want to listen to, press and hold  –/+ to locate the approximate frequency, then press –/+ repeatedly to fine adjust to the desired frequency (manual tuning).
Other functions
Changing the sound settings
Adjusting the sound characteristics — BAL/FAD/SUB
You can adjust the balance, fader, and subwoofer volume.
- Press the select button repeatedly until "BAL," "FAD" or "SUB" appears. The item changes as follows:
LOW*1 ➝ MID*1 ➝ HI*1 ➝ BAL (left-right) ➝ FAD (front-rear) ➝ SUB (subwoofer volume)*2 ➝ AUX*3
*1 When EQ3 is activated.
*2 When the audio output is set to "SUB." "ATT" is displayed at the lowest setting, and can be adjusted up to 21 steps.
*3 When AUX source is activated.
- Rotate the volume control dial to adjust the selected item.
After 3 seconds, the setting is complete and the display returns to normal play/reception mode.
Customizing the equalizer curve — EQ3
"CUSTOM" of EQ3 allows you to make your own equalizer settings.
- Select a source, then press
![]() repeatedly to select "CUSTOM."
repeatedly to select "CUSTOM." - Press the select button repeatedly until "LOW," "MID" or "HI" appears.
- Rotate the volume control dial to adjust the selected item.
The volume level is adjustable in 1 dB steps, from –10 dB to +10 dB.
 repeatedly to select "CUSTOM."
Repeat steps 2 and 3 to adjust the equalizer curve.
To restore the factory-set equalizer curve, press and hold the select button before the setting is complete.
After 3 seconds, the setting is complete and the display returns to normal play/reception mode.
Tip
Other equalizer types are also adjustable.
Adjusting setup items — SET
- Press and hold the select button.
The setup display appears. - Press the select button repeatedly until the desired item appears.
- Rotate the volume control dial to select the setting (example "ON" or "OFF").
- Press and hold the select button.
The setup is complete and the display returns to normal play/reception mode.
Note
Displayed items will differ, depending on the source and setting.
The following items can be set:
" " indicates the default settings.
| CLOCK-ADJ | (Clock Adjust) |
| BEEP | To set "BEEP-ON" () or "BEEP-OFF." |
| AUX-A*1 (AUX Audio) | To turn the AUX source display "AUX-A-ON" ( ) or "AUX-A-OFF." |
| A.OFF (Auto Off) | To shut off automatically after a desired time when the unit is turned off: "A.OFF-NO" ( ),"A.OFF-30S (Seconds)," "A.OFF-30M (Minutes)" or "A.OFF-60M (Minutes)." |
| SUB/REAR*1 | To switch the audio output.
|
| DEMO (Demonstration) | To set "DEMO-ON" () or "DEMO-OFF." |
| DIM (Dimmer) | To change the brightness of the display.
|
| M.DSPL (Motion Display) |
|
| A.SCRL (Auto Scroll) | To scroll long displayed item automatically when the album/track is changed.
|
| LOCAL (Local Seek Mode) |
|
| MONO*2 (Monaural Mode) | To improve poor FM reception, select monaural reception mode.
|
| LPF*3 (Low Pass Filter) | To select the subwoofer cut-off frequency: "LPF OFF" ( ), "LPF125Hz" or "LPF 78Hz." |
| LOUD (Loudness) | To allow you to listen clearly at low volume levels.
|
| BTM |
*1 When the unit is turned off.
*2 When FM is received.
*3 When the audio output is set to "SUB."
Using optional equipment
Auxiliary audio equipment
By connecting an optional portable audio device to the AUX input jack (stereo mini jack) on the unit and then simply selecting the source, you can listen on your car speakers. The volume level is adjustable for any difference between the unit and the portable audio device. Follow the procedure below:
Connecting the portable audio device
- Turn off the portable audio device.
- Turn down the volume on the unit.
- Connect to the unit.


Adjusting the volume level
Be sure to adjust the volume for each connected audio device before playback.
- Turn down the volume on the unit.
- Press
![]() repeatedly until "FRONT IN" appears.
repeatedly until "FRONT IN" appears. - Start playback of the portable audio device at a moderate volume.
- Set your usual listening volume on the unit.
- Press the select button repeatedly until "AUX" appears, and rotate the volume control dial to adjust the input level (–8 dB to +18 dB).
Playback order of MP3/WMA files

About MP3 files
- MP3, which stands for MPEG-1 Audio Layer-3, is a music file compression format standard. It compresses audio CD data to approximately 1/10 of its original size.
- ID3 tag versions 1.0, 1.1, 2.2, 2.3 and 2.4 apply to MP3 only. ID3 tag is 15/30 characters (1.0 and 1.1), or 63/126 characters (2.2, 2.3 and 2.4).
- When naming an MP3 file, be sure to add the file extension ".mp3" to the file name.
- During playback or fast-forward/reverse of a VBR (variable bit rate) MP3 file, elapsed playing time may not display accurately.
Note
If you play a high-bit-rate MP3, such as 320 kbps, sound may be intermittent.
About WMA files
- WMA, which stands for Windows Media Audio, is a music file compression format standard. It compresses audio CD data to approximately 1/22* of its original size.
- WMA tag is 63 characters.
- When naming a WMA file, be sure to add the file extension ".wma" to the file name.
- During playback or fast-forward/reverse of a VBR (variable bit rate) WMA file, elapsed playing time may not display accurately.
* only for 64 kbps
Note
Playback of the following WMA files is not supported.
- lossless compression
- copyright-protected
If you have any questions or problems concerning your unit that are not covered in this manual, consult your nearest Sony dealer.
Maintenance
Replacing the lithium battery of the card remote commander
Under normal conditions, the battery will last approximately 1 year. (The service life may be shorter, depending on the conditions of use.) When the battery becomes weak, the range of the card remote commander becomes shorter. Replace the battery with a new CR2025 lithium battery. Use of any other battery may present a risk of fire or explosion./

Notes on the lithium battery
- Keep the lithium battery out of the reach of children. Should the battery be swallowed, immediately consult a doctor.
- Wipe the battery with a dry cloth to assure a good contact.
- Be sure to observe the correct polarity when installing the battery.
- Do not hold the battery with metallic tweezers, otherwise a short-circuit may occur.

Battery may explode if mistreated. Do not recharge, disassemble, or dispose of in fire.
Fuse replacement

When replacing the fuse, be sure to use one matching the amperage rating stated on the original fuse. If the fuse blows, check the power connection and replace the fuse. If the fuse blows again after replacement, there may be an internal malfunction. In such a case, onsult your nearest Sony dealer.
Cleaning the connectors
The unit may not function properly if the connectors between the unit and the front panel are not clean. In order to prevent this, detach the front panel and clean the connectors with a cotton swab. Do not apply too much force. Otherwise, the connectors may be damaged.

Main unit

Back of the front panel
Notes
- For safety, turn off the ignition before cleaning the connectors, and remove the key from the ignition switch.
- Never touch the connectors directly with your fingers or with any metal device.
Removing the unit
- Remove the protection collar.
- Detach the front panel.
- Pinch both edges of the protection collar, then pull it out.
![]()
- Remove the unit.
- Insert both release keys simultaneously until they click.

- Pull the release keys to unseat the unit.
![]()
- Slide the unit out of the mounting.
![]()
- Insert both release keys simultaneously until they click.


Specifications
AUDIO POWER SPECIFICATIONS

CEA2006 Standard
Power Output: 16 Watts RMS × 4 at
4 Ohms < 1% THD+N
SN Ratio: 82 dBA (reference: 1 Watt into 4 Ohms)
CD Player section
Signal-to-noise ratio: 120 dB
Frequency response: 10 – 20,000 Hz
Wow and flutter: Below measurable limit
Tuner section
FM
Tuning range: 87.5 – 107.9 MHz
Antenna terminal: External antenna (aerial) connector
Intermediate frequency: 10.7 MHz/450 kHz
Usable sensitivity: 9 dBf
Selectivity: 75 dB at 400 kHz
Signal-to-noise ratio: 67 dB (stereo), 69 dB (mono)
Harmonic distortion at 1 kHz: 0.5% (stereo), 0.3% (mono)
Separation: 35 dB at 1 kHzЭ
Frequency response: 30 – 15,000 Hz
AM
Tuning range: 530 – 1,710 kHz
Antenna (aerial) terminal: External antenna (aerial) connector
Intermediate frequency: 10.7 MHz/450 kHz
Sensitivity: 30 µV
Power amplifier section
Outputs: Speaker outputs (sure seal connectors)
Speaker impedance: 4 – 8 ohms
Maximum power output: 45 W × 4 (at 4 ohms)
General
Outputs:
Audio outputs terminal (sub/rear switchable)
Power antenna relay control terminal
Power amplifier control terminal
Inputs:
Antenna (aerial) input terminal
AUX input jack (stereo mini jack)
Tone controls:
Low: ±10 dB at 60 Hz
Mid: ±10 dB at 1 kHz (XPLOD)
High: ±10 dB at 10 kHz
Power requirements: 12 V DC car battery (negative ground)
Dimensions: Approx. 178 × 50 × 179 mm (7 1/8 × 2 × 7 1/8 in) (w/h/d)
Mounting dimensions: Approx. 182 × 53 × 162 mm (7 1/4 × 2 1/8 × 6 1/2 in) (w/h/d)
Mass: Approx. 1.2 kg (2 lb 11 oz)
Supplied accessories:
Card remote commander: RM-X151
Parts for installation and connections (1 set)
Connecting cord
MPEG Layer-3 audio coding technology and patents licensed from Fraunhofer IIS and Thomson.
Design and specifications are subject to change without notice.

- Halogenated flame retardants are not used in the certain printed wiring boards.
- Halogenated flame retardants are not used in cabinets.
- Packaging cushions are made from paper.
Troubleshooting
The following checklist will help you remedy problems you may encounter with your unit. Before going through the checklist below, check the connection and operating procedures.
No power is being supplied to the unit.
- Check the connection. If everything is in order, check the fuse.
- If the unit is turned off and the display disappears, it cannot be operated with the remote commander.
➜ Turn on the unit.
The power antenna (aerial) does not extend.
The power antenna (aerial) does not have a relay box.
No sound.
- The volume is too low.
- The ATT function is activated.
- The position of the fader control "FAD" is not set for a 2-speaker system.
No beep sound.
- The beep sound is canceled.
- An optional power amplifier is connected and you are not using the built-in amplifier.
The contents of the memory have been erased.
- The power supply lead or battery has been disconnected.
- The power supply lead is not connected properly.
Stored stations and correct time are erased.
The fuse has blown.
Makes noise when the position of the ignition key is switched.
The leads are not matched correctly with the car's accessory power connector.
During playback or reception, demonstration mode starts.
If no operation is performed for 5 minutes with "DEMO-ON" set, demonstration mode starts.
➜ Set "DEMO-OFF."
The display disappears from/does not appear in the display window.
- The dimmer is set "DIM-ON."
- The display disappears if you press and hold
![]() .
.
➜ Press and hold![]() on the unit until the display appears.
on the unit until the display appears. - The connectors are dirty.
 .
.The Auto Off function does not operate.
The unit is turned on. The Auto Off function activates after turning off the unit.
➜ Turn off the unit.
Card remote commander operation is not possible.
Make sure the insulation film has been removed.
CD playback
The disc cannot be loaded.
- Another disc is already loaded.
- The disc has been forcibly inserted upside down or in the wrong way.
The disc does not playback.
- Defective or dirty disc.
- The CD-Rs/CD-RWs are not for audio use.
MP3/WMA files cannot be played back.
The disc is incompatible with the MP3/WMA format and version.
MP3/WMA files take longer to play back than others.
The following discs take a longer time to start playback.
- a disc recorded with a complicated tree structure.
- a disc recorded in Multi Session.
- a disc to which data can be added.
The display items do not scroll.
- For discs with very many characters, those may not scroll.
- "A.SCRL" is set to "OFF".
➜ Set "A.SCRL-ON."
➜ Press and hold![]() (SCRL).
(SCRL).
 (SCRL).
The sound skips.
- Installation is not correct.
➜ Install the unit at an angle of less than 45° in a sturdy part of the car. - Defective or dirty disc.
The disc will not eject.
Press  (eject).
Radio reception
The stations cannot be received.
The sound is hampered by noises.
- Connect a power antenna (aerial) control lead (blue) or accessory power supply lead (red) to the power supply lead of a car's antenna (aerial) booster (only when your car has built-in FM/AM antenna (aerial) in the rear/side glass).
- Check the connection of the car antenna (aerial).
- The auto antenna (aerial) will not go up.
➜ Check the connection of the power antenna (aerial) control lead. - Check the frequency.
Preset tuning is not possible.
- Store the correct frequency in the memory.
- The broadcast signal is too weak.
Automatic tuning is not possible.
- Setting of the local seek mode is not correct.
➜ Tuning stops too frequently: Set "LOCAL-ON."
➜ Tuning does not stop at a station: Set "MONO-ON." - The broadcast signal is too weak.
➜ Perform manual tuning.
During FM reception, the "ST" indication flashes.
- Tune in the frequency accurately.
- The broadcast signal is too weak.
➜ Set "MONO-ON."
An FM program broadcast in stereo is heard in monaural.
The unit is in monaural reception mode.
➜ Set "MONO-OFF."
Error displays/Messages
ERROR
- The disc is dirty or inserted upside down.
➜ Clean or insert the disc correctly. - A blank disc has been inserted.
- The disc cannot play because of some problem.
➜ Insert another disc.
FAILURE
The connection of speakers/amplifiers is incorrect.
➜ See the installation/connections manual of this model to check the connection.
L. SEEK +/–
The local seek mode is on during automatic tuning.
NO INFO
Text information is not written in the MP3/WMA file.
NO MUSIC
The disc does not contain a music file.
➜ Insert a music CD.
NO NAME
An album/track name is not written in the track.
OFFSET
There may be an internal malfunction.
➜ Check the connection. If the error indication remains on in the display, consult your nearest Sony dealer.
PUSH EJT
The disc cannot be ejected.
➜ Press (eject).
READ
The unit is reading all track and album information on the disc.
➜ Wait until reading is complete and playback starts automatically. Depending on the disc structure, it may take more than a minute.
" " or "
  "
"
During reverse or fast-forward, you have reached the beginning or the end of the disc and you cannot go any further.
" "
"
The character cannot be displayed with the unit.
If these solutions do not help improve the situation, consult your nearest Sony dealer. If you take the unit to be repaired because of CD playback trouble, bring the disc that was used at the time the problem began.
If you have any questions/problems regarding this product, try the following:
- Read Troubleshooting in these Operating Instructions.
- Reset the unit.
(Only for models with a RESET button.)
![warning]() Note: Stored data may be erased.
Note: Stored data may be erased. - Please contact (U.S.A. only);
Call: 1-800-222-7669
URL: http://www.SONY.com

Documents / Resources
References
Download manual
Here you can download full pdf version of manual, it may contain additional safety instructions, warranty information, FCC rules, etc.
Advertisement


Need help?
Do you have a question about the CDX-GT08 and is the answer not in the manual?
Questions and answers