Advertisement
Quick Links
Advertisement

Subscribe to Our Youtube Channel
Related Manuals for VonHaus 05/072


Summary of Contents for VonHaus 05/072
- Page 1 SLIM FULL MOTION WALL MOUNT 05/072 - Instruction Manual...
-
Page 2: Table Of Contents
CONTENTS Safety Instructions, Tools Required Components, Removing the Decorative Cover Wood Stud Wall Mounting Solid Wall and Brick Mounting Attaching the Display to the VESA Plate Using the Spacers Attaching the Brackets Warranty... - Page 3 WARNING PLEASE READ THESE INSTRUCTIONS CAREFULLY AND KEEP FOR FUTURE REFERENCE This unit is intended for indoor use only. Do not use this WARNING! Do not exceed the maximum stated load unit for any purpose that is not explicitly specified in this capacity of 45kg/99lbs.
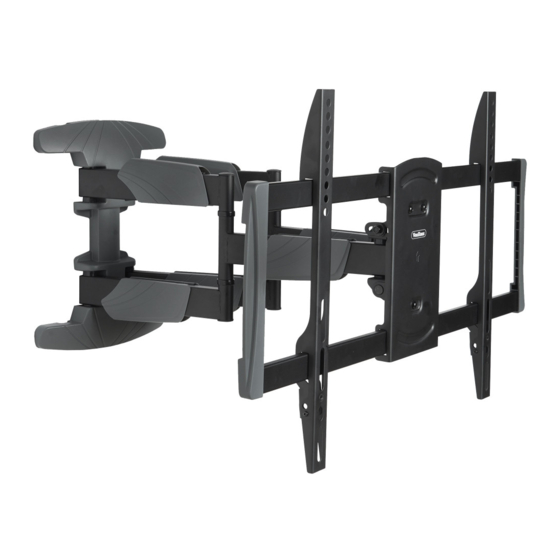
- Page 4 COMPONENTS Decorative Cover (x1) Spanner (x1) Wall Mount Template (x1) Wall Mount (x1) Arm (x2) M5x14 (x14) M6x14 (x4) M8x20 (x4) M6x30 (x4) M8x30 (x4) ST6.3x55 (x6) Rectangle Small Spacer (x8) Large Spacer (x4) Washer (x5) Concrete Wall Spacer (x4) Anchor (x3) REMOVING THE DECORATIVE COVER...
-
Page 5: Wood Stud Wall Mounting
WOOD STUD WALL MOUNTING Approx outlet 16-24’’ as guide apart For strength, it is recommended that you mount the Bracket on a wall stud. Stud Drill pilot holes. Locate an appropriate installation area. NOTE: Use of a Stud Finder (not included) is recommended. -
Page 6: Solid Wall And Brick Mounting
SOLID WALL AND BRICK MOUNTING Find and mark the exact location of the mounting holes. Drill pilot holes. Locate a suitable place for installation. CAUTION: Avoid any live or utility wires which may be positioned behind the wall. 2. Place the Wall Mount Template (C) against the wall where it is to be mounted. Mark the centre point of the 2 furthest holes and the centre mounting hole on the top and bottom of the template. - Page 7 ATTACHING THE ARM TO THE WALL PLATE Re-attach the Decorative Covers (E). ATTACHING THE ARMS Remove small screw to unlock the Arms (B) and retain for future use.
-
Page 8: Using The Spacers
USING THE SPACERS Attach the Arms (B) to the back of your television using the suitable Mounting Screw (M-A, M-B, M-C, M-D, M-E) and M-F Rectangle Spacer. NOTE: Some sets will require use of M-G or M-H Spacers as illustrated to ensure a flat fit against the back of your set. -
Page 9: Attaching The Brackets
ATTACHING THE BRACKETS 1. Using two people, lower the television onto the Bracket. Close over the bottom clamps on the Arms (B) to secure the Bracket. Insert and re-tighten the Screws removed earlier to secure. 2. Secure all Bolts as illustrated with Spanner (D) to align the television into the desired viewing position. 3. -
Page 10: Warranty
WARRANTY To register your product and find out if you qualify for a free extended warranty, go to: www.VonHaus.com/warranty Please retain a proof of purchase receipt or statement as proof of the purchase date. The warranty only applies if the product is used solely in the manner indicated in the Warnings page of this manual, and all other instructions have been followed accurately. - Page 11 Thank you for purchasing the Slim Full Motion Wall Mount. VonHaus is a registered trademark of DOMU Brands Ltd Made in China for DOMU Brands Ltd BL2 2HH...
Need help?
Do you have a question about the 05/072 and is the answer not in the manual?
Questions and answers