Table of Contents
Advertisement
Quick Links
Trane XL824
Smart Control User Guide
The XL824 is an easy-to-use,
programmable control with a
color touch-screen.
When connected with Nexia™
Home Intelligence, you can
control your home's heating
and cooling system and
up to 230 separate Z-Wave
devices from a smart phone,
PC or tablet from virtually
anywhere.
This guide will help you
configure and connect your
XL824 Smart Control quickly
and easily.
Start using your
new XL824 now!
See "Start Here!"
on page 3.
032-5090-02
Advertisement
Table of Contents

Related Manuals for Trane XL824


Summary of Contents for Trane XL824
- Page 1 Trane XL824 Smart Control User Guide The XL824 is an easy-to-use, programmable control with a color touch-screen. When connected with Nexia™ Home Intelligence, you can control your home’s heating and cooling system and up to 230 separate Z-Wave devices from a smart phone, PC or tablet from virtually anywhere.
-
Page 2: Table Of Contents
Manual Software Upgrades .......18 Up to four smart controls of any combination of the 950, Smart Optimization ..........18 850, XL824 and 624 are allowed on your Nexia™ Home Notices Intelligence account for no additional cost. A monthly FCC Notice ...............19 subscription charge may apply beyond this number of ICC NOTICE ..............19... -
Page 3: Start Here
Wizard (requires Internet connection) Schedule Settings c o n f i g u r a b l e • Your XL824 Control comes equipped with • Set the XL824 scheduling feature to settings. remote access and other features from enabled or disabled. When Scheduling is To complete the Setup Wizard and connect the Nexia™... -
Page 4: Navigating The Control
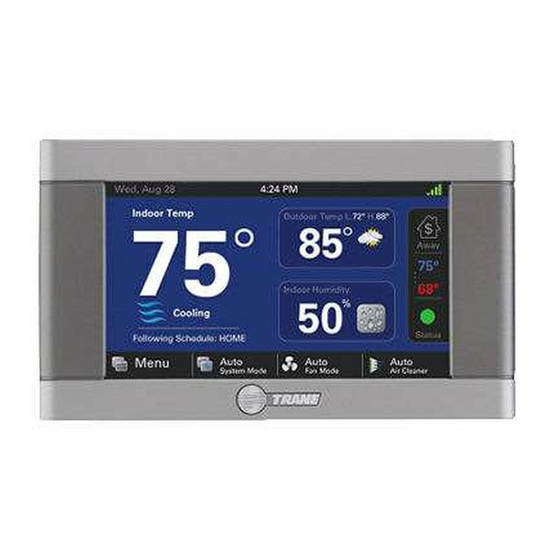
Navigating the Control Home Screen Press here for 5-Day Noti cations and System Alerts Date and Time appear here Weather Forecast, Radar appear here Display and Alerts Network Tue, Dec 16 4:19 PM Status Press to activate Indoor Temp Outdoor Temp L 39°... -
Page 5: Temperature Control Panel Screen
Temperature Control Panel Screen The Temperature Control Panel is where target temperatures are manually set and adjusted. Displayed when Displayed when Scheduling is Enabled Scheduling is Disabled Press in the INDOOR TEMPERATURE area Press to Permanently Press Away, Home or to reveal the Temperature Control Panel. -
Page 6: Menu Screen
Menu Screen Press to view or edit your schedule (when Press to access Screen Lock and Press to view 5-Day Weather scheduling is enabled) or edit 1-Touch Guest Access settings. Forecast, Radar and Weather Presets (when scheduling is disabled) Press the Home Screen>Menu (requires Nexia registration) Enable/Disable Scheduling at button and hold for 5 seconds to... -
Page 7: Settings Screen
Settings Screen Con gure 1-Touch Presets (when Press to modify screen brightness, Press to Enable or Scheduling is enabled, only Away backlight timer, screensaver and Disable Scheduling setting is available) color theme Tue, Dec 16 4:19 PM Press to set Temperature Scale, Deadband, Manually set the... -
Page 8: Scheduling
Scheduling Schedule Screen To access the Schedules Screen, navigate to Menu>Schedules or select Show Schedules from the Temperature Control Panel. The current day is Press in the red or blue area, then adjust the Set Point highlighted Press the using the up and down arrows Time to change start Schedule... -
Page 9: Changing Periods
UP and DOWN 85º 78º 78º 82º arrows. Note: The XL824 uses intelligent Start technology and will not allow setting an illogical start or end time. Periods must be Use the Up and at least 30 minutes in duration. -
Page 10: Adding Periods
5. Press NEXT. to insert a Period. 6. Add additional periods, the maximum per The XL XL824 Smart Control is capable of 3. Choose a name for the new Period or select day is 6. adjusting the temperature settings throughout... -
Page 11: Deleting Periods
Deleting Periods Deleting Periods Press the trash can to mark a period for deletion 1. From the Schedule Screen press DELETE PERIOD, the Delete Periods Screen is Delete Periods displayed. 2. Press the TRASH CAN icon in the Period(s) you wish to delete. Note that each day must 6:00 am 8:00 am 6:00 pm... -
Page 12: Overriding Schedules
Overriding Schedules Use the UP and DOWN Arrows to adjust the Set Point to the desired temperature. 4. Press HOLD PERM. The words Hold Perm Note: These functions require Scheduling 6. Press in the STATUS AREA again to toggle will appear in bold type. to be enabled. -
Page 13: Configuring 1-Touch Presets
Away Preset Away cooling set points are maintained indefinitely. Temperatures When a temperature change is desired, the user Home must manually adjust the XL824 Control to the Press to 62º new setting. decrease active Configuring 1-Touch Presets set point 1. -
Page 14: Nexia™ Home Intelligence
Nexia™ Home Intelligence When enrolled to a Nexia™ Home Intelligence account, the XL824 is a Z-Wave security-enabled device that can serve as a central hub for an entire network of home automation devices POWER and can display local weather conditions, five-... -
Page 15: Including/Excluding Z-Wave Devices
Including/Excluding Z-Wave Devices Including Z-Wave Devices Excluding Z-Wave Devices Your XL824 is designed to integrate seamlessly with Nexia™ Home Intelligence as part of a 1. From the HOME>MENU Screen on the 1. From the HOME>MENU Screen on the complete Z-Wave home automation system. -
Page 16: Z-Wave Repeater Screen
Z-Wave repeater, the Z-Wave Repeater Screen remove Z-Wave repeater. Nexia account. allows you to exclude the XL824 Control from the 3. Press the EXCLUDE on the standalone network and to unregister the device from your Z-Wave network bridge to complete account. -
Page 17: Security Settings
Security Settings Screen Lock Security setting options on the 824 Control are Off, On and Guest Access. To access the Security Settings, press MENU>SCREEN LOCK. Screen Lock allows you to lock the Screen Lock screen so users can’t make Screen Lock Off unwanted changes. -
Page 18: Other Features
Automatic Software Upgrades heating and cooling operations are disabled. The screen will indicate that the 850 Control is in When the XL824 is connected to a Nexia™ Home Smart Optimization mode. Intelligence account, software upgrades will occur automatically and do not require user To delay Smart Optimization for an additional 18 intervention. -
Page 19: Notices
Notices FCC Notice ICC NOTICE the equipment off and on, the user is encouraged to try to correct the interference by one or more INFORMATION TO USER This device complies with Industry Canada of the following measures. license-exempt RSS standard(s). Operation is This device complies with Part 15 of the FCC subject to the following two conditions: (1) this Reorient or relocate the receiving antenna... - Page 20 The manufacturer has a policy of continuous product and product data improvement and it reserves the right to change design and specifications without notice. Representative-only illustrations included in this document. February 2015 032-5090-03...
Need help?
Do you have a question about the XL824 and is the answer not in the manual?
Questions and answers
The LCD on my XL824 thermostat suddenly went blank (dark). What can I do to repair it?