
Related Manuals for Ralink RT3090


Summary of Contents for Ralink RT3090
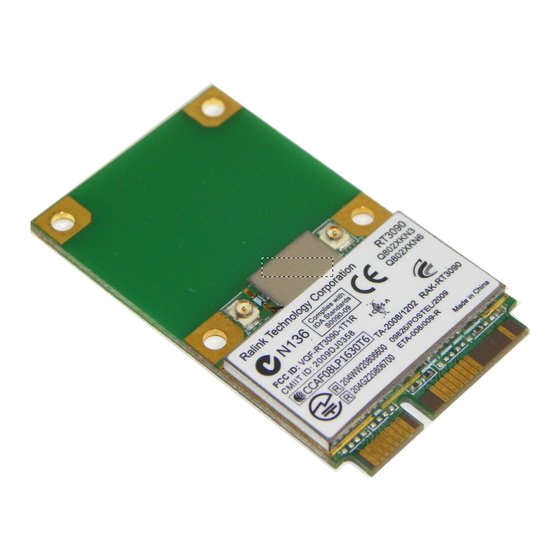
- Page 1 802.11n compliant 2.4GHz 11b/g/n 1T1R WLAN Mini Card Mini-PCI Module Ralink RT3090 User’s Manual...
- Page 2 REGULATORY STATEMENTS FCC Certification The United States Federal Communication Commission (FCC) and the Canadian Department of Communications have established certain rules governing the use of electronic equipment. Part15, Class B This device complies with Part 15 of FCC rules. Operation is subject to the following two conditions: 1) This device may not cause harmful interference, and 2) This device must accept any interference received, including interference...
- Page 3 Warning: Changes or modifications to this unit not expressly approved by the party responsible for compliance could void the user authority to operate the equipment. CAUTION 1. This Transmitter must not be co-located or operating in conjunction with any other antenna or transmitter. 2.
- Page 4 (2) this device must accept any interference received, including interference that may cause undesired operation. Hereby, Ralink, declares that this device is in compliance with the essential requirement and other relevant provisions of the R&TTE Driective 1999/5/EC.
-
Page 5: Table Of Contents
Table of Contents INTRODUCTION ....................1 ................1 IRELESS ETWORK PTIONS The Peer-to-Peer Network .................1 The Access Point Network ................2 SOFTWARE INSTALLATION................3 ....................3 NSTALL THE DEVICE & U ................3 NSTALL THE RIVER TILITY HARDWARE INSTALLATION................8 ......................8 ERIFICATION NETWORK CONNECTION .................9 2000/ XP ..................9 INDOWS IP A ......................11... - Page 6 WPS......................33 Radio On/Off ...................36 About .......................36 UNINSTALLATION.....................38...
-
Page 7: Introduction
INTRODUCTION The 11b/g/n 1T1R WLAN Mini Card is a device that allows you connect your computer to a wireless local area network (LAN). A wireless LAN allows your system to use wireless Radio Frequency (RF) technology to transmit and receive data without physically attaching to the network. The Wireless protocols that come with this product ensure data security and isolation from interference generated by other radio frequencies. -
Page 8: The Access Point Network
You can also use one computer as an Internet Server to connect to a wired global network and share files and information with other computers via a wireless LAN. The Access Point Network The network installation allows you to share files, printers, and Internet access much more conveniently. -
Page 9: Software Installation
SOFTWARE INSTALLATION Install the device 1. Make sure the computer is turned off. Remove the expansion slot cover from the computer. 2. Carefully slide the 11b/g/n 1T1R WLAN Mini Card into the mini PCI slot. Push evenly and slowly and ensure it is properly seated. - Page 10 3. Select the check box to choose a Configuration Tool from the listed two choices. Configuration Tool: Choose to use our configuration utility. Microsoft Zero Configuration Tool: Choose to use Windows XP’s built-in Zero Configuration Utility (ZCU). Click Next to continue.
- Page 11 4. There are two modes for you to choose in this screen, either choose WiFi mode or performance mode (TxBurst mode). This mode selection screen is set for the default mode shown in the utility screen, you can still change its mode later in the utility screen. Click Next to continue.
- Page 12 5. When you are prompted the following message, please click Install to begin the installation.
- Page 13 6. When the following screen appears, click Finish to complete the software installation.
-
Page 14: Hardware Installation
HARDWARE INSTALLATION Verification To verify if the device exists in your computer and is enabled, go to Start > Control Panel > System (> Hardware) > Device Manager. Expand the Network Adapters category. If the 11b/g/n 1T1R WLAN Half Mini Card is listed here, it means that your device is properly installed and enabled. -
Page 15: Network Connection
NETWORK CONNECTION Once the device driver is well installed, a network setting described in the following should be also established. In Windows 2000/ XP 1. (In Windows 2000) Go to Start Settings Control Panel Network and Dial-up Connections Local Area Connection Properties. - Page 16 Make sure that all the required components are installed. 11b/g/n 1T2R WLAN Mini Card 3. If any components are missing, click on the Install… button to select the Client/Service/Protocol required. After selecting the component you need, click Add… to add it in. For making your computer visible on the network, make sure you have installed File and Printer Sharing for Microsoft Networks.
-
Page 17: Ip Address
IP Address Note: When assigning IP Addresses to the computers on the network, remember to have the IP address for each computer set on the same subnet mask. If your Broadband Router use DHCP technology, however, it won’t be necessary for you to assign Static IP Address for your computer. -
Page 18: Configuration Utility
After the Wireless adapter has been successfully installed, users can use the included Configuration Utility to set their preference. Go to Start (All) Programs Ralink Wireless Ralink Wireless Utility. You can also open the Configuration Utility by double clicking the icon or right clicking to select Launch Config Utilities. 12 -... -
Page 19: Intelligent Wireless Utility
Intelligent Wireless Utility Profile Profile can book keeping your favorite wireless setting among your home, office, and other public hot-spot. You may save multiple profiles, and activate the correct one at your preference. The Profile manager enables you to Add, Edit, Delete and Activate profiles. - Page 20 Profile Tab Profile Name You may enter a distinctive name of profile in this column. The default is PROF# (# 1, #2, #3..) The SSID is the unique name shared among all points in SSID your wireless network. Shows the network type of the device, including Network Type infrastructure.
- Page 21 Profile Name: User can enter profile name, or use default name defined by system. The default is PROF# (# 1, #2, #3..). SSID: The SSID is the unique name shared among all points in your wireless network. The name must be identical for all devices and points attempting to connect to the same network.
- Page 22 • The infrastructure is intended for the connection between wireless network cards and an Access Point. With the wireless adapter, you can connect wireless LAN to a wired global network via an Access Point. Tx Power: Select the Tx power percentage from the pull-down list including Auto, 100%, 75%, 50%, 25%, 10% and Lowest.
- Page 23 Authentication and Encryption tab: Authentication Type: There seven type authentication modes including Open, Shared, Leap, WPA, WPA-PSK, WPA2, WPA2-PSK, and WPA-None. • Open: If your access point/wireless router is using "Open” authentication, then the wireless adapter will need to be set to the same authentication type. •...
- Page 24 TKIP or AES and then enter a WPA Shared Key of 8-63 characters in the WPA Pre-shared Key field. Encryption Type: For open and shared authentication mode, the selection of encryption type are None and WEP. WPA, WPA2, WPA-PSK WPA2-PSK authentication mode, the encryption type supports both TKIP and AES.
- Page 25 EAP Method: • PEAP: Protect Extensible Authentication Protocol. PEAP transport securely authentication data by using tunneling between PEAP clients and an authentication server. PEAP can authenticate wireless LAN clients using only server-side certificates, thus simplifying the implementation and administration of a secure wireless LAN.
- Page 26 encrypted channel. Unlike EAP-TLS, EAP-TTLS requires only server-side certificates. • EAP-FAST: Flexible Authentication via Secure Tunneling. It was developed by Cisco. Instead of using a certificate, mutual authentication is achieved by means of a PAC (Protected Access Credential) which managed dynamically authentication server.
- Page 27 ID/ PASSWORD: Identity and password for server. • Authentication ID / Password: Identity, password and domain name for server. Only "EAP-FAST" and "LEAP" authentication can key in domain name. Domain name can be keyed in blank space. • Tunnel ID / Password: Identity and Password for server.
-
Page 28: Network
Use Certificate chain: Choose use server that issuer of certificates. Allow intimidate certificates: It must be in the server certificate chain between the server certificate and the server specified in the certificate issuer must be field. Server name: Enter an authentication sever root. Server name must match exactly: Click to enable or disable this function. - Page 29 Network Tab Indicate that AP list are sorted by SSID, Channel or Signal. Sorted by Show dBm Check the box to show the dBm of the AP list. Shows the name of BSS network. SSID Network Type Network type in use, Infrastructure for BSS. Channel Shows the currently used channel.
- Page 30 Encryption Shows the encryption type currently in use. Valid value includes WEP, TKIP, AES, and Not Use. Signal Shows the receiving signal strength of specified network. Rescan Click to refresh the AP list. Connect Select an item on the list and then click to make a connection.
- Page 31 TX/RX packet error rate. Signal Shows the Receiving signal strength, you can choose to Strength display as percentage or dBm format. 1, 2 and 3 Noise Strength Shows the noise signal strength. Transmit Shows the current Link Speed and Throughput of the transmit rate.
- Page 32 WPS information contains Authentication Type, Encryption Type, Config Methods, Device Password ID, Selected Registrar, State, Version, AP Setup Locked, UUID-E and RF Bands. Authentication Type: There are four types of authentication modes supported by RaConfig. They are open, Shared, WPA-PSK and WPA system.
-
Page 33: Advanced
CCX information contains CCKM, Cmic and Ckip information. OK: Click this button to exit the information screen. Advanced This Advanced page provides advanced and detailed settings for your wireless network. 27 -... - Page 34 Advanced Tab Select wireless mode. There are 802.11b/g/n mixed, Wireless mode 802.11b only and 802.11b/g mixed modes are supported. Default mode is 802.11b/g/n mixed. Check to enable the burst mode. Enable Tx Burst Enable TCP Check to increase the transmission quality. Window Size Check to set the roaming interval, fast to roaming, setup Fast Roaming at...
-
Page 35: Statistics
Authentication whether show "Authentication Status Dialog" or not. Status Dialog Authentication Status Dialog displays the process about 802.1x authentications. Select Your Select your country region code from the pull-down Country Region menu. Code Enable CCX Check to enable the CCX function. •... - Page 36 Transmit Frames Transmitted Successfully Shows information of frames successfully sent. Frames Retransmitted Shows information of frames successfully sent with one or more reties. Successfully Frames Fail To Receive ACK Shows information frames failed After All Retries transmit after hitting retry limit. RTS Frames Successfully Receive Shows information of successfully receive CTS after sending RTS frame...
- Page 37 RTS Frames Fail To Receive Shows information of failed to receive CTS after sending RTS. Reset Counter Click this button to reset counters to zero. Receive Statistics Frames Received Successfully Shows information of frames Received Successfully. Frames Received With CRC Shows information of frames received with Error 31 -...
-
Page 38: Wmm / Qos
CRC error. Frames Dropped Due To Shows information of frames dropped due Out-of-Resource to resource issue. Duplicate Frames Received Shows information of duplicate received frames. Reset Counter Click this button to reset counters to zero. WMM / QoS The WMM page shows the Wi-Fi Multi-Media power save function and Direct Link Setup that ensure your wireless network quality. -
Page 39: Wps
WMM Enable Check the box to enable Wi-Fi Multi-Media function. WMM- Power Save Enable Select which ACs you want to enable. Direct Link Setup Enable Check the box to enable Direct Link Setup. MAC Address The setting of DLS indicates as follow : Fill in the blanks of Direct Link with MAC Address of STA, and the STA must conform to two conditions:... - Page 40 WPS AP List Display the information of surrounding APs with WPS IE from last scan result. List information included SSID, BSSID, Channel, (Device Password ID), Security-Enabled. Rescan Issue a rescan command to wireless NIC to update information on surrounding wireless network. Information Display the information about WPS IE on the selected network.
- Page 41 Encryption Type, Config Methods, Device Password ID, Selected Registrar, State, Version, AP Setup Locked, UUID-E and RF Bands. PIN Code 8-digit numbers. It is required to enter PIN Code into Registrar using PIN method. Config Mode Our station role-playing as an Enrollee or an external Registrar.
-
Page 42: Radio On/Off
It is optional for STA. Progress Bar Display rate of progress from Start to Connected status. Status Bar Display currently WPS Status. Radio On/Off Click this icon to turn on radio function. Click this icon to turn off radio function. About Click this button to show the information of the wireless card including, RaConfig Version/ Date, Driver Version/ Date, EEPROM Version, Firmware... - Page 43 37 -...
-
Page 44: Uninstallation
UNINSTALLATION In case you need to uninstall the utility and driver, please refer to below steps. (As you uninstall the utility, the driver will be uninstalled as well.) Go to Start Programs Ralink Wireless Uninstall. 38 -... - Page 45 Select Remove all button and click Next to start uninstalling. Click Yes to complete remove the selected application and all of its features. 39 -...
- Page 46 Select “Yes, I want to restart my computer now” and then click Finish to complete the uninstallation. 40 -...
Need help?
Do you have a question about the RT3090 and is the answer not in the manual?
Questions and answers